A Spin On Norns Fall – The Evolution Of A Patch

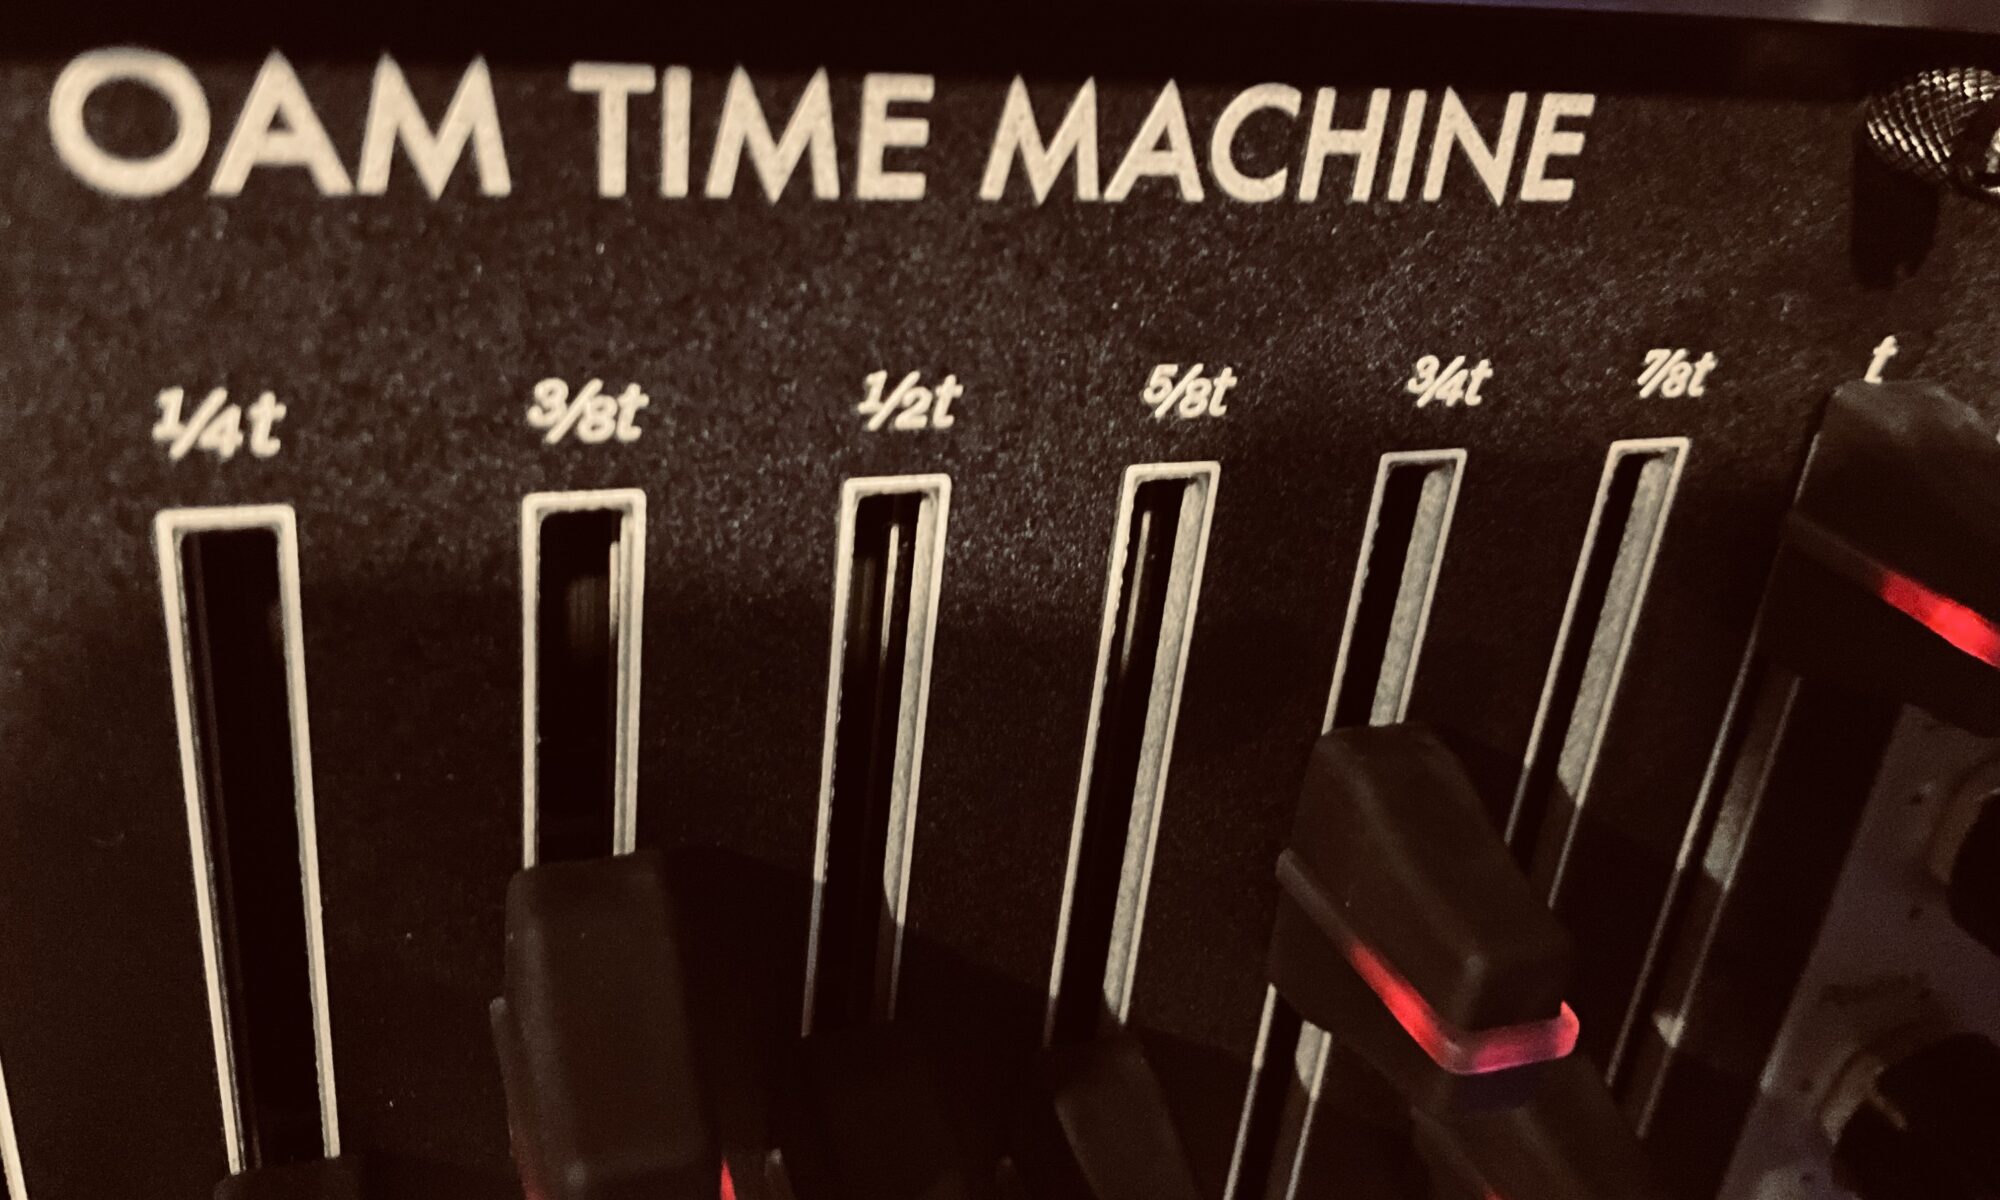
Like all good little electronic ambient musicians, I’ve finally picked up a Monome Norns. Any quick look around the web, and you’ll see Norns is a common tool for creating ambient music, used by musicians from around the world. Norns is a small, open source, community driven music computer that runs scripts written in a language called Lua. There are hundreds, if not over a thousand, Norns scripts that perform any number of musical tasks from sequencing, being a sound source, or processing audio. Overall, it’s a very charming piece of kit that is elegant, minimalist, and can sound beautiful. To me, no script represents Norns better than Fall, a beautiful generative sequencer designed to be a soundscape of falling leaves, and synthesizer made of pure relax-ium, written by Ambalek. It’s simple, elegant (especially when paired with a Grid), and creates absolutely beautiful sounds that will lull you to sleep, or send you on a journey in a bed of peace.

The Init settings on Fall’s sound engine are seemingly simple. A chaotic (or random) process guides virtual leaves falling to the ground. As they hit the ground, sound emerges. A 13-bit filtered square wave is brought in with a gentle rise, and fades out with an even slower decay. This note is sent through two separate stereo delays, the first with a one second delay time, and the second delay with a ten second delay time, all followed up by long reverb. Although I can send midi from Norns to the synth, I wanted to try my hand at patching my own Fall algorithm from scratch. ”This should be pretty simple”, I thought as I started to patch. A few square waves into a filter, followed up by two delays and reverb. “That should be easy enough.”

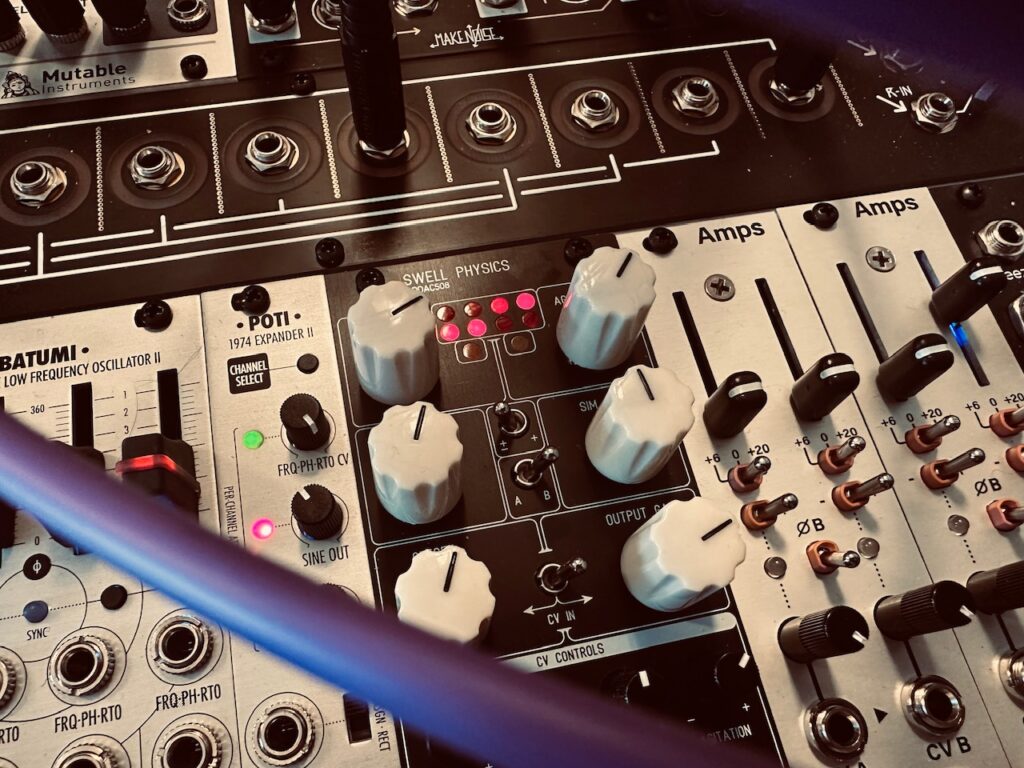
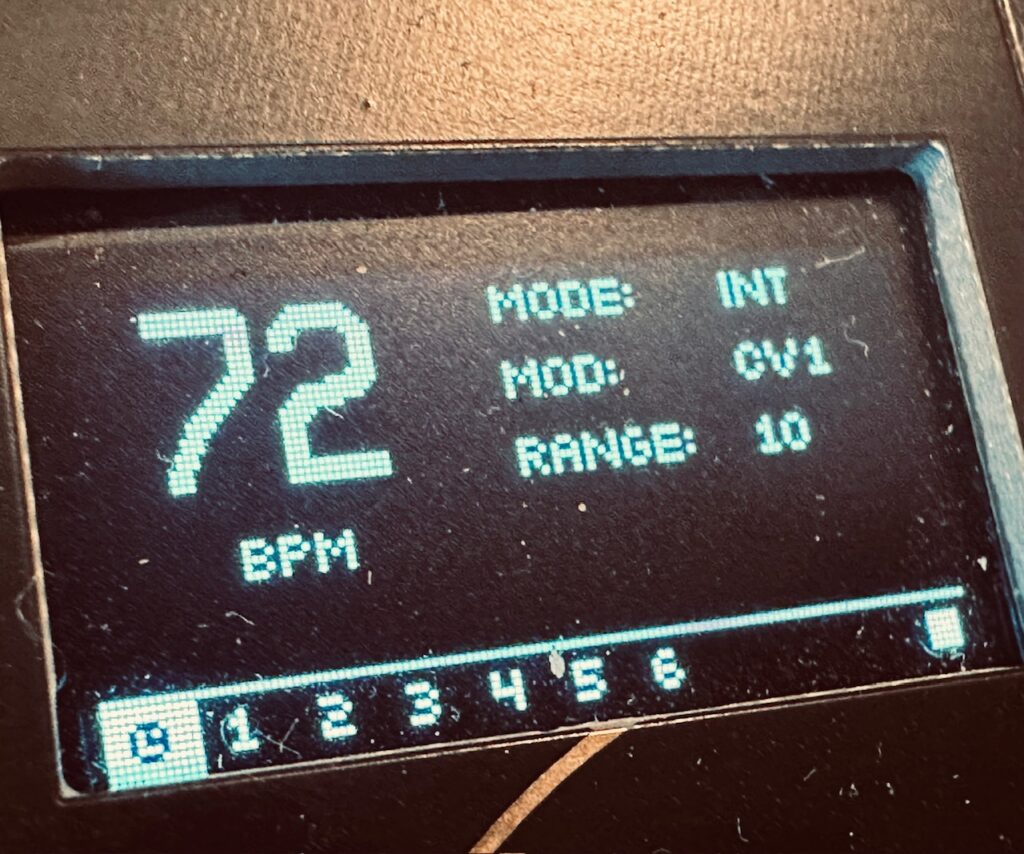
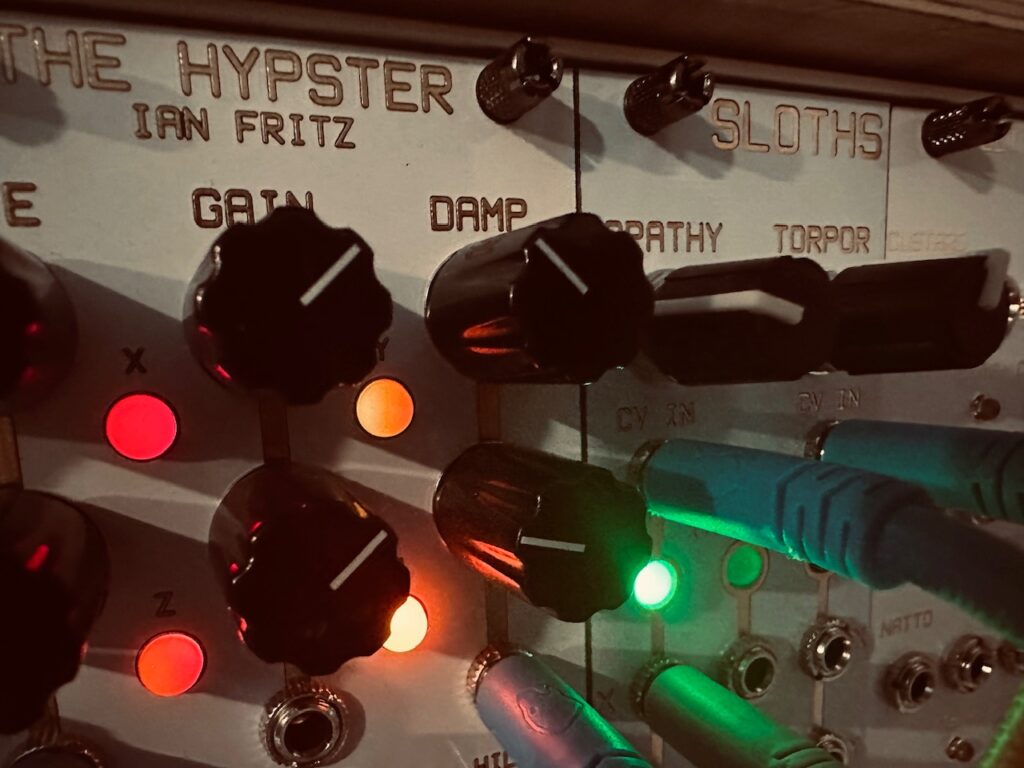
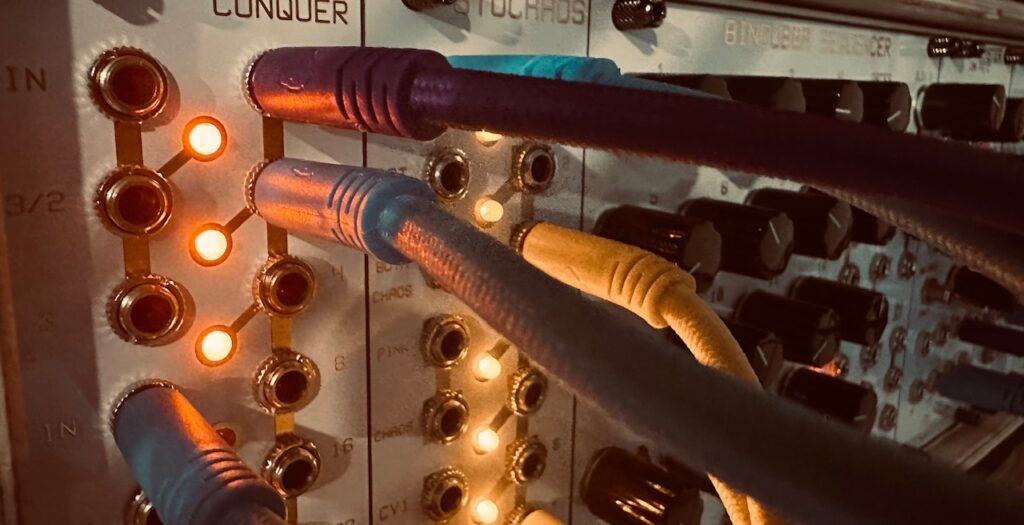
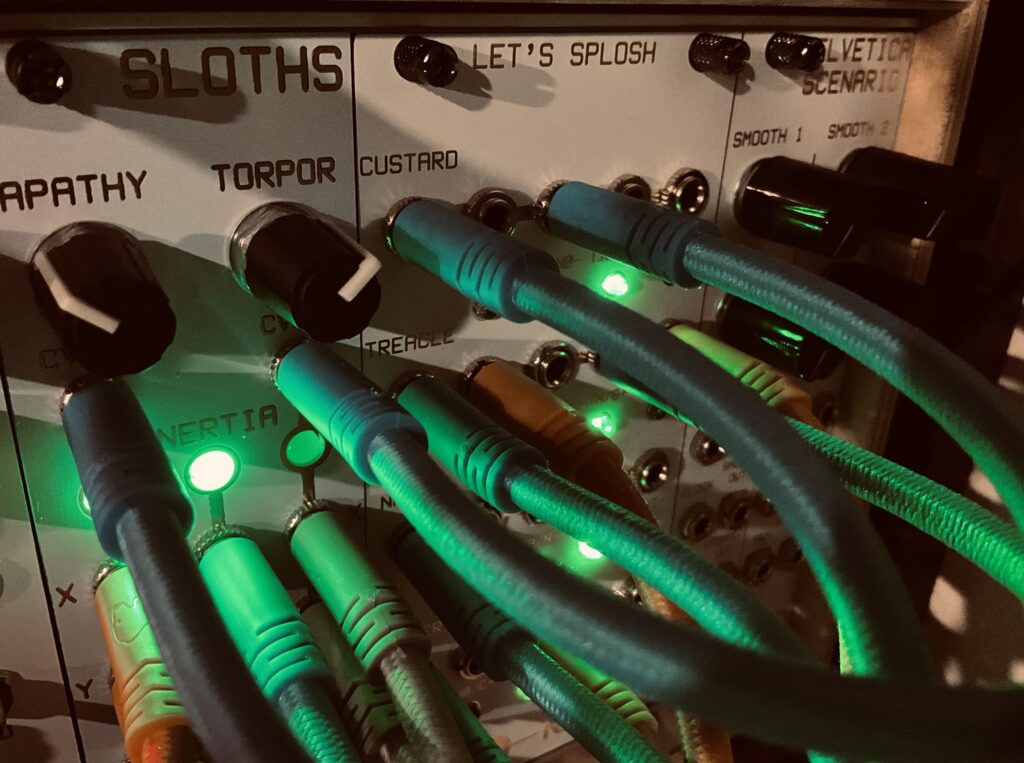
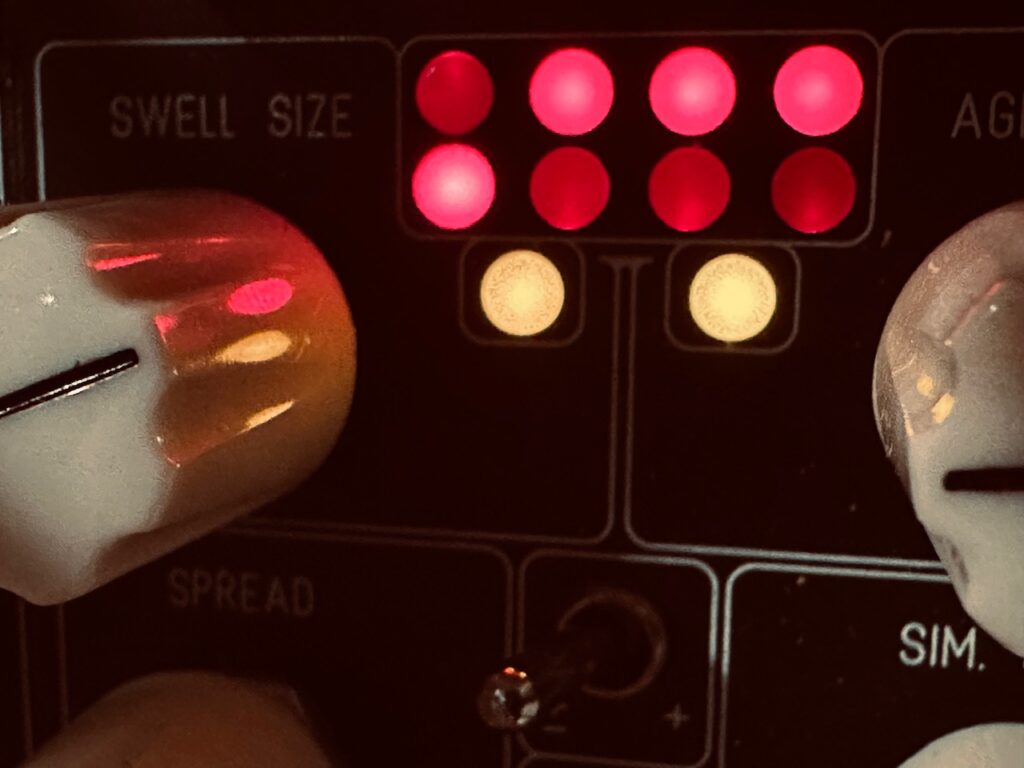
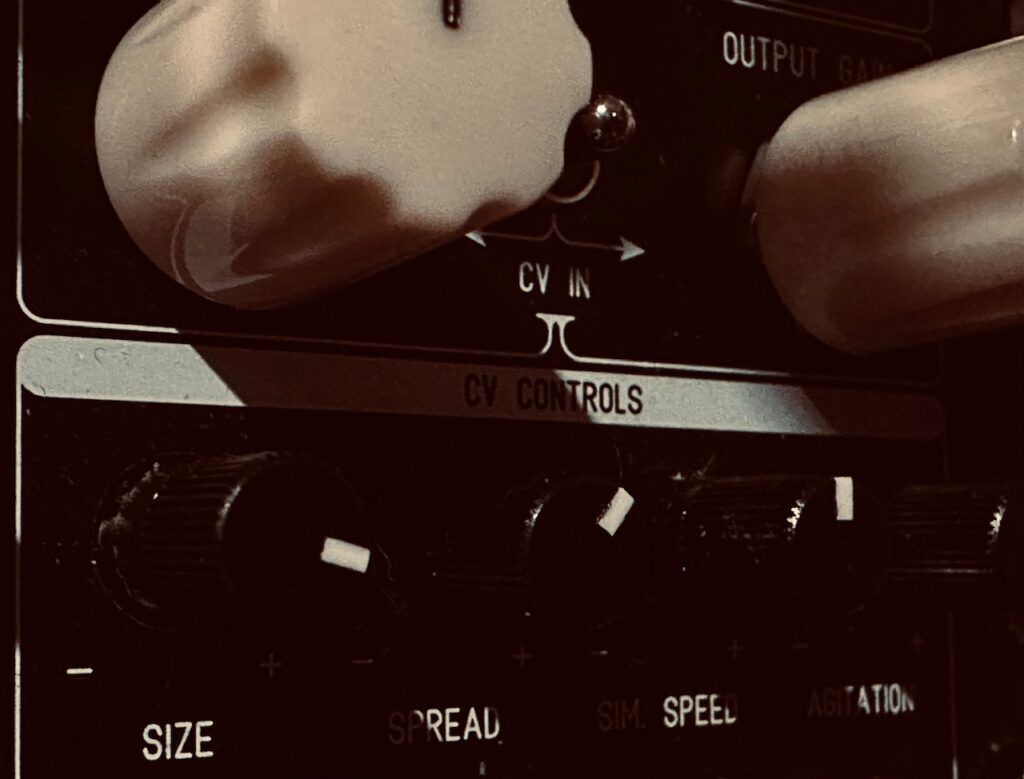
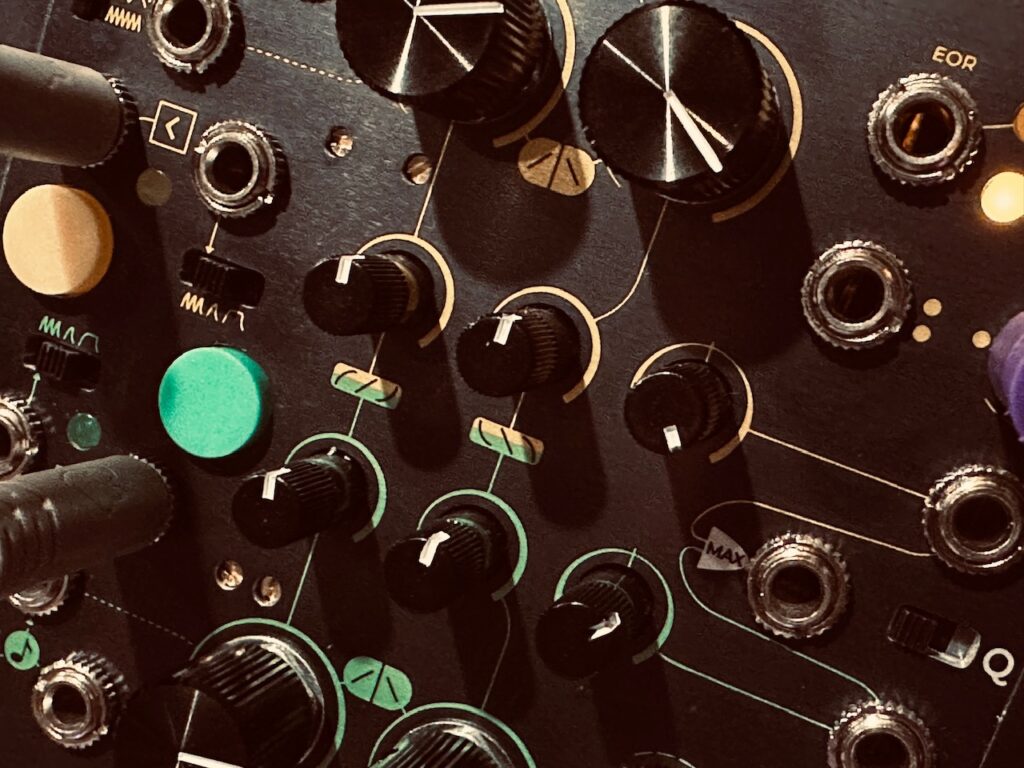
My first consideration was how I might create a similar cadence to Fall using the tools I have in the case. This all important process determines when notes are played, and I was hopeful to get a reasonable approximation of a representative sample of how often notes are fired in Fall. Fall assigns a note value to each leaf as it’s generated, which can change if the key or scale is changed before a leaf hits the ground. That’s not possible in Eurorack. There are no predetermined leaves here. The only part of that simulation we have in this patch is once these proverbial leaves hit the ground and are actuated by the gate triggering an envelope. Since it’s not clear to me what sort of process generates the falling leaves in Fall, I decided to use chaos. A leaf falling is a chaotic phenomenon created by any number of nonlinear conditions from wind speed and direction, to humidity and leaf density. In that light, I decided to use Swell Physics, a CV generator based on ocean waves, another chaotic process, and ran the four wave outputs through the Nonlinearcircuits Numberwang in order to create nonlinear, sporadic gates. Increasing the simulation speed of Swell Physics would render “leaves” hitting the ground more often.

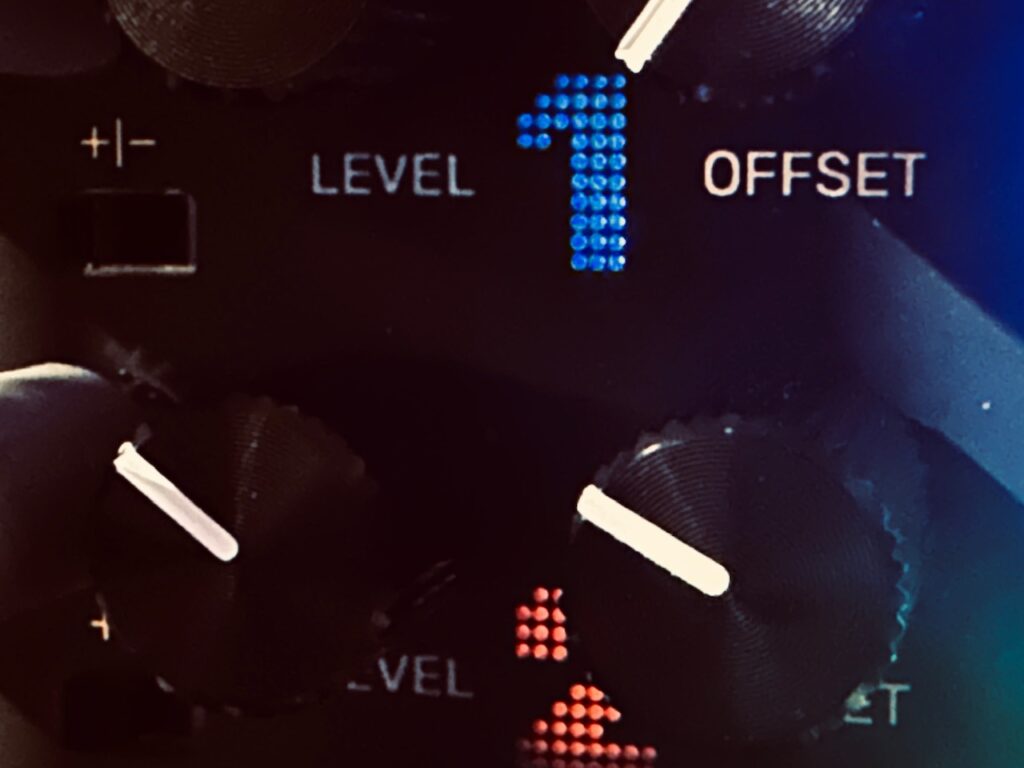
A second copy of the four Swell Physics outputs were sent to the Vostok Instruments Asset, a very handy six channel attenuator and offset generator, in order to tune them into a range that was good for pitch changes as to not have pitches too high or too low. Though I was able to accomplish a reasonable range, I wasn’t entirely happy. There are too many notes in a very low register, and they repeat too often. I’ll need to really sit down and further tune this set of CV outputs to get it right.

Though I was pretty happy with the cadence of triggers fairly quickly (I’ve done this sub-patch many times), something wasn’t right. Whether from a bad case of mis-remembering or simply being wrong, I struggled with the envelope that shapes each note, which created all sorts of downstream issues. The first delay was utterly lost, which also lengthened the note in a bad way, which also affected the second delay. It also created way too much dissonance with more newly created notes in this generative sequence. I couldn’t figure out the problem until after several listens. When I went to Norns to check the Init settings, I discovered I was wildly off on the envelope times. I somehow remembered a three second rise with a nine second fall, or thereabouts, while in reality the rise is around one second, with an approximately three second fall. About three times shorter than the settings I used. I’ve no doubt that shortening the envelope will prove to be fruitful in many ways. I used Falistri for all four envelopes, which served fine, but I’ll need to shorten those envelopes in order to get closer to Fall. Falistri has become my “go-to” function generator. Whether for modulation or actuating sounds, I use Falistri in almost every patch. I use Falistri so much that I’m in the process of expanding my Frap Tools case to include a total of four Falistris. The module is fantastic and flexible, and if I could keep only one function generator it would be Falistri.

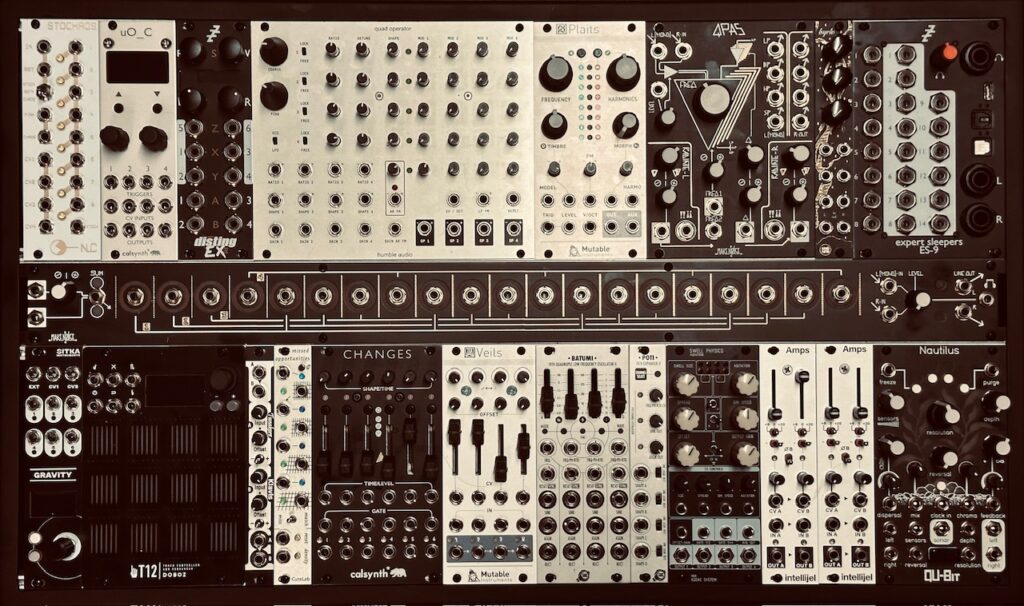
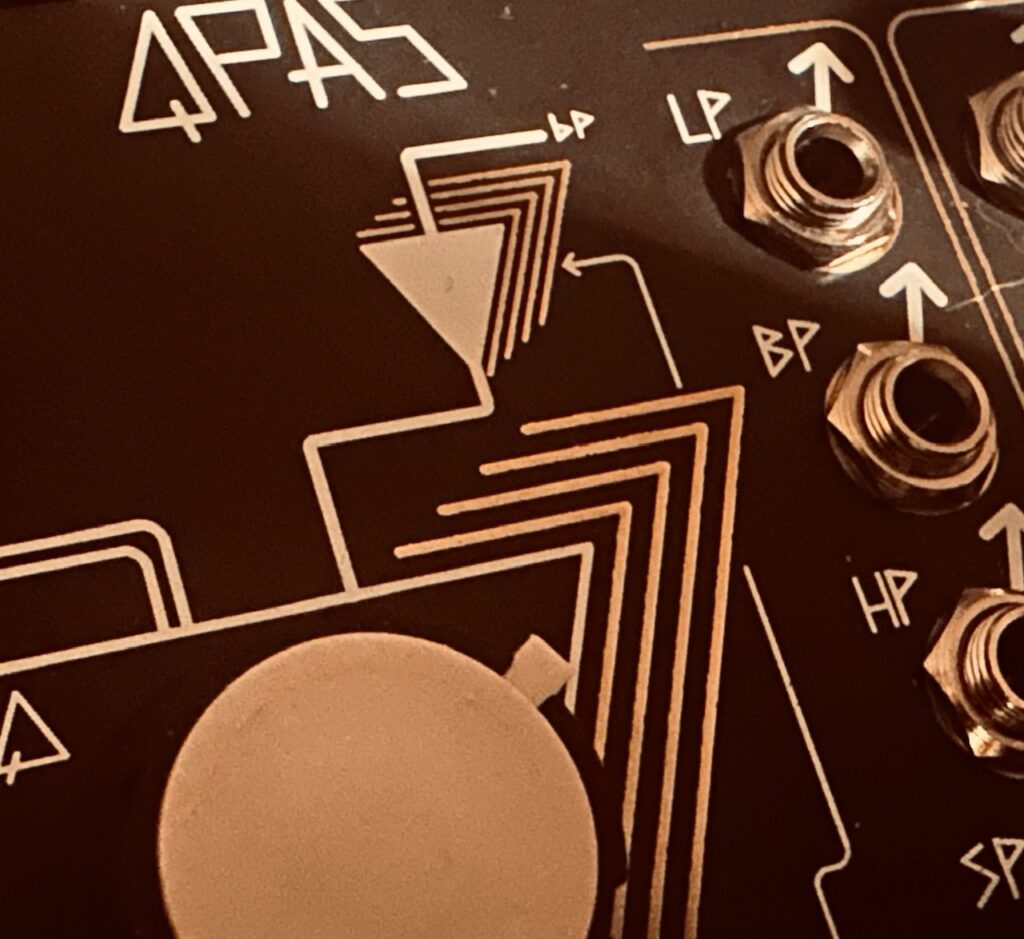
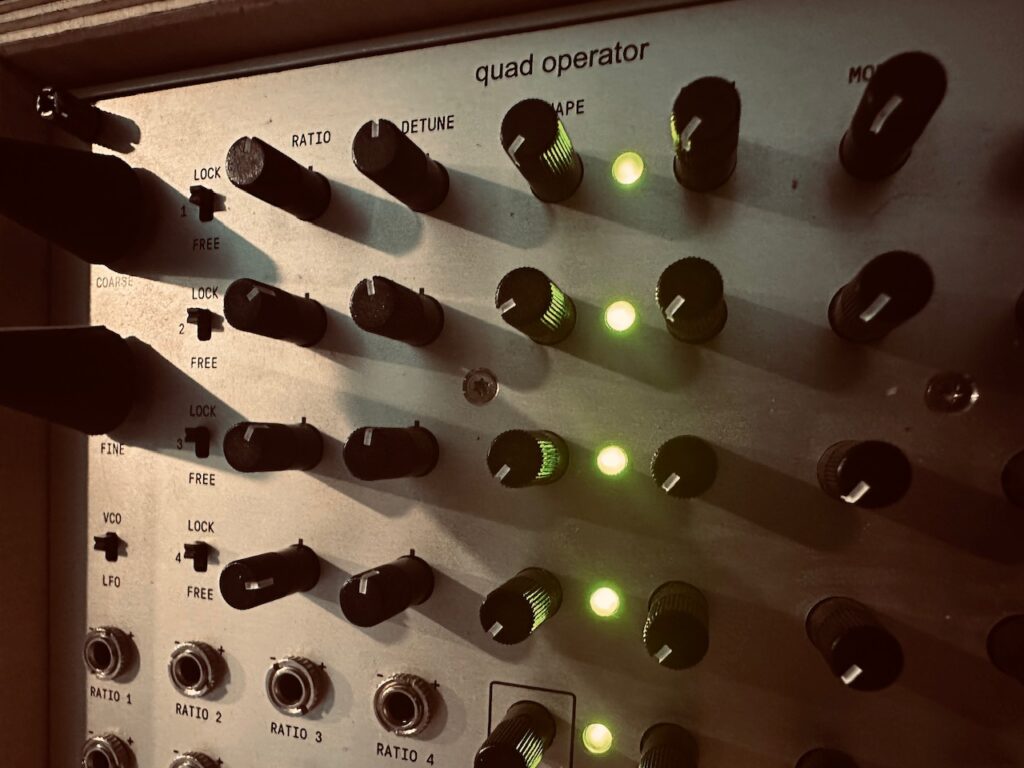
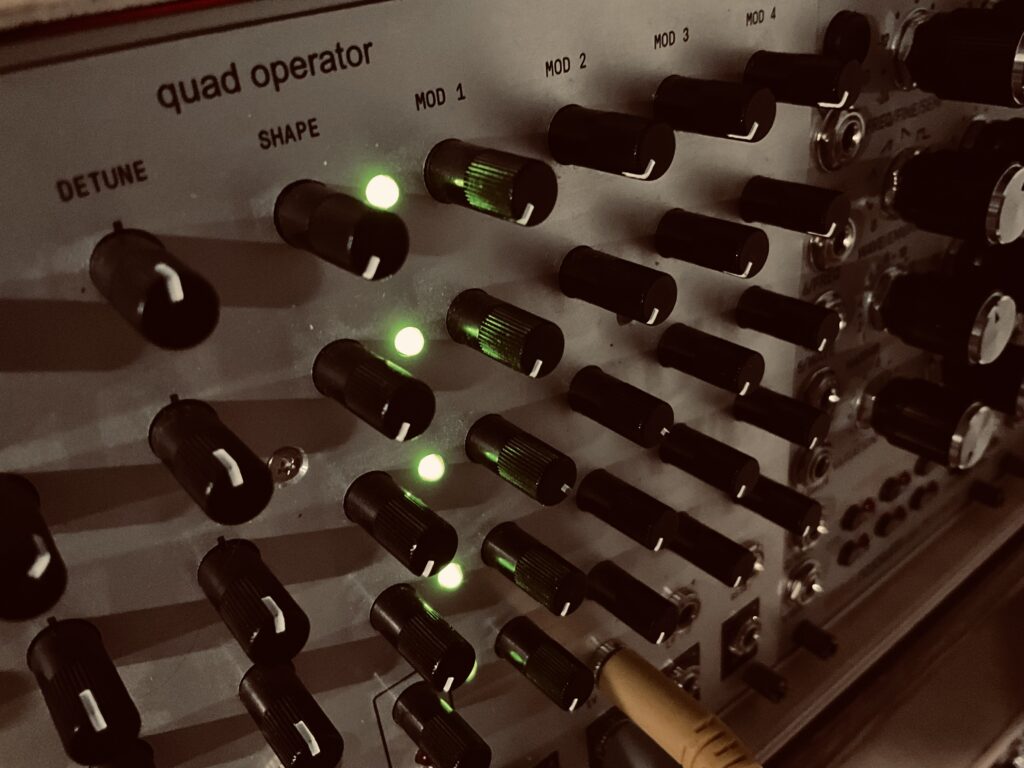
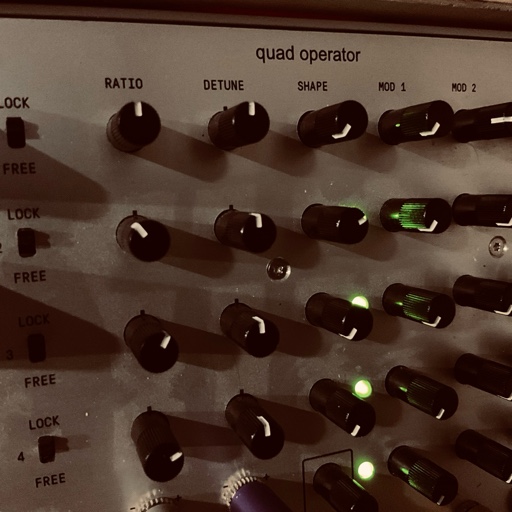
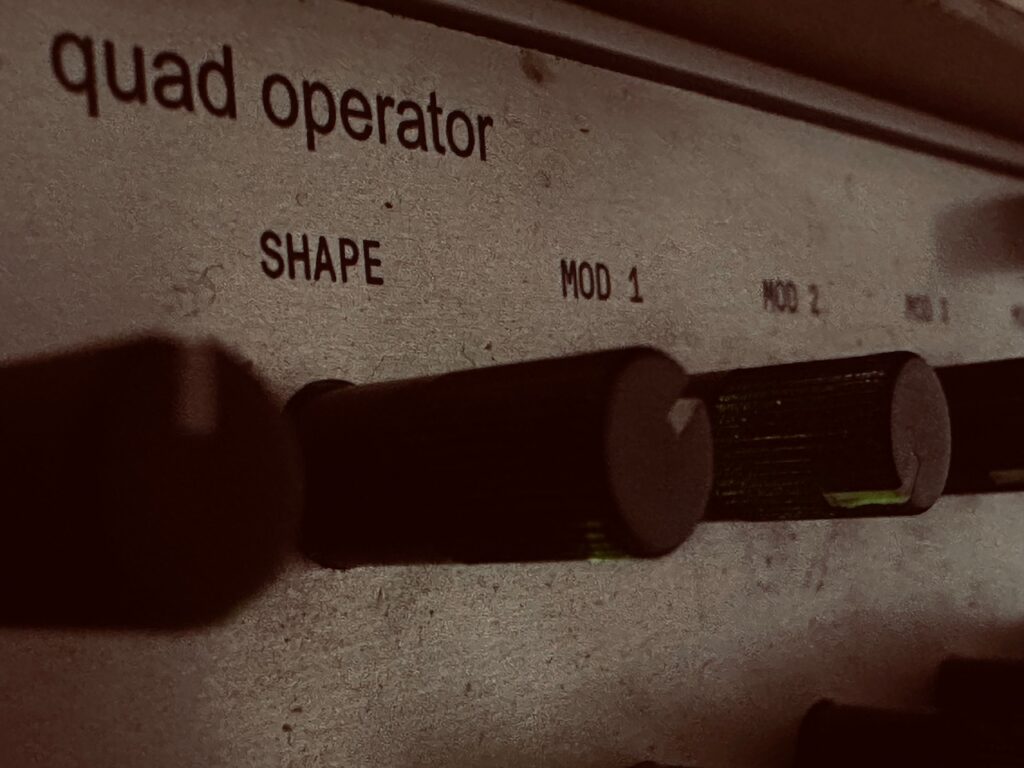
I used the Humble Audio Quad Operator bank as my four square wave oscillators. Operators one and three were tuned in unison, with operators two and four tuned one octave higher. There’s no good reason why I chose to stagger high and low pitched oscillators, but it doesn’t make much difference in the long run. I tuned each oscillator to each other, but none are tuned to a specific pitch, a mistake I’ll remedy when I tweak the patch. The audio from each channel went to the Frap Tools CUNSA for some low pass filtering, and was enveloped by Falistri in CUNSA’s VCAs.

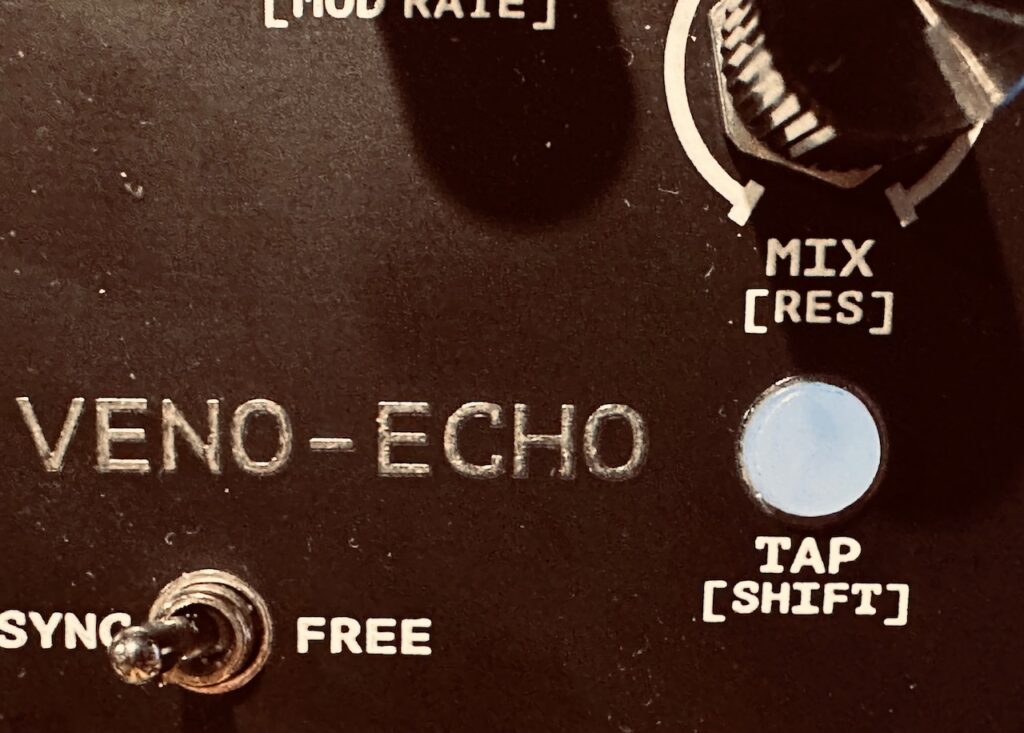
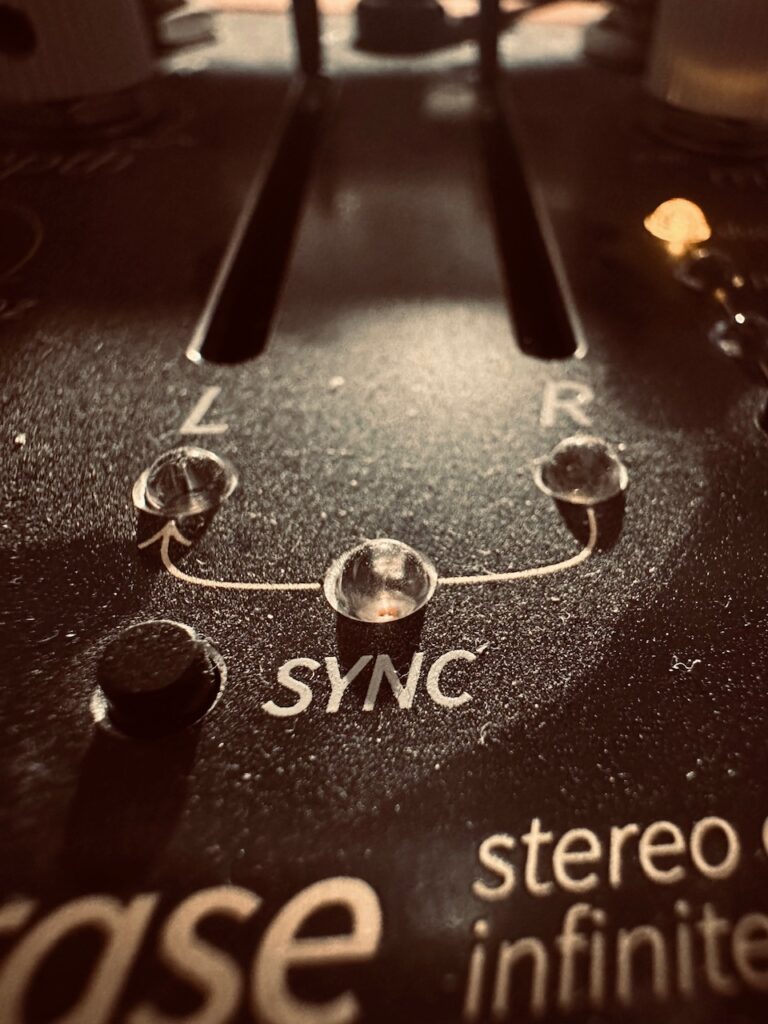
The delays used were the Venus Instruments Veno-Echo for the short delay and the Vongon Polyphrase for the long delay. I’ve spilled much proverbial ink writing about Veno-Echo. It’s a seriously wonderful delay with a feature set that’s tough to beat. I’ve used it in a goodly chunk of my patches since getting it. But because the envelope of the note was so long it’s barely audible despite being turned up much higher in the mix than the Init setting calls for. The long delay is also “weird” because it too followed too closely to the note played. It needed more space to be effective in the way it is in Fall. I chose the Polyphrase because of its very long delay times. Many delays can do one to three second delays, but finding one that can do full ten second delays without serious degradation is tough. The Polyphrase records up to 22 seconds in its continuous buffer, so very long delays with high fidelity are possible. Degradation in repeats can be lovely, as I was reminded of multiple times during Jamuary while using the Bizarre Jezabel Quarté Mk2, but Fall calls for a more clear set of repeats, not disintegrating fragments of what was once there.

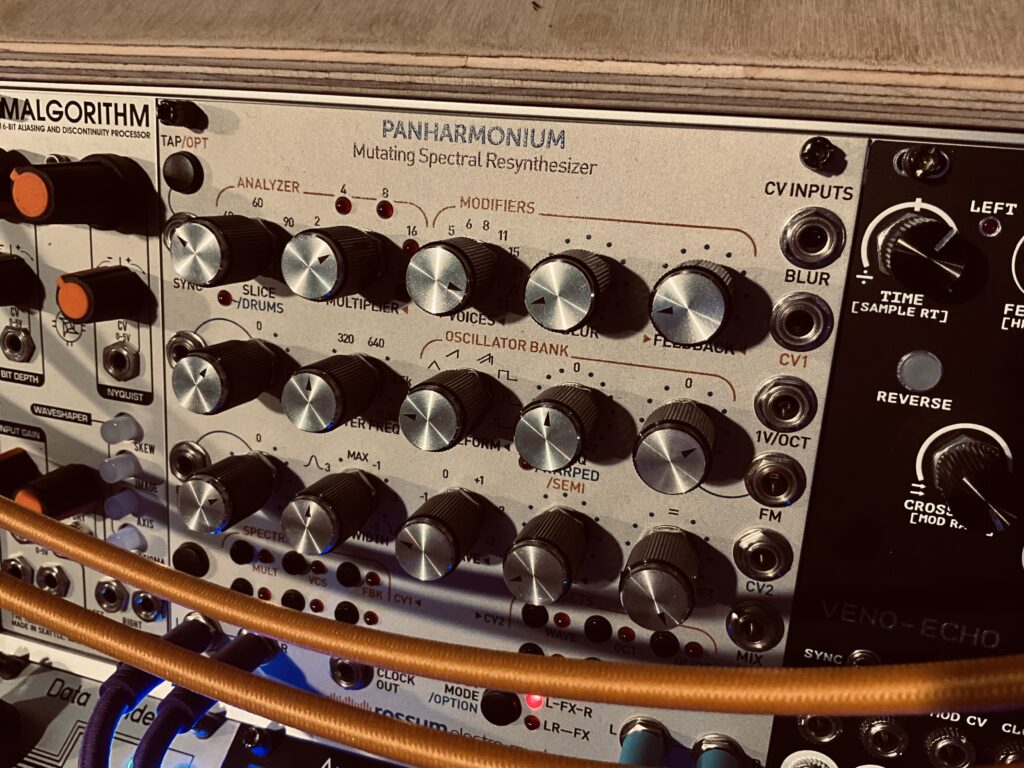
Although I wouldn’t describe Fall as inherently lo-fi sounding, it can definitely get in that territory via its control over bit depth. We can go from crisp 32 bit resolution down to a cascade of distorted, bit-reduced blocks, with the Init settings at a fairly low 13 bits. It’s not chiptune sounding by any means, but there is a certain dustiness to Fall that is charming. Wanting to get my clear filtered square waves closer to the OG Fall sound, I decided to patch in Malgorithm for some light bit and sample reduction. With Fall, the bit depth can be modulated by an internal LFO, for which I substituted a slow, cycling triangle function from the Joranalogue Contour 1 to bring the square wave from lightly bit and sample reduced to clean and back again.

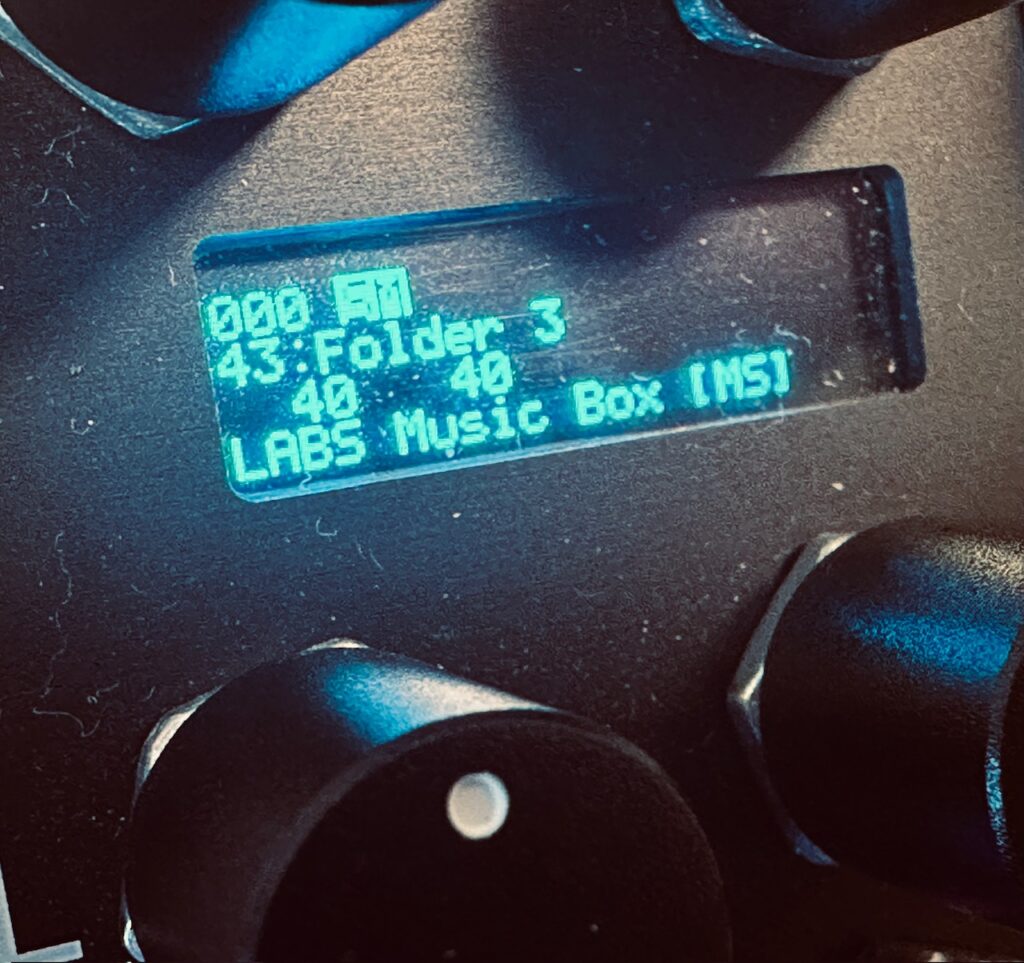
But I didn’t want to just replicate Fall and call it a day. As instructive as replicating a patch or sound can be, I wanted more. I decided on using the Disting NT Poly Multisample with LABS Music Box samples, triggered randomly by the two lowest outputs of the CuteLab Missed Opportunities, using the Average output from Swell Physics as a pitch source via the Disting quantizer. I wasn’t unhappy with the results, not even a little, but I was unhappy when I discovered that things were a bit out of order because the oscillators weren’t tuned to a pitch, meaning the Fall notes and short plucks of the music box were playing in different keys. The registers are different enough that it doesn’t clash too strongly, but it has dissonance where there should be none.

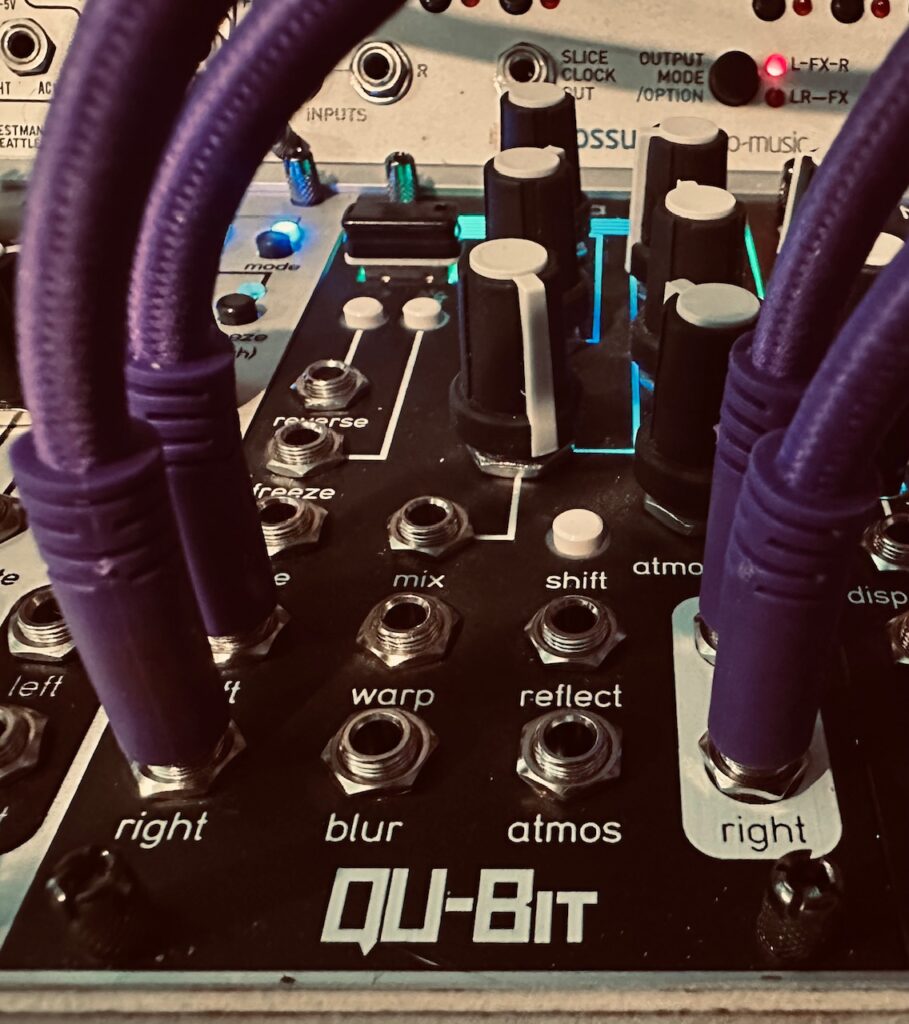
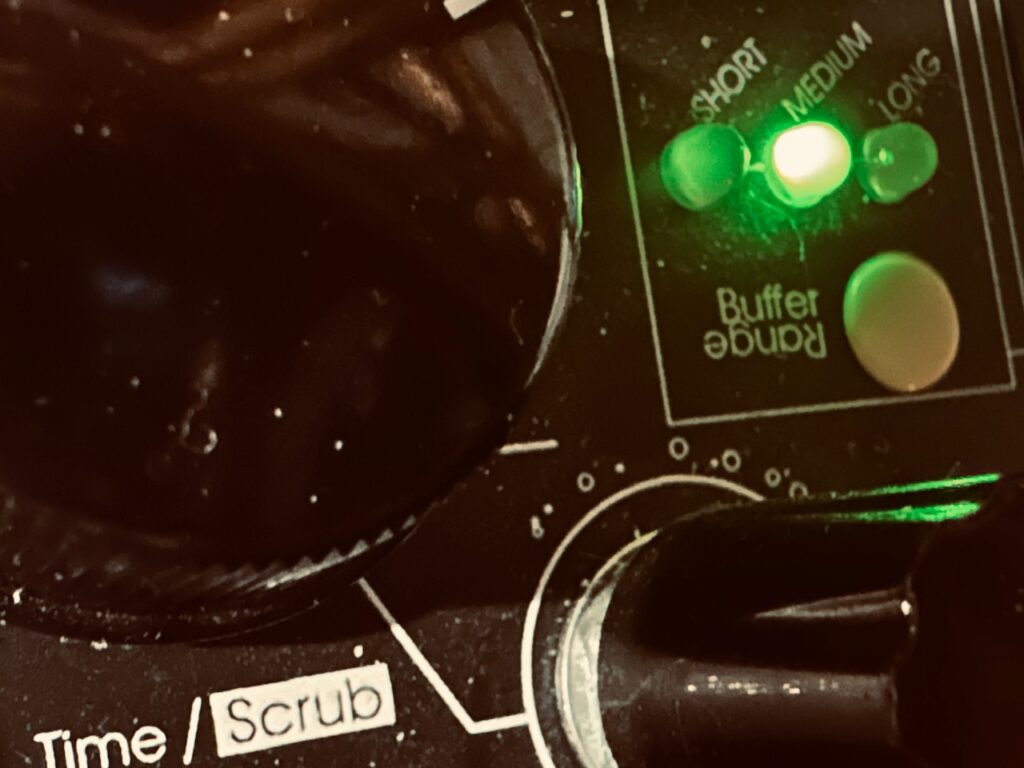
I fed the output of the Disting NT to the Holocene Electronics Non-Linear Memory Machine, via the Addac 814 6×6 Stereo Matrix Mixer, with a fairly slow delay time. Like in a couple of Jamuary patches, I occasionally froze and scanned the buffer for a granular-like effect which I find absolutely charming. The wet and dry signals were mixed in a Knob Farm Hyrlo at about an 45/55 mix and sent to the output mixer for some reverb.

The last voice in this patch was Mutable Instruments Beads, playing grains in reverse at two octaves up. You know; for some sparkle on top. I initially only sent the “Fall” audio to Beads, then as the patch progressed introduced the music box samples to give the patch even more sparkle at the top end. Beads provided a nice flourish to the patch.

This patch interests me enough to want to improve it. Fall is a fascinating script, and I’d love to be able to get closer. I’ll definitely be making the adjustments I’ve identified and giving the patch another shot.

Rev 1

After recording this patch and listening back several times, I had ideas. I wrote furiously in my Notability notebook where I keep all of my synth and patch notes trying to suss out what changes I wanted to make, and the best way to go about making those changes. After a couple of days of writing I identified no fewer than eight different parts of the patch that I wanted to tweak, or at least think about tweaking. No part of the patch was left unexamined, and after writing and pondering I was ready to try again.

After tuning the oscillators to C2 and C3, as opposed to merely tuning them to each other at a random pitch value (it was ~Eb), the first change was to the envelope length. In my first iteration, whether through faulty memory or bad information, the envelope for each note was way too long. Something like three times too long, which caused other problems downstream in the audio chain. After fumbling around with a high level of uncertainty, coupled with the desire to be as close as possible to the Fall settings, I decided to run the envelopes to the Mordax Data in order to get their rise and fall times as close as possible to the Init settings. With this simple change the patch was instantaneously improved, and, as hoped, it did fix several other issues like pitches changing mid-note.1 It’s amazing how such a simple change can make such a huge difference. Although the Init settings in Fall imply that its envelope is a simple AD function, it’s not clear to me whether there is an appreciable curve in one direction or another. I decided to stick with a linear function unless I get some sort of clue or confirmation.

Things weren’t perfect, however, and it wasn’t something I’d noticed until I was deep into the recording: with shorter notes, more of them can be heard more clearly, and it dawned on me that although the cadence of gates hadn’t really changed, there were too many notes. When I had way-too-long envelopes controlling note generation during the original recording, many notes were camouflaged by others. By mid-recording on this revision (or thereabouts) I adjusted the Simulation Speed on Swell Physics to slow it down, and although that had the desired effect of creating fewer notes, it was still too many notes happening too quickly. It wasn’t slow enough, and their tendency to pile up, particularly with more discernible repeats, was a bit distracting, and caused a few problems in the process. Lots of notes with various levels of repeats created dissonance, and even if it wasn’t overwhelming most of the time, it was noticeable too much of the time. At least to me. The cadence wasn’t overwhelmingly fast, but, between the notes and their various echoes, the cadence was just quick enough to still have too many notes floating about simultaneously.

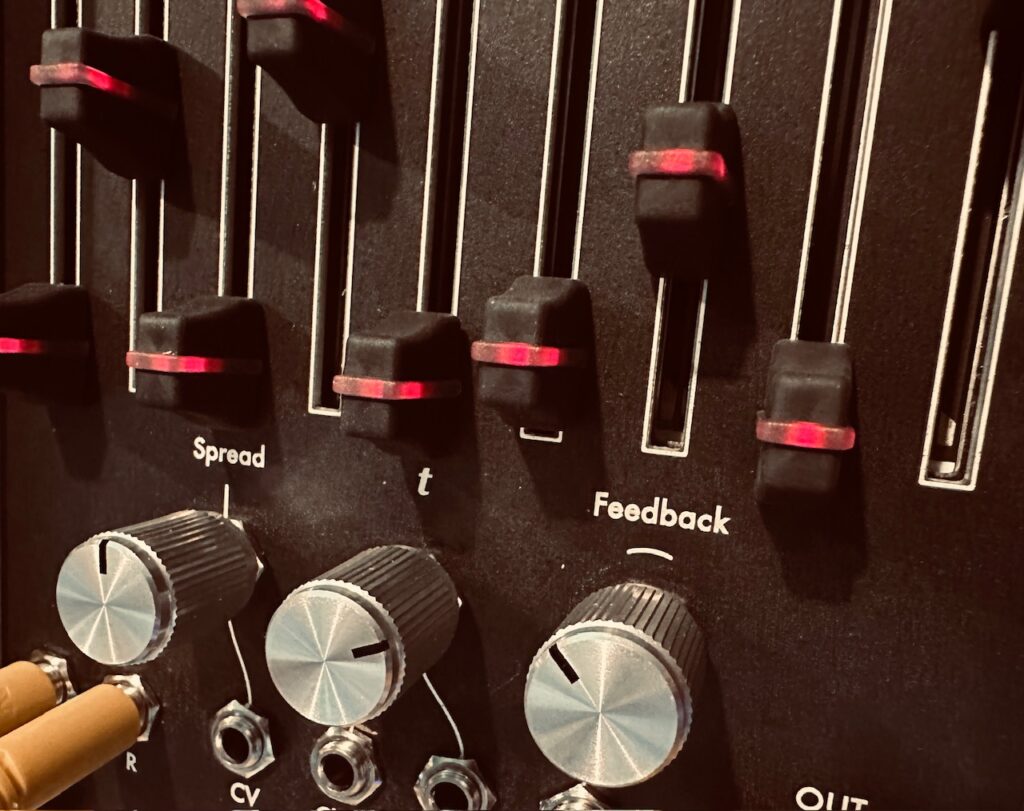
Although I didn’t make any appreciable changes to the delays themselves, the delay times stayed the same, I did add slightly more feedback, and adjusted their levels in the matrix mixer to be closer to that of Fall. In the first recording I had the delays both set at about 3 o’clock on the dial. That’s roughly 75%. In Fall’s Init settings, the delay “Gain” is listed as “.400” and “.600” for the short and long delays respectively. Although it’s not exactly clear just what that means, I’ve interpreted those settings as roughly 40 and 60% of the dry level. Even if I was wildly off in my hypothesis, the results bore positive results. The delays no longer overwhelmed the dry signal, and it added a more somber tenor to the patch, with repeats drifting in the distance on different time scales. Just beautiful.

I briefly considered consolidating this part of the patch down to a mostly Frap Tools affair by switching oscillators from the Quad Operator to using the EOR gate outputs on Falistri as square/pulse wave generators, but it would have required a fairly major overhaul to the patch, including installing a new case which I do not like doing while there’s cables hanging everywhere, and so quickly decided against it. Besides patch consolidation, I’m not convinced that there would have been much difference.

Another problem faced in this iteration is that there were too many Music Box notes too. There was just a tad too much CV going to the Density input on the CuteLab Missed Opportunities, which resulted in too many random triggers. This too wasn’t something I’d noticed until well into the recording, and even when I tried to alter it, I didn’t do enough to save the recording. I also worked on the wet/dry mix between the Music Box samples and Non-Linear Memory Machine, allowing the echoes to be a bit more prominent, emphasizing when the buffer was frozen and being scanned. Even just this simple level adjustment between dry and wet was a drastic improvement to this voice, even if I’d still add yet more in the next revision.

Rev 2

Still not yet content with the recordings I’ve captured, I once again started to identify tweaks to make. Too many “Fall” notes. Too many Music Box notes. Not enough feedback or level from the long delay. Wanting to change something about Beads, but not sure what.

My first challenge was getting the Fall cadence down to something manageable. Enough notes to remain relevant in the patch, while not becoming a distraction. My first idea was to simply lower the Simulation Speed on Swell Physics, and while that had an effect, the effect was too great. I was at a point with far too few notes, oftentimes hearing the long echo repeat two or even three times without another note being produced, leaving the space too sparse. I knew that speeding the simulation up again would lead back to too many notes, so I tried a different solution: using Stackcables to combine gates in Numberwang. The switching in Numberwang’s outputs wouldn’t happen any faster, the input signals controlling Numberwang were still running at the same speed, but more gate outputs were being used to trigger the same number of notes (six as opposed to four). These extra gates worked a treat, allowing notes to be triggered more often, but without being overwhelming.

But after several listens of this revision I’ve come to the conclusion that more notes are paramount. There are too many spots with way too much empty space. I’ll have to decide on whether raising the speed of the simulation, or a couple more Stackcables, or indeed a combination of both, is the best route to make that happen. But I’d like two to three notes every ten seconds or so, not one note every ten to 20 seconds as sometimes happened while recording this revision. At first I had too many notes, now too few. Finding that medium ground is my key concern with the next revision.

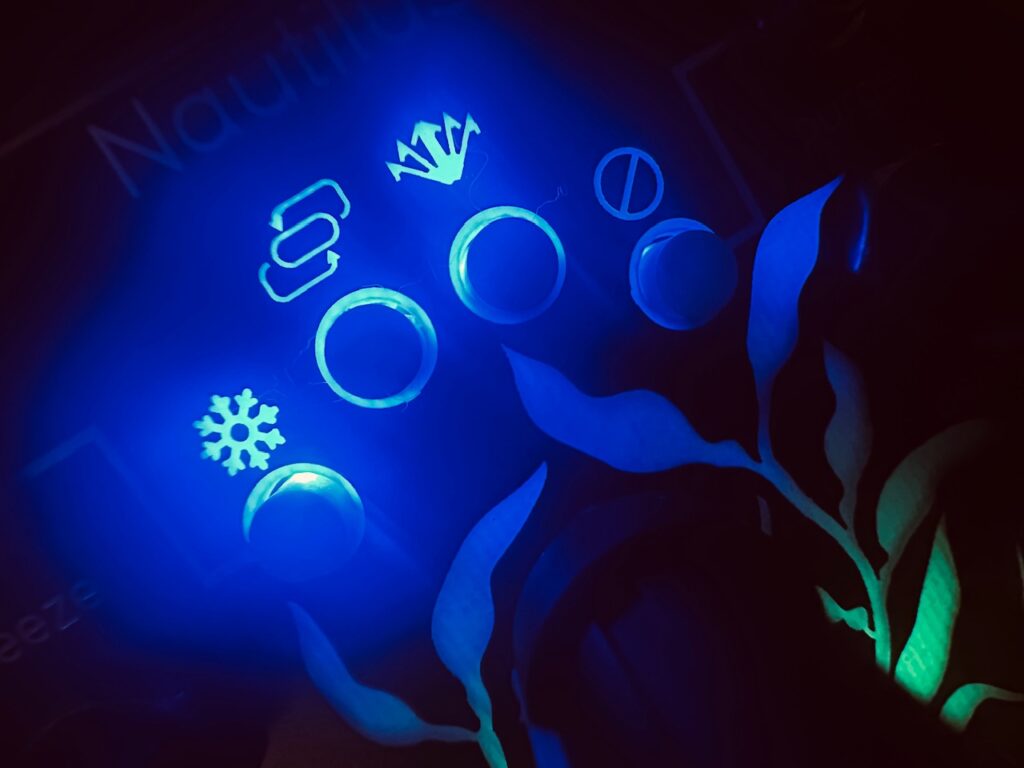
Having the desire to somehow vary Beads in this patch, I changed how it would fade in and out of the mix by using the Swell Physics Average output to control the output levels via the excellent Intellijel Amps. Rather than being a constant volume once introduced into the mix, Beads faded in and out along with the flow of the wave simulation that controls most of the patch.

In addition to this change in Beads, I also used the same gate that allows Swell Physics to scan NLMM’s buffer to change the repeats to an octave up for a very nice effect. I very much enjoy scanning NLMM’s buffer. It’s an incredibly playful way of presenting a different side of the audio source. The overt aliasing when pitched (especially up) adds a character that is lively and expressive; bits of audio that crackle like sparks from a fire.

Rev 3

Immediately after hitting Stop in AUM, I thought I had captured the recording I was after. But as so often happens, the memory of a moment can be misleading. While recording, it felt right, but after even the slightest bit of examination, I knew I needed more notes. The recording was simply too sparse: the noise floor being the only thing audible in too many spots, which is a weird thing with multiple overlapping delays. This isn’t to say that every second of every recording needs to be filled with something. John Cage showed us that a recording need not be filled with anything. Silence is a fantastic juxtaposition to sound, but too much silence can leave a listener bored rather than enraptured with anticipation, and that’s the feeling I had after listening to revision 2.

Getting more notes in the Fall pattern was my only real priority in this recording. I’ve been after that perfect cadence the entire time, and I hadn’t yet found it. While studiously examining how the gates fire from Numberwang and its relationship to Swell Physics, I tried everything I could think of. Increasing the wave simulation speed, adding another Stackcable, cursing the gods, but it wasn’t until after a while that I discovered that gate generation started to slow and then stall for a bit when the Swell Physics waves were collectively in a trough, all of them well below 0v. Once the waves started to move upwards again, the gates would fire more or less how I wanted them to fire, but I knew that the collective signals from Swell Physics needed some positive offset to keep them below 0v for much less time.

There’s still a bit too much silence in a couple of spots of Revision 3 while Swell Physics was in a lull, particularly from about 2:17-2:42 of the recording, but after several days of trying to proverbially shove a square peg into a round hole, I finally came to accept that Swell Physics was simply the wrong tool for replicating the falling of leaves. Both are chaotic processes, but they are still fundamentally different from one another in a lot of ways. Falling leaves don’t oscillate, they only go downwards, while ocean waves move both ways. If I want to replicate the falling of leaves in any meaningful way, I need a different algorithm in my patch to get me there, and I think I have an idea, though that will be for another day.

Rev 4 – A Rework

When I was done with Revision 3, I was content to tear the patch down and maybe come back to it another day. But there was a gnawing in the back of my mind. As I was writing what was going to be the conclusion to this post, an idea sprang to mind about how to better cadence my interpretation of Fall.

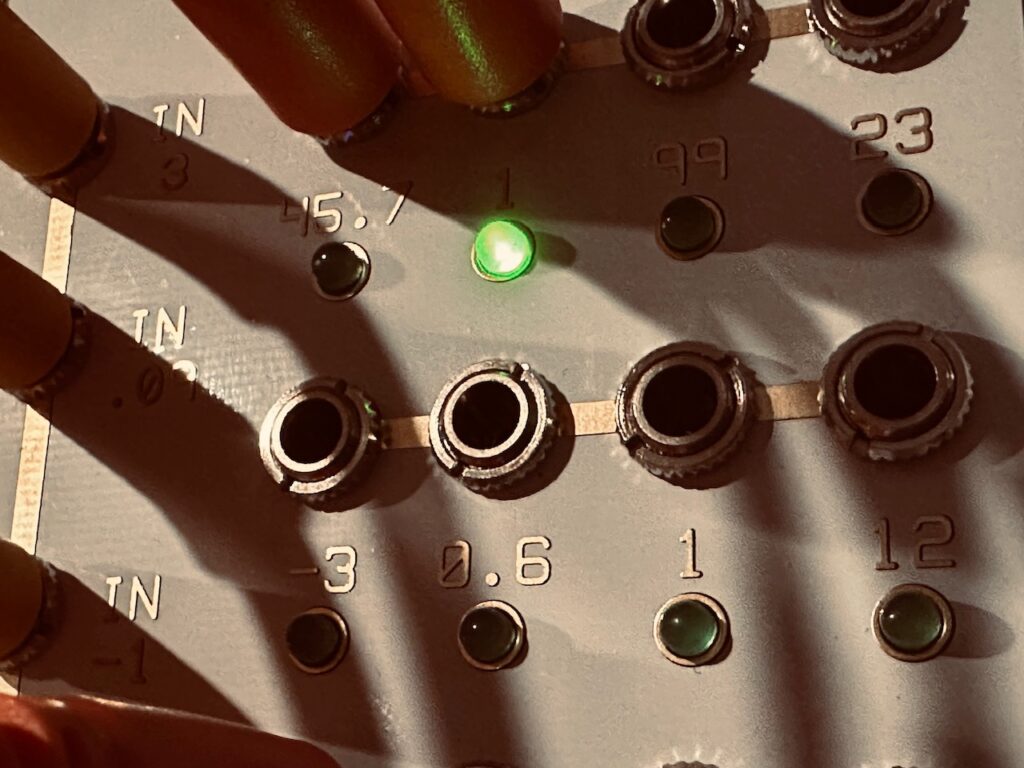
I thought about what sorts of movement I could create that was in the direction of falling leaves, and immediately thought of a saw wave, or falling ramp. The start of each cycle would be the moment a leaf breaks away from the tree, and the fall time that leaf’s journey to the ground. But I also knew that I couldn’t just have cycling saw waves. That would create an unwanted pattern, so I chose the Addac506 Stochastic Function Generator as the new engine of the Fall portion of this patch. Every time an envelope cycled the Addac506 randomly assigned a new fall time to the function within a pre-determined range, and the End Of Cycle outputs triggered the quantizer and envelope for the Fall note. Each leaf fell at a different rate, just as leaves falling from a tree do. The functions themselves were patched to the CV input of the quantizer, via the Vostok Asset for some attenuation and offset. After un-patching Swell Physics and re-patching the Addac506, I realized I made an absolute rookie mistake.

Normally when I’m creating a polyphonic patch, I keep everything fairly orderly. The first trigger goes to the first envelope generator which goes to the first filter, etc. Having quad modules like Quad Operator, CUNSA, the Addac506 and 508, dual Natural Gates, Sum Mix & Pan, etc. generally make polyphonic patches a much easier proposition. But when an End of Cycle trigger is a patched to a quantizer with that channel’s function as CV input, you will always trigger at 0v (unless there is an offset on the function). Not cool. Every trigger is the same note! To remedy this mistake, I simply switched the functions around in the Vostok Asset, with the Ch 4 and Ch 1 envelope outputs, and the Change 2 and Ch 3 outputs. Once I made the switch, each end of cycle triggered a different envelope, and not its own, resulting once again in random pitches.

With this new engine in place the Addac506 drove the patch at a much better and more evenly distributed cadence. I could change it easily by adjusting the fall time range, and it was much more consistent than when I used Swell Physics. Lulls in note creation disappeared, and overall the patch became much easier to control.

All of the delays and other effects remained the same with the exception of how I froze and scanned the buffer on the Non-Linear Memory Machine. The method was the same, but rather than using Swell Physics gate outputs I used one of the End Of Rise gates on the Addac506.

Conclusion

Though I’m sure there could be many changes made to get a better recording, I’m happy enough with the result of this fifth version to finally move on. My re-imagining of Fall, though not perfect, is a credible stand-in and I’ve found a new way to facilitate patches like it. The Addac506 has turned into something resembling a super-modulator. A very flexible module offering several methods to create different timing systems and control entire patches.

Overall, this was a very fun patch to make. Trying to mimic a sound or patch can be very instructive, and this patch was no exception. The process of revising a patch can be a tedious one. Small changes and decisions often have an impactful outcome.

Modules Used:
Addac System Addac508 Swell Physics
Addac System Addac506 Stochastic Function Generator
Addac System Addac814 6×6 Stereo Matrix Mixer
Nonlinearcircuits Numberwang
Nonlinearcircuits Divide & Conquer
Humble Audio Quad Operator
Frap Tools Falistri
Frap Tools CUNSA
Vostok Instruments Asset
Calsynth uO_C (Quantermain)
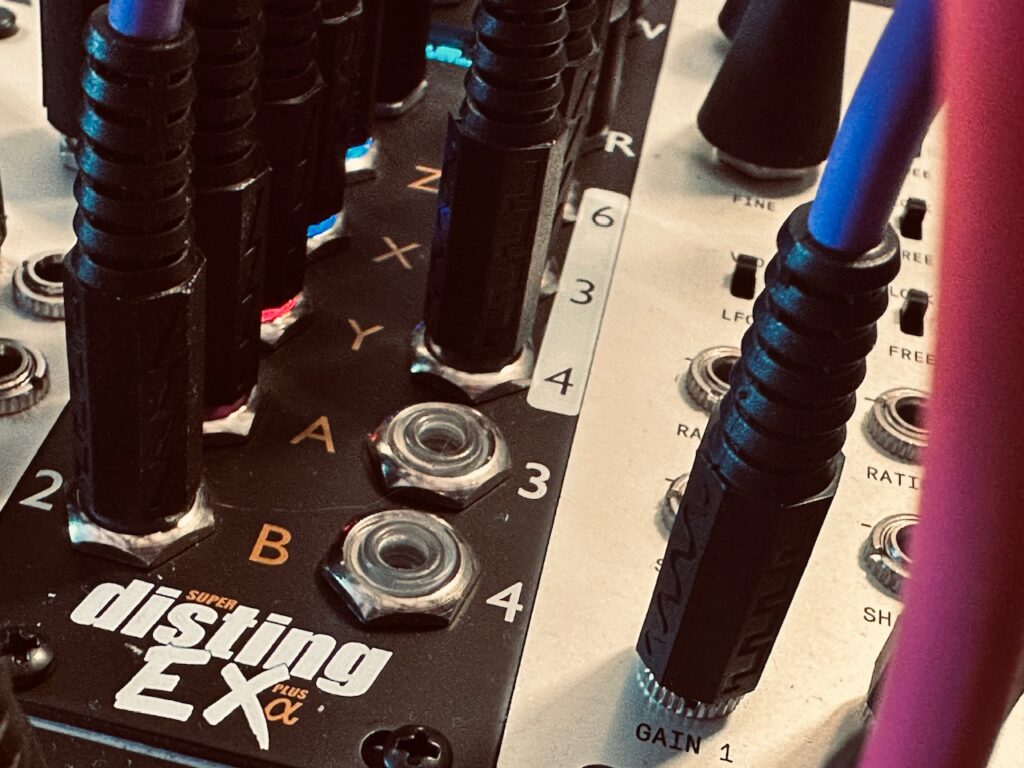
Expert Sleepers Disting NT
CuteLab Missed Opportunities
ST Modular Sum Mix & Pan
ST Modular SVCA
Intellijel Amps
Intellijel Quad VCA
Knob Farm Ferry

Outboard Gear Used:
Vongon Polyphrase
Vongon Ultrasheer

  1. These changes didn’t completely alleviate rogue pitch changes, you can hear one in quite literally the first note of the recording, but it greatly reduced them. I’m pretty sure that first untimely pitch change is the only one in the recording. ↩︎

Jamuary 2517

Today’s patch was a long time coming. Several years ago I saw a patch from scratch video by Omri Cohen which used a Befaco Rampage as the base of everything else. It dictated volume, speed, when pitch changes would happen, timbres, and lots of others things besides. I was inspired, and immediately purchased a Rampage. Only I never tried that patch, and moved on to other great things.

Even though I no longer even have that Rampage, I do have several other Function Generators with many of the same features, and after watching the video again recently, I decided today was the day. Only I cheated a little bit. Rather than patch up various Sample and Hold modules to vary envelope length for the higher Brenso voice, I used the Addac506 Stochastic Function Generator which accomplished the same effect. I initially tried using a Falistri but the pitch was always changing a fraction too late for the cycling envelope, and I’d hear that pitch change. I worked on it for a bit, but decided to move on once I realized I wasn’t getting anywhere. To be fair, it was similar with the Addac506, but since I can negatively offset its functions directly, I was able to make it so that always happened in silence, and didn’t give a noticeable blip. I could have accomplished the same thing using a separate offset with the Falistri envelopes, but in a bit of laziness decided I didn’t want to patch it. I did use a certain kind of Sample and Hold for pitch voltage, via Quantermain for quantization into D# Phyrigian (which gives it a dark, mystical feel – like were walking through a dark elvish den), from the Nonlinearcircuits Helvetica Scenario. It differs from a standard Sample and Hold module in one unique way. Rather than using a noise source for sampling voltages, Helvetica Scenario uses a Jerk Chaos circuit running at 300Hz, which, from a practical standpoint, is similar enough.

That varying envelope and pitch control a Frap Tools Brenso, with its wave shape being modulated, along with a slight bit of modulation to the wavefolder. I’ll be the first to admit that I haven’t used Brenso very much. Not nearly as often as I should. I’m generally a bit intimidated by complex oscillators, and have mostly used them as two separate oscillators without the FM or waveshaping features, but in the spirit of loving my Frap Tools case and generally trying new things during Jamuary, I decided to give it a bit of a shot by using the waveshaper and wavefolder features. At least a little bit. I would have used some FM too, but decided to leave that for another day. I did note, however, that while patching Brenso, how beautiful the sound was. Reedy in some ways, at least before running it through the noisy PT2399 delay chip of the Bizarre Jezabel Quarté Mk2. I then ran it through to ST Modular Sum Mix & Pan to slowly pan the signal across the stereo field.

This voice was doubled by the Dradd(s) in Grain mode, time stretching the Brenso part, but at a fairly high clock rate to both shorten the buffer, and produce shorter grains.. I’ve really enjoyed using the Dradd(s) this way of late.

The ever oozing chord base underneath is the Humble Audio Quad Operator with a set chord of the one, three, five, and seven of D# Phrygian (D#, F#, A#, and B). I initially used three cycling envelopes from a pair of Falistris to control the level of those notes, but opted in the end to use a cycle similar to the one I used in Jamuary 2505 and 2511, where the End of Rise gate would trigger the next envelope, allowing the next note to fade in while the current note fades out. I should have used Sample and Hold on these envelopes to vary their length, but opted not to in the end to allow the main Brenso voice to monopolize attention. All four oscillators were mixed to mono in Intellijel Amps, and sent to the Bizarre Jezabel Pkhi Mk3 for low pass filtering before the output. The low passed audio signal was also sent to a the Venus Instruments Veno-Echo, which had its high pass filtering enabled in the feedback loop so as not to muddy the sound. I was never fully happy with how this voice turned out. The mix was too easily blown out, giving it a much darker and grittier feel than I initially intended, though after a bit of struggle, decided to lean into it a bit. I need to find a different way for gentler chord washes like this using saw waves. Some of the individual tones were buried in the mix, and at times the chord is lost.

My forgetfulness finally caught up to this Jamuary day. I forgot to take pictures of this patch before I had to turn everything off for the night so my wife could go to bed, so no pretty eye candy tonight. I may add some tomorrow. If I remember anyways.

Modules Used:
Frap Tools Brenso
Frap Tools Falistri
Addac Systems Addac506 Stochastic Function Generator
Intellijel Amps
Humble Audio Quad Operator
Nonlinearcircuits Helvetica Scenario
Nonlinearcircuits De-Escalate
Nonlinearcircuits Triple Sloths
Bizarre Jezabel Quarté Mk2
Bizarre Jezabel Pkhi Mk3
ST Modular Sum Mix & Pan
Venus Instruments Veno-Echo
Befaco/DivKid Stereo Strip
AI Synthesis 018 Stereo Matrix Mixer
Knob Farm Ferry

Outboard Gear Used:
Walrus Audio Slöer

Plugins Used:
Toneboosters TB Equalizer 4

Performed and recorded in 1 take in AUM on iPad via the Expert Sleepers ES-9.

Day 3 – Sailing Through The Clouds

The first night at sea was as eery as I can remember seeing on the water. Like a scene from a dreamworld that was real, but didn’t always seem like it. Like we were traveling between realms. I won’t claim to be some long travelled seafarer, but, having grown up by the ocean, I’ve spent a good amount of time on the water in my life. I’ve been in ocean faring boats on three continents and three oceans from the tropics to the arctic. But one thing I’ve never experienced while on the water is The Marine Layer. I’ve seen fog, even bad fog, but nothing could really prepare me for the enveloping marine layer clouds. It was the kind of dense cloud soup that, in another age, might have been the demise of a ship unable to see any navigation markers whether on the land, sea, or in the sky. The only thing visible in the gloom was the sparkling refraction of the ship’s fog lamps, and the sea rolling off the hull as we slowly made our way through Puget Sound and out to sea. The ship’s fog horns blasting every few minutes, and gentle splashing against the hull 80 or so feet below us, the only things to be heard. The entire experience left a lasting impression.

I spent much of that night and parts of day two scouting the ship for someplace that would be a good spot to whip open a modular synth case later at night. I wanted to be as out of the way as I could, but still in a spot that has adequate electricity to power the synth and a small USB hub connected to my iPad, the Michigan Synth Works XVI, and a small 4-channel headphone amp I bought in a lieu of a passive TRS splitter for using with more than 1 person (I loathe not having individual volume control).. Although I ultimately found a couple of good candidate spots, but this first recording I made during some morning downtime in my cabin before arrival at our first port of call. I wanted to give a full test run of the equipment in my room before lugging it down nine decks, the full width of the ship, and nearly its entire length. The setup is not terribly complicated, but it can be fussy, and I didn’t want to waste time futzing with gear in a communal space.

For this first run of the full use of this synth with all of its accompanying support gear, I wanted to use a familiar patch so as not to become overstimulated if I were to encounter problems with my other gear. I spent the better part of two weeks pouring over a patch with the Addac Systems Addac508 Swell Physics and RYK Algo that I quite enjoyed making, and so decided to go with that same approach using the Humble Audio Quad Operator. The four Swell Physics wave outputs to the four operator VCAs (Gain 1-4) to slowly bring their individual voices in and out with the flow of the ocean. This goes straight to the mixer, operators one and three panned left, with operators two and four panned right, where it’s then sent to a reverb bus using the beautiful Blue Mangoo Stratosphere Cloud Reverb.

Three of the Swell Physics outputs also provided the source for pitch CV used in the second voice. In another bid to patch something familiar, I once again used chaotically generated gates with the NLC Stochaos, alongside Disting Ex’s SD Multisample algorithm, this time using LABS Music Box samples. As in my test patch at home, I again used a tempo modulated Sitka Gravity to have the clock float above and below the base tempo of 72bpm. If I were just a bit smarter, I would have thought to use one of the four wave outputs from Swell Physics rather than a random LFO from Batumi II.

The Toy Piano samples output to the Qu-Bit Electronix Nautilus for some delay and with gradually introduced bit crushing in the feedback path. The delay is set fairly slow, with light modulation to Reversal, Feedback, and Dispersal. In a roughly 50/50 dry/wet mix, the Nautilus outputs go straight to the mixer, and are sent to the reverb bus.

The last portion of the modular is an approximation of the ship’s blaring foghorn. I’m using Plaits in (I think) FM Synthesis mode, using the Doboz T12 touch controller to manually play the note. It’s only used three or four times through the ~7 minute recording.

This patch is the first I can recall making where I’ve used post-production processing rather than playing everything live. This synth is limited, and so is time to create patches. Before I left on the trip I knew that my synth was without one of my staples: a granular processor. Earlier revisions of the case had a Mutable Instruments Beads, but it was eventually lost in favor of something else I can’t remember. I do know that I while I was building the synth I was insistent on several modules having a spot. The Addac Swell Physics, Qu-Bit Nautilus,1 Doboz T12 + 3hp module of choice (I chose the Klavis Tweakers), Expert Sleepers Disting Ex, uO_C, CalSynth Changes (MI Stages), Sitka Gravity, and the Humble Audio Quad Operator were non-negotiable for me, despite a couple of them being large for a case this size. But Beads didn’t make the cut because I found an excellent granular processing plugin for iPad, Fluss, by Hainbach and Bram Bos. It can function as a granular instrument, granular sampler to record and process longer samples, or a live granular processor with a 6 second buffer. Because it’s the behavior that most closely resembles Beads, I’ve only used it in live mode, and I can say that I really like it. Because it’s a live processor Fluss is a good substitute for Beads, and despite being a plugin, it leverages the iPad touch environment well, being a very hands-on, playful interface. Sliders and discs can be flicked around, the effect frozen, manipulation of the three voices, and more are all easily accomplished with touch gestures. Fluss also speaks fluent midi, and can be used with hardware controllers should you want even more manual control.

After recording the modular, I played the recorded file in AUM through an effect bus with Fluss as the plugin, with yet another send from the Fluss output to the Blue Mangoo Stratosphere Cloud Reverb. I mixed the original recording with the granular processing and reverb, and recorded that mix, which is what we have here.

I’ve been using AUM as a final mixer for quite a while with my modular. The way my main synth is set up now, I can’t even listen to it without plugging it into my iPad with AUM. An Expert Sleepers ES-9 is my only output module in that synth. Until recently I’d basically been using it as a very basic mixer. Most of the time it would be a simple stereo input mixed in the synth, primarily via the AI Synthesis 018 Stereo Matrix Mixer, while using one send/return bus to go out to a reverb pedal before final mixing. But as I prepared for this trip, knowing I’d need to use plugins in ways I generally don’t, I started making more intricate mixes, utilizing various sends from several input channels to effects plugins and the output bus. Although I haven’t (yet) recorded multitracks on this trip, AUM is certainly set up to easily to do so. Since I haven’t done much post-processing, I haven’t felt the need to, though that may change as I learn to better leverage a mixed hardware-software environment. I’m not terribly interested in moving in the box, but if a plugin has a touch driven interface that’s playable, like Fluss, there’s no good reason to avoid it since I’m already using AUM as my mixer.

Modules Used:
Addac Systems Addac508 Swell Physics
Humble Audio Quad Operator
Mutable Instruments Plaits
Mutable Instruments Veils
Expert Sleepers Disting Ex (LABS Music Box)
CalSynth uO_C
Nonlinearcircuits Stochaos
Sitka Instruments Gravity
Qu-Bit Electronix Nautilus
Intellijel Amps
Xaoc Devices Batumi II + Poti II
Doboz T12

AUv3 Plugins Used:
Bram Bos / Ruismaker and Hainbach Fluss
Blue Mangoo Stratosphere Cloud Reverb

Modular synth performed and recorded in 1 take in AUM on iPad via the Expert Sleepers ES-9. Granular effects added during post processing in AUM on iPad.

*****

  1. Yes, both the Swell Physics and Nautilus were chosen specifically for their oceanic themes. An early revision of the case also had the Qu-Bit Aurora, which would fit the destination too, but it was substituted out early on during the revision process for something more practical like VCAs or modulation.

Red Orange Yellow Green: A Synth Test Turned Beautiful

While I was testing a synth I built for my brother and me to play while on a family vacation, I wanted to see if I could get something more ambient from what I perceived as a more rhythmic-oriented case. I have a master clock, a sequencer, a chaotic/random gate producer that likes the time grid, all dedicated to staying in time. My brother is more of a shake your booty type of guy and I wanted to bring something he would enjoy too, so rather than chaos and random ahoy, I put in several modules that he could feel comfortable with too. But rather than resign myself to grid based tempos and rhythms from this synth, I ventured to see how I might go about creating something more freeform. Instruments tends to direct their players towards certain ways of doing things. Modules do the same via their UI cues. All modules demand some particular workflow which lends towards different styles as a result of their design. But this subtle push by module makers doesn’t preclude using their designs in ways that maybe they weren’t designed to be used, or in ways they hadn’t considered. Individual case builds likewise push musicians to patch in certain ways.

Since this was a test, I started with a familiar idea and tried to see how I might create an irregular clock in order to use Stochaos to hit the Disting Ex in the SD Multisample mode using the LABS Soft Piano samples. It’s one of my favorite voice patches, and generally it sounds beautiful. Enter the Sitka Instruments Gravity.

The Gravity is a 6hp, 6 output master clock. It doesn’t have the sorts of clocked modulation options that something like the ALM Busy Circuits Pamela’s Pro Workout has, nor does it have the quick, hands on manipulation of the Make Noise Tempi. But it does have a fair few things going for it. It’s a rock solid clock, and easy to manipulate, even at first glance. The UI is intuitive, and its distractions few. Each output has three modes: Clock, Probability Clock, and Sequencer. The clock and probability clock does what it says. The outputs put out short triggers according to a clocked division or multiplication of the master tempo.1 Timekeeping is not exciting, however it is crucial. But the killer app in the Gravity is that its tempo can be modulated by control voltage, a feature not found in every master clock. At this realization I knew just exactly how I was going to get my wonky clock.

After plugging in a smooth random LFO from Batumi II + Poti II and tuning its frequency and amplitude to taste, we had a modulating clock that randomly floats above and below the master tempo. The Gravity gives a numerical option when the master tempo is being modulated, called Range. It’s simply a number that goes up by tens. Although initially I wasn’t sure just exactly what that number represents, the developer noted that it’s a fixed maximum BPM deviation above and below the set master tempo. So if your tempo is set to 80bpm, for example, with a Range of 10, it will swing as low as 70bpm with -5v of CV, and as high as 90bpm with +5v of CV. Clever. Subtle undulations is one thing. Wild tempo fluctuations is something else altogether, and having a defined maximum range built in to the modulation is a really good way of making it easier. This clock was fantastic, subtly shifting faster and slower. Being anticipated, while not being predictable, and never on a strict grid. Perfect.

Although I didn’t need more triggers than what Gravity can supply to ping the Disting Ex, I did want those triggers to extend laterally, never close to anything we could call a pattern. Stochaos once again provides a beautifully timed spread of triggers which form the basis of the piano voice in the patch. It always takes some clock adjustments to get the triggers just so. In this patch I ultimately used a x8 multiplication of that modulated clock with a 20% chance of skipping a beat to drive Stochaos. This kept triggers coming at a reasonable pace for Stochaos to spread the gates through its various outputs, helped by the retrigger setting in the SD Multisample algorithm to “Synth” to keep it from going too cluttered with notes.

For pitch, I used three of the four Swell Physics outputs into Quantermain (in C major). One of the quantizers was set to quantize to all 7 notes in the scale, with the other two set to quantize only to the root, third, and fifth. This turned out to be a wonderful method of getting pitch. The outputs on Swell Physics are all inter-related, and something akin to phased LFOs, only the phasing is more organic. Swell Physics is not a single speed with waves sliding back and forth, but the movement of the ocean, with ebbs and flows that can’t be strictly controlled, and where each wave affects the others. All of their speeds fluctuate, as do their amplitudes. This set of waves allowed for a good spread of notes, with minimal dissonance.

The Soft Piano sample outputs from Disting go to the Qu-Bit Nautilus for some unclocked delay. Feedback and Depth are lightly modulated by the highly attenuated AVG output from Swell Physics, while a highly attenuated saw ramp LFO from Batumi II + Poti II modulates Reversal. The patch starts with no Chroma (Qu-Bit speak for an effect inserted into the delay feedback path), but heavy distortion is introduced later on as the patch heightens. Using the delay feedback line for distortion, as opposed to using distortion before the delay, still allows for the piano notes to sing through quite clear, before being clipped to hell over and again as the repeats fade away.

After going through Nautilus, the signal made its way to the Make Noise QPAS for some light HP filtering. In most situations I would run a hard clipped signal through a LP filter to shave off some of the most egregious harmonics, but for some reason I preferred the HP filtering in this patch (I tried all four stereo outputs before deciding on HP filter), and so I won’t be too harsh on myself for an intentional decision made in the moment. The only modulation is via the 1 < 2 and 3 > 4 gate outputs on the Swell Physics via the CuteLab Missed Opportunities to both !!¡¡ inputs for some occasional shooting stars.

But getting a pretty flow of random piano notes wasn’t the final goal. The final goal was to test the new elements of this case so I’d have a basic understanding of how to use the case in a style I enjoy, and hopefully avoid having to constantly dig through manuals during the little time I’d have to patch on the trip, which brings me to a real beast of a module: the new Doboz T12, a 17hp (😕) touch controller, arpeggiator, and sequencer. I had half-assedly tried to get it going a couple of times over the last couple of weeks, but came up empty both times, so it was time to sit down with the manual and dig in.

At first I was intimidated by the T12. There’s not much on the panel outside of 12 touch plates, a screen, a couple of buttons, and an encoder to give you cues, and the options in the screen are many. But once I got over the initial hurdle of Step 1, the intuitive nature of the screen UI took over, which makes it generally simple to navigate and use. The T12 has 4 modes: a touch controller, an arpeggiator, a very straightforward up-to-32 step sequencer, and a more complex extended functionality step sequencer. Although I certainly want to understand the Complex Sequencer, my aim was to tackle the touch controller (why I initially bought the T12 to begin with), the arpeggiator, and the simple step sequencer.

Despite being a bit overwhelming at first glance, having loads of options in the UI, the T12 workflow is both fast and intuitive. Not only are there the standard pitch CV and gate outputs, but also a secondary CV output for something other than pitch. You can set vibrato, including a delay, gate probability, random note probability, touch behaviors, and many other facets of your sequence quickly and easily. The AUX CV output can send envelopes, slewed gates, secondary raw CV, amongst other stuff. The T12 is a really powerful, highly flexible, and intuitive module that is fun to use. Just don’t forget to save your work in one of the many save slots, or else you’re gonna lose all your shit. Ask me how I know. Fortunately this particular patch is pretty easy to reproduce should I have the need.

For this initial patch I wanted to keep sequencing as simple as possible. A slowly plodding 10 note, repeating sub-bass line via the Humble Audio Quad Operator that would flood the audio and shake the room. I was loosely aiming for a post-rockish feel in the progression. It’s intentionally loud, though not so loud that the piano can’t still be clearly heard. With the wandering clock set to /8, and after a smidge of tuning the individual notes in the sequence to what I wanted, I pretty quickly got what I was after.

Which isn’t to say that the bass line is without issues.

Firstly, I’d like to note that both the high level and super-low frequencies were exactly what I was trying to accomplish. I was looking for film score kind of epic. The kind of bass that rattles walls and that you can feel in your stomach. That said, there’s far too much audio gear, including very high quality audio gear, that has a difficult time reproducing C1 (32.70Hz). My audio monitors, a set of Focus Alpha 80 studio monitors only reach down to 38Hz before the cutoff becomes pronounced. At 32Hz, the tone could still be heard, but not with near the authority it should have. D1 (36.71Hz) had similar issues, although not nearly as marked. By the time we get to E1 (41.2Hz) things are booming, but of the 10 notes in the bass sequence, only 5 can be heard with the vigor I intended, and that’s through a good pair of studio monitors. Fortunately the cans I used to record this patch, a set of GK Ultraphones, and the AirPods Max Bluetooth headphones I use for general listening, have no pronounced problems with reproducing the low C. But if I were to record this patch again, and I’m highly considering it, I’ll pitch the entire piece up 4 full semitones (E1) to avoid that conundrum. It’s one thing for a bass heavy piece to not play through phone, tablet, or laptop speakers. It’s a different sort of problem when high quality studio gear can’t do it. Any system with a subwoofer should really shake the foundation, but you shouldn’t need a subwoofer to properly hear music.

The last voice was a spur of the moment addition to the patch. I didn’t know exactly what, but I knew the patch was missing something. It needed one last final touch. It needed Plaits. Though it certainly has its limitations, Plaits is one of the most versatile and best sounding oscillator modelers available. Everything from kick drums, a scaled down Rings algorithm, and FM, plus more is possible with Plaits. At first I didn’t really know what I wanted, other than it be sparse. The Rings algorithm didn’t really fulfill the role. It took away from the patch as much as it added to it.

But as I made my way through the modes one by one, I landed on the final green algorithm: Vowel and speech synthesis. This would normally be unremarkable, but as it happened, I kept hearing the word “Red.” How the various knobs had been set while testing other algorithms landed me smack at the beginning of the colors of the rainbow. I slowly turned the Morph knob to see what else was hidden there, and found a slew of words. At first I set up modulation of the Morph to cycle through the words quickly. Think Robot Auctioneer. And although this addition certainly moved me in the right direction, it still wasn’t the destination. There were too many words being synthesized too quickly. It was slightly distracting, and not wholly complementary.

After a bit of envelope experimentation, I settled on 4 words: Red, Orange, Yellow, Green, “said” at a slightly slower than “natural” pace, and with a fairly thin tone. This gives the voice an almost sad feel, which I think slightly tempers the optimism and hope found in C major piano alongside an epic bass line. It brings a bit of the non-perfection and often lonely feel of reality back into scope, and that even non-perfection and loneliness can be contained within beauty.

After repeated listens, I know that I wouldn’t send any pitch information to Plaits were I to record this again. I think having it repeat at the same pitch would have an even larger impact, and be more focused.

One last new module I used is the Intellijel Amps VCA. Two of them chained, actually. Although I initially planned and built this case with an Intellijel Quad VCA, I recently realized the power of fully cascading VCAs,2 and decided to replace one of my Quad VCAs with this pair of Amps. Even with the first use I could see the utility in cascading inputs. The ability to patch one input and get out several signals that are related, yet separately attenuated and/or modulated, for use throughout a patch is powerful. Of course multiple related outputs could also be accomplished by patching multiplied copies of the signal into all four VCA inputs, but with cascading inputs we can eliminate at least six patch points and three patch cables. Efficiency is key. Add in ring modulation and signal inversion, and Amps is a powerful tool indeed.

Modules Used:
Sitka Instruments Gravity
Doboz T12
Nonlinearcircuits Stochaos
Expert Sleepers Disting Ex
Humble Audio Quad Operator
Mutable Instruments Plaits
Mutable Instruments Veils
CalSynth Changes (MI Stages) (w/ quimem)
CalSynth uO_C (w/ Phazerville)
Addac Systems Addac508 Swell Physics
Xaoc Devices Batumi II + Poti II
Make Noise QPAS
Intellijel Amps
Qu-Bit Electronix Nautilus
Blue Mangoo Stratosphere Cloud Reverb (AUv3 plugin)

Performed and recorded in 1 take in AUM on iPad via the Expert Sleepers ES-9.

*****

  1. According to the developer, Gravity should (fairly) soon get a firmware update which adds the ability to adjust gate duty size as a prominent feature, rather than only short 15ms triggers. This addition would make the Gravity outputs far more useful as a clocked modulator, and make it able to trigger longer ASD or ADSR envelopes that are determined by gate length. The developer has also noted that MOAR divisions and multiplications of the master tempo will be added.
  2. A fully cascading VCA is one in which all inputs, CV inputs, and outputs are normalized to the following channel until the normalization is broken by a plugged in jack. This configuration allows for a flexible array of both CV and audio patching, capable of complex mixes or routing.

Stochaotic Bubbles: Effervescent Chaos Up And Down

Since I’ve recently received several modules, I’ve been using them rather heavily of late, and they’ve kind of taken front and center. The Nonlinearcircuits Stochaos and Humble Audio Quad Operator are featured in many of my recent patches, and this is no exception. I wasn’t sure, exactly, what I wanted with this patch, but I knew I wanted a chaos clock that was moving fast. I wanted lots of gates firing quickly, and use those gates to hit 4 separate LPGs, this time a pair of Tokyo Gates. Then I knew I wanted these quickly firing notes to be heavily delayed, and sent to a resynthesizer to fill in space and give something for those quickly firing notes and repeats to swim in. I wasn’t imagining bubbles when I first started, but that’s what I kept coming to as I was fiddling with the patch, and after a while leaned into this theme a bit to see where I could take it.

Getting a fast chaotic clock was the easy part. I’ve been using chaos-based clocks almost exclusively for a few months. I don’t mind a grid, but most of my creative inclinations are more towards malleable textures, and chaos provides an almost perfect ebb and flow. At slow tempos it’s definitely noticeable, but this patch was to be clocked at a very high rate; perhaps even approaching audio rate, and those differences at high rate are much less noticeable As per usual, I sent the modulated chaos signal to Divide & Conquer, before sending a fast division to Stochaos. From there the chaos-generated gates would go to the CalSynth Changes to create some snappy decay envelopes that would hit the CV input of four separate Tokyo Gates. The outputs of the Tokyo Gates were mixed into 2 signals in the Mutable Instruments Veils, and finally sent to the AI Synthesis 018 Stereo Matrix Mixer.

The audio is from the 4 operators of the Humble Audio Quad Operator. Although I initially experimented with tweaking the wave shape of the operators, several times, actually, I settled on sine waves. I also tried to work in some FM, but I couldn’t find exactly what I was looking for, which is likely because I was using all 4 operators as carriers, rather than trying to use just a couple of the oscillators as carriers, with the others acting as modulators. It’s tough to get oscillators to behave when you have lots of cross frequency modulation happening. Generally it’s pretty pedestrian as far as the audio source, but there are so many individual notes that are echoed so many times that anything much more complex might be a wall of sound rather than something more enunciated.

The pitch signal is taken from a slow chaos wave through Xaoc Devices Samara II for some careful offset and attenuation before going to uO_C’s Quantermain for quantization into D minor (even if I have no idea what the oscillator is actually tuned to), before being sent to the v/oct input on the Quad Operator. That accounts for the generally up and down nature of the pitch progression. It’s also a good example on how chaos operates. It’s steady-ish, but there are definitely times when the chaos deviates from its path. Sometimes that means speeding up or slowing down. Sometimes that means direction reversals. Sometimes it means lingering at some pitches longer than others. You think you know what’s going to happen, but then the chaos surprises you, providing something interesting. Even still, I feel like there is too much of the same thing when it comes to the pitch in this patch, but since it was more an exploratory patch I think I can forgive myself.

I recently became aware to the dismal fact that my main synth, a large set of separate subsystems that comprises 1,560hp and that has another 588hp in interchangeable subsystems, did not have a vactrol-based LPG in it. Despite having several vactrol LPGs from the Make Noise LxD and Optomix, to the Nekyia Sosumi, and still more, not a single one was in my main case. All of them had been moved to either my Make Noise Satellite Subsystem, or else my Side Case. I have plenty of non-vactrol-based LPGs like the Rabid Elephant Natural Gate, Bard Synthesizers VTG, Frap Tools CUNSA, and Verbos Amp & Tone in the main case, but not one vactrol LPG. As soon as I came to this realization I knew that it couldn’t stand for a single moment longer, and moved a pair of Tokyo Tape Music Center Tokyo Gates from my side case back to the main case. I’d get 4 channels of my favorite vactrol LPG to go along with all of the additive-style oscillators I tend to gravitate towards. Three Body, Quad Operator, Algo, Mob of Emus, and many others besides pair so naturally with a LPG that it seems boneheaded to not have them ready for the occasion.

I’ve liked LPGs for a long time. My first foray was via the Make Noise Optomix, which quickly led to several others, both with and without vactrols. I like both types, but it’s the non-exactness of vactrols that really draws my ear. They can be a little sloppy, particularly when hit repeatedly with a gate or envelope. Vactrol-less LPGs like the Natural Gate or DXG too sound great, but there’s something about their precision that doesn’t feel the same as with vactrols. It’s almost too perfect, and too repeatable. I also feel that vactrols bleed prettier, which is a patching technique I love to use. I don’t know whether I was insistent in using vactrol LPGs in this patch because I thought they’d be best, or because I had just put four of them back in my main case, but I decided on using the venerable Tokyo Gate.

Even if I don’t use Tokyo Gate very often, it is my favorite of the vactrol LPGs I’ve had. Its decay is adjustable (to a degree) with the Bridge control, pleasant, and even can have a little squelch of resonance if you pin the Bridge knob full CW. Although you can directly ping Tokyo Gate with a trigger or gate just fine, I’ve found that envelopes generally sound more pleasant to the ear. There’s a harshness with slamming a gate into that isn’t there when using a well shaped decay envelope.

In this patch, because I was using sine waves, the Tokyo Gate probably performs not much different than a regular VCA. There are no harmonics in a sine wave to reveal and hide again as the filter also goes up and down with the volume, but you still get that vactrol decay which can’t really be had with anything else. I also liked the perceived sloppiness of the vactrols as they were being repeatedly hit by envelopes. All of the chaos-derived gates flying about in rapid succession, triggering short, snappy envelopes started to resemble four separate telegraph signals flying about in space.

And although the effect of four vactrol LPGs pinging away was pretty cool, I knew that I wanted a lot more of it by using delay. These pings were the start, not the end. Far from it. Rather than using one delay like I normally might, I opted to use two of them in parallel.

Delay number one was the Venus Instruments Veno-Echo. Its reverse function per channel was being modulated by chaos-derived gates from the very slow end of the Divide & Conquer. Since the original chaos clock signal itself was running quite fast, even very low divisions would trigger too frequently for me, and decided to run those gates through the CuteLab Missed Opportunities gate probability utility that I tend to use in most of my patches.

The second delay is the Olivia Artz Modular Time Machine. Using various delay taps would ensure the effervescent feeling I was getting as the patch started to take some shape, spraying delays all about the stereo space. Besides creating that bubbly feeling I was now striving for, the Time Machine is also the source audio for the Qu-Bit Aurora resynthesis module that fills in the gaps and helps create something thicker for those bubbles to float in.

Altogether we have the feeling of bubbles floating around space. One thing I might try in a future patch like this is to use the pitch as CV for the clock rate. As the pitch changes, so too does the clock, creating more gates with higher pitched bubbles, and fewer with lower pitched bubbles. I’d also be a bit more inventive with my pitch sequence as well. This is just a chaos signal triggering Quantermain as it moves through from note to note in the selected scale. Even if I want to use chaos as a source for pitch, in order for there be some quality pitch movement I’d be better off using one of the chaos derived gates to trigger the quantizer via some labyrinth of gate probability, logic, and/or a Bernoulli Gate.

Altogether there isn’t anything special about this patch other than it was experimentation throughout. Experimentation with chaos as pitch. Experimentation with extremely fast gates with vactrol LPGs. Experimentation with delay taps to get a good feeling of watching bubbles in a freshly poured glass of Coke. Experimenting with parallel delays. Experimenting with Aurora.

Modules Used:
Nonlinearcircuits The Hypster
Nonlinearcircuits Divide & Conquer
Nonlinearcircuits Stochaos
Nonlinearcircuits Triple Sloth
Xaoc Devices Samara II
CalSynth uO_C
Humble Audio Quad Operator
CuteLab Missed Opportunities
CalSynth Changes (MI Stages)
Mutable Instruments Veils
Tokyo Tape Music Center Tokyo Gate
Olivia Artz Modular Time Machine
Venus Instruments Veno-Echo
Qu-Bit Electronix Aurora
Knob Farm Ferry
Vongon Ultrasheer

Improvised and recorded in 1 take on iPad in AUM via the Expert Sleepers ES-9.

A Patch In Which The OAM Time Machine Does The Heavy Lifting

I keep it no secret that I’m a certified delay junky. I love all kinds of delay from murky analog repeats, to the beautiful compression of tape delay, to pristine copies of digital delays. I dig them all. Even if my collection has shrunken significantly, at one time I had over 30 delay pedals, I still have a few delay pedals I consider choice, like the Oto Bim, Vongon Polyphrase, and the Free The Tone Future Factory FF-1Y Future Factory. I have dual Echofix EF-X2 tape delays. And it shouldn’t be a surprise that I have several Eurorack delay modules. From the mighty Verbos Multi-Delay Processor, to the Xaoc Devices Sarajewo, and the Qu-Bit Electronix Nautilus to the Venus Instruments Veno-Echo (plus yet more), I’m covered when it comes to Eurorack delays. But when the new Time Machine from Olivia Artz Modular was announced, I knew there was no way I could pass on it for too long before I hit “Add to Cart.” Due to a confluence of random events, I was informed by OAM within minutes of the Time Machine being released for sale at Perfect Circuit, and so was able to snag one quick without the ~6 week wait time if you order direct from OAM. I would have ordered one anyways, but bypassing the wait was a nice surprise, and moving their product through retail stores helps them get more retail orders and wider distribution.

When I imagined the Time Machine, I was imagining a stereo version of the Verbos Multi-Delay Processor. I’m sure much of the Time Machine was influenced by the MDP, from its looks to its multi-tap nature. And although it can certainly replicate some of the things the MDP does, the Time Machine is definitely something different, and highly rewarding. True stereo is a wonder to behold.

One thing I’ve learned about testing delays is that if you really want to hear its voice, you need to feed it short transient signals. This moves the dry signal more out of the way and allows the delay room to breathe and be heard on its own terms. I use these quick notes to test every delay I get. With Eurorack, that test is almost always short pings in an LPG in order to see what’s its limits are. How clean (or dirty) are the repeats? How does the feedback behave? Does it do The Thing?1 How do the taps behave? How does the feedback go into entropy? This simple test allows me to really evaluate how a delay sounds and behaves.

This er of this patch is sets of sparse plucks of the Bard Synthesizers VTG (Vacuum Tube Gate – it sounds wonderful, if not quite like a traditional LPG). These plucks are created using the Humble Audio Quad Operator, which has the 2 waves being modulated by The Hypster, and one of the Ratios modulated by the Bindubba, into the LPG’s two input channels. The gates are hit by envelopes created by the CalSynth Changes (MI Stages), which is triggered by chaos-derived gates of the Stochaos. From the VTG, it goes straight to the matrix mixer, and onto the Time Machine.

After tweaking the Time Machine faders to get a delay pattern I really liked, I was pleased with what was happening, but I wanted more. Delays are cool and all, but dancing repeats do not make a track. After a second it clicked: “Panharmonium really likes short transients!” Although I wasn’t at all sure what I might get out of the Panharmonium, I thought it would be interesting, and that assumption was correct. After wiggling some knobs and adjusting the sampling interval (using a division of the clock used for the Time Machine), what I got was far more than interesting. It was the best thing I’ve heard from the Panharmonium in my own practice. A sort of distorted cello/upright bass sound that really fills in the space, and is harmonically relevant to the repeats that form the base of the track. Even if you can’t hear the repeats themselves through the Panharmonium, the sound of the it is a direct transliteration of those repeats in the form of resynthesis. Without the repeats, the Panharmonium isn’t making any sound. Since the Panharmonium sounded almost like something you’d hear in a sludge metal or Post-Rock context, I decided to also route the Panharmonium output to the Bizarre Jezabel Mimosa and really give it some drive, which was a perfect choice.

The patch is finished off with some reverb courtesy of the Oto Bam Ambient algorithm.

Modules Used:
Humble Audio Quad Operator
Bard Synthesizers VTG
Nonlinear Circuits Stochaos
Nonlinearcircuits The Hypster
CalSynth uO_C
CalSynth Changes (MI Stages)
Olivia Artz Modular Time Machine
Xaoc Devices Batumi II
Xaoc Devices Samara II
Rossum Electro-Music Panharmonium
Bizarre Jezabel Mimosa
AI Synthesis 018 Stereo Matrix Mixer
Knob Farm Ferry
Oto Bam

Improvised and recorded in 1 take on iPad in AUM via the Expert Sleepers ES-9.

__________

  1. When it can sit on the edge of feedback without running away uncontrollably. It’s even better when it can do that at a low volume, while still allowing your repeats to go through at full volume. The EF-X2 is masterful at this trick.

Chaos Organ: A Quad Operator Experiment

Hi, my name is Chris, and I’m a chordaholic.

Lately I’ve been in a polyphonic mood, attempting to find evermore methods of creating chords and chord sequences with the modular synth. Using a DAW for this sort of thing is child’s play, but in modular synthesis, creating polyphonic chords isn’t a straightforward task most of the time. Most oscillators can only output one pitch at a time, and using multiple oscillators can create timbre mismatches. Tuning 4 or more oscillators to the same pitch while not suffering from pitch drift over time is a chore and a half. Sequencing chords in a traditional modular sequencer can be a mission rife with potential problems, and you don’t always want the repeating uniformity of a sequence, but something more organic. In short, modular synthesis is traditionally a monophonic enterprise, with only a small handful of monophonic voices being used together. A melody, a bass line, perhaps something else to fill in space, and some effects to create a stereo space. Full on chord generation isn’t common because it’s a tedious exercise that generally requires a lot of gear and even more patience. But over the last couple of years this is beginning to change. Although there have always been ways to create chords and chord progressions in modular synthesis, it’s not until relatively recently that we can more easily create chords. Oscillator banks like the Xaoc Devices Odessa (with its expander, Hel), Humble Audio Quad Operator, and RYK Modular Algo, and chord sequencers like the NOH-Modular Pianist make composing with chords on the modular a much more efficient and simple process.

In a previous patch I used the very excellent (and recently updated) NOH-Modular Pianist to create chords that were triggered by an irregular chaotic gate pattern. Although I am generally psyched about how that patch turned out, there are still a couple spots of ugliness that appear due to a bad match of back-to-back chords in the progression. On their own they sound fine. But once smeared out by the delay, FFT resynthesis, and reverb, there is some clashing that happens, creating some ear-cringing dissonance. I wanted something cleaner, and I didn’t want to have prescribed chords, but something that could change organically with a bit of modulation, without the worry of a spicy note peeping its ugly head in. Enter Quad Operator.

The Humble Audio Quad Operator is a bank of 4 oscillators that can be tuned to harmonic and subharmonic ratios of a base pitch. Tune the base pitch to your liking, then simply adjust the ratios of each operator, and you have oscillators that are all harmonically in tune. Patch in a single v/oct signal, and all 4 operators will move along in harmony. The Quad Operator is primarily designed as a the ultimate FM oscillator with any traditional FM algorithm possible, along with any other combo of modulator/carrier you can imagine. But with each operator being independent with its own output (both in a mix and independently), using it as a complex chord generator is a very happy side benefit. Input a single v/oct signal, output always-harmonically related chords. Add in some modulation of a couple of the operator’s ratios, and not only will the chords always be harmonically relevant, they’ll also quite often be different (even if the base of the chord is the same). For modulating the ratios I used both the Nonlinearcircuits Stochaos and the Auza Wave Packets.

There are lots of methods for getting a nice v/oct signal. Sequencers are the obvious solution, but with a quantizer any signal can be a used for pitch. S&H is extremely popular, but random pitch is only slightly less boring than patterns repeating themselves over and over in the exact same way. One solution is to use LFOs alongside triggers to create melodies or arpeggios. Envelopes work great too. But I wanted something a smidge different. LFOs and envelopes repeat themselves by nature. Unless modulated, an LFO or envelope is the same up and down every time. This regularity can be mitigated by irregular triggers, but then it starts to veer towards random, which isn’t really what I’m after. Enter chaos.

In my post, Chaotic Gates, I explained how chaos signals are regular-ish. They take the same general path on each pass, but some unknown irregularity in the feedback path will shift it off course in a non-regular way. These signals are kind of regular, but enough differences come about that there are always surprises. I mostly use chaos as a modulator of some kind. Opening and closing filter cutoffs or wavefolders, slowly modulating level, timbre, or some other facet of a patch. Today I would use it for pitch.

In most circumstances I would use triggers alongside my CV input with a quantizer. Send off a trigger, and whatever voltage is present at the quantizer’s input is sampled, quantized to the nearest note of your chosen scale, and output to the v/oct input on your oscillator. But some quantizers can function without a corresponding trigger, sensing voltage changes, and quantizing automatically once it detects a change large enough to be a separate note in the scale. Quantermain, the quad quantizer algorithm on the ever-useful Ornament&Crime, has this capability, and I decided to give it a whirl. It should be easy enough. Shove in a chaos signal, get quantized pitch CV on the output. And by and large, it was that easy. I knew I wanted fairly slow chord changes, so I needed a slow(er) moving chaos signal. After a bit of attenuation of the chaos signal to reign in the range, I was getting exactly what I wanted. Irregularly moving chords that shift at irregular speeds and that have irregular movement both up and down.

But chords themselves, cool as they are, need embellishment to be interesting. For effects, I sent the chords, via the stereo matrix mixer, to the Qu-Bit Nautilus for some smearing with low pass filtered delay, before going to the Instruo Arbhar. My initial plan was to have some shimmery granular action floating on top of the chords, but I could never find what I was hoping to get. Instead I found a happy accident of harmonically relevant dancing grains that moved to a rhythm.

These dancing grains, although not at all what I envisioned when I set out on this path, turned out being perfect, giving a sense of life inside the thick chords. Like minnows in a lake, or lightning bugs in the night.

Enjoy!

Modules Used:
Nonlinearcircuits Triple Sloth
Nonlinearcircuits Stochaos
Auza Wave Packets
Humble Audio Quad Operator
ST Modular Sum Mix & Pan
AI Synthesis 018 Stereo Matrix Mixer
Qu-Bit Electronix Nautilus
Instruo Arbhar
CalSynth uO_C
Knob Farm Ferry
Mutable Instruments Blinds
Oto Bam

Improvised and recorded in 1 take on iPad in AUM via the Expert Sleepers ES-9.


0:00
0:00