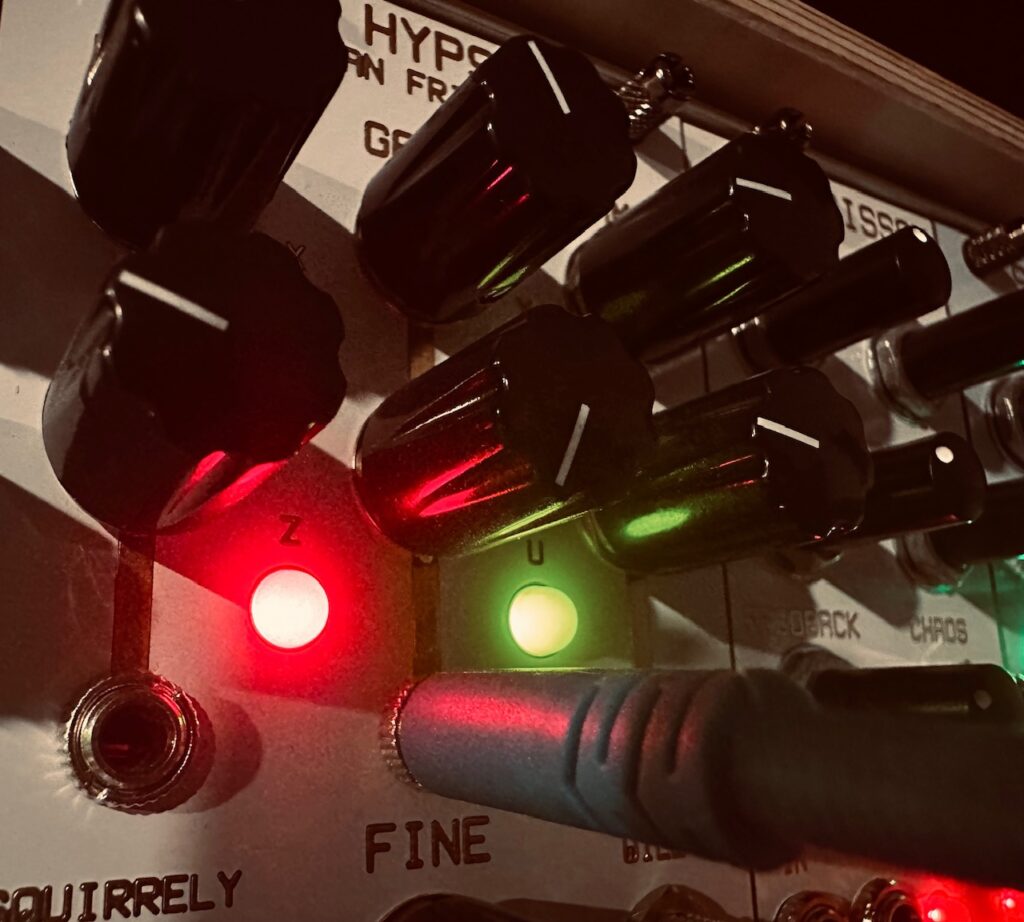
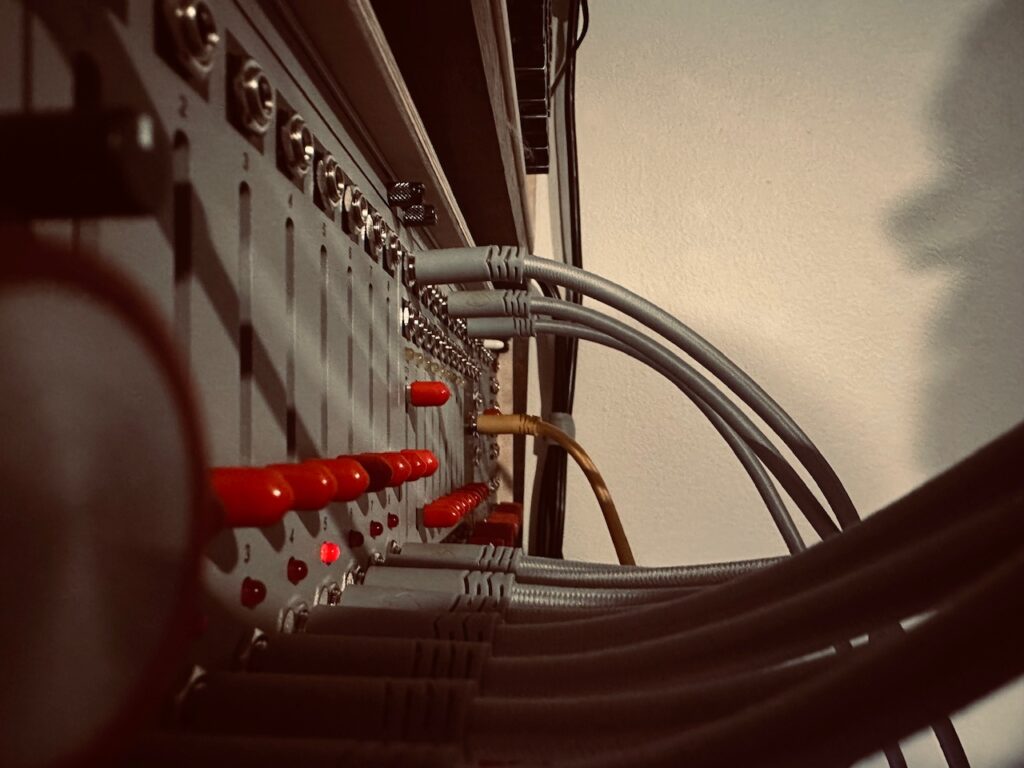
Today’s Jamuary was hard. I’m tired, and I made the fatal mistake of waiting until the last minute. The result isn’t bad. I actually like it, even if I’d make changes in a future revision. But in the spirit of using some unfamiliar gear during Jamuary, I ran into unfamiliar problems. I couldn’t find a filter I liked, had a hard time choosing delays, and had to patch and re-patch several times, only to arrive at a fairly simple audio chain and control scheme. I made dumb mistakes that hampered the effort and made it much more difficult than it should be.
Jamuary 2513 and 2514 were both rhythmic driven patches, and cool as they were, I was ready for something slow today. Up in the top right corner of my synth (as it’s currently configured) sits the revered Mannequins Just Friends. I haven’t had it too long, perhaps three or four months, but I hadn’t had the occasion to use it yet and I figured there’s no better time than right now to pop that particular cherry. Though I know Just Friends is many things, including a harmonic oscillator, I wanted to try its modulation capabilities during my premier with it. From all reports, it’s utterly fantastic in that role. So I set it at a slow yet still moving Time, and let it loose. The Hypster, via De-Escalate, modulated both Intone and Curve to keep the movement of each function in constant flux.
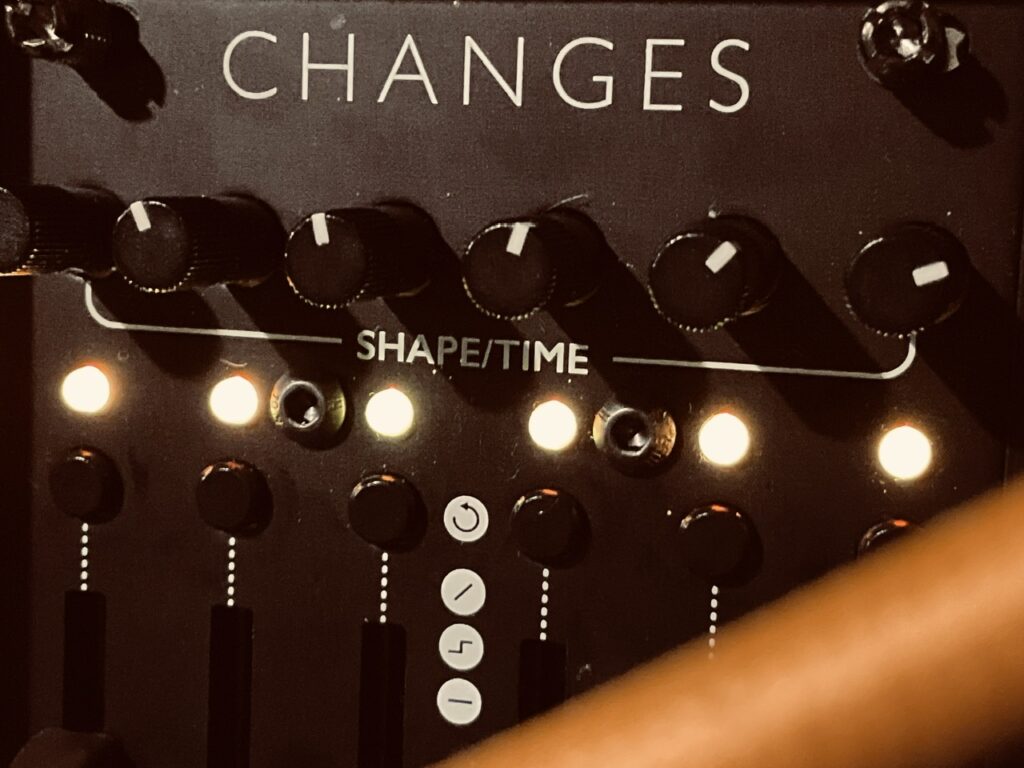
I thought about using virtually every multi-oscillator module I had. The E370, Falistri(s), 4Vox, CUNSA, Harmonic Oscillator, Quad Operator, and several others. But for some reason, I settled on using a Calsynth Changes, a very excellent 1:1 Mutable Instruments Stages clone, in Harmonic Oscillator (AKA Ouroboros mode). It’s not really a conventional choice for use as an oscillator, though it does the job great, and has the added benefit of having exactly six oscillators with six shapes (I used triangle waves), conveniently matching the six outputs of Just Friends.
Initially I tried to control the levels of each oscillator directly on Changes, but it doesn’t work great that way, so I opted to patch each output to a individual VCAs to be modulated by Just Friends, with the odd harmonics left and the even harmonics right. The output goes directly to the Bizarre Jezabel Mimosa, then Quarté Mk2 for a bit of lo-fi-ification. I had two looping triangle envelopes modulating time on both delay channels for some vibrato (even if I couldn’t hone in the modulation to my satisfaction), and, as the performance progressed, fed a slow looping stochastic function from the Addac506 to Mimosa’s wet/dry CV input. The noisy delay made Mimosa superfluous in some ways, but the effect is still nice, though probably not necessary, especially since I was also overdriving the VCAs with hot envelopes and, for much of the performance, with the attenuator wide open.
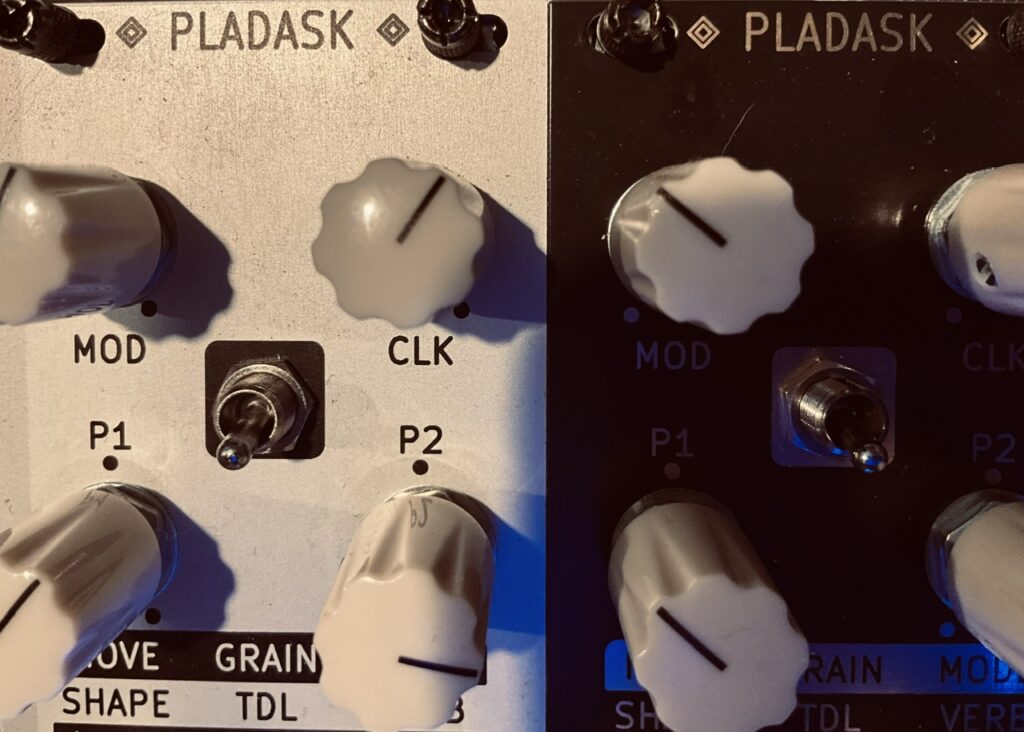
As a last minute addition, I also added a send to the Dradd brothers (in Grain mode) for some more gritty texture. This patch is full of texture. I tried to send the Dradd(s) through a delay, but couldn’t find one I liked quickly enough, and so abandoned the idea and ran it straight to the mixer for some reverb treatment.
The result is a pretty epic drone, perhaps a bit reminiscent of Alessandro Cortini (if I may be so bold), especially with the signature noisy PT2399 sound from the delay chips.
I set out today to experiment with exactly two things: a dynamic trigger patch technique suggested by none other than DivKid, and a new stereo wavefolder that I haven’t used nearly enough. It started off as a simple patch, that turned into a beast.
Dynamic triggers are interesting. Normally a trigger’s amplitude doesn’t matter. Most triggers simply cue other modules to do whatever it is they do. But some drum modules, filters, and LPGs thrive when fed with dynamic triggers because it allows individual hits to be different volumes, which brings an interesting dimension to LPG pings. There’s variety; a variance that adds character and drama.
The patch itself isn’t that difficult. The key is to both attenuate and offset noise, and use that in a VCA CV input. In a thread about Dynamic Triggers on Modwiggler, DivKid writes,
It’s also good to remember (for all of us, I know I need a reminder sometimes) that CV utilities are our friends. Offset and attenuation would get you a long way. So rather than fully random. Take a CV utility and use an offset of say 3V (roughly) and then mix in the noise but attenuated and you’ll have a series of values that are hovering and dancing around the offset. Musically and sort of “humanised” around that offset.
Although it sounded easy enough, I asked, on his Discord server, to elaborate, and he confirmed that the patch is as easy as I imagined it would be:
Trigger > VCA input
Offset/attenuated noise > VCA CV input
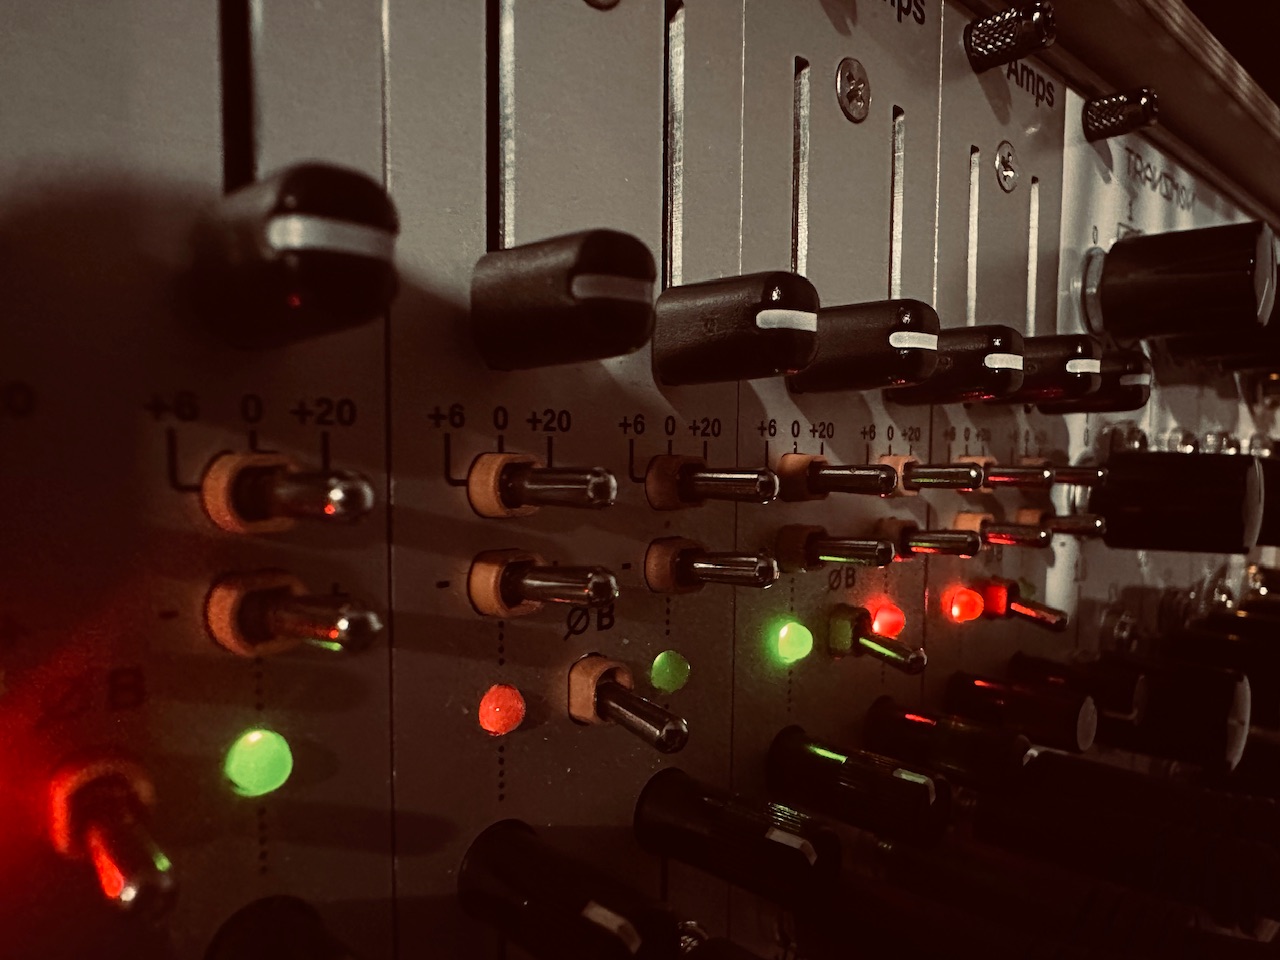
If you have a VCA with both level bias/offset and CV attenuators (like the Intellijel Amps, Quad VCA, or many others), simply patch the trigger to the input, set the offset to taste (3V, for example), and set the CV attenuator to taste. If you set it at around 1V, you’ll have triggers between 2-4V. The more attenuated the noise, the closer the triggers will be to the offset level. However you do it, it’s a dynamic treat.
I did this patch times four, using four copies of a Frap Tools Sapel trigger, each patched to the CuteLab Missed Opportunities for probability processing before going to the Intellijel Amps in order to be dynamically controlled by the offset and attenuated noise. Amps made this patch much easier because it has CV inputs that normalize, which means I only needed to use a single patch cable to feed all four channels doing trigger processing.1
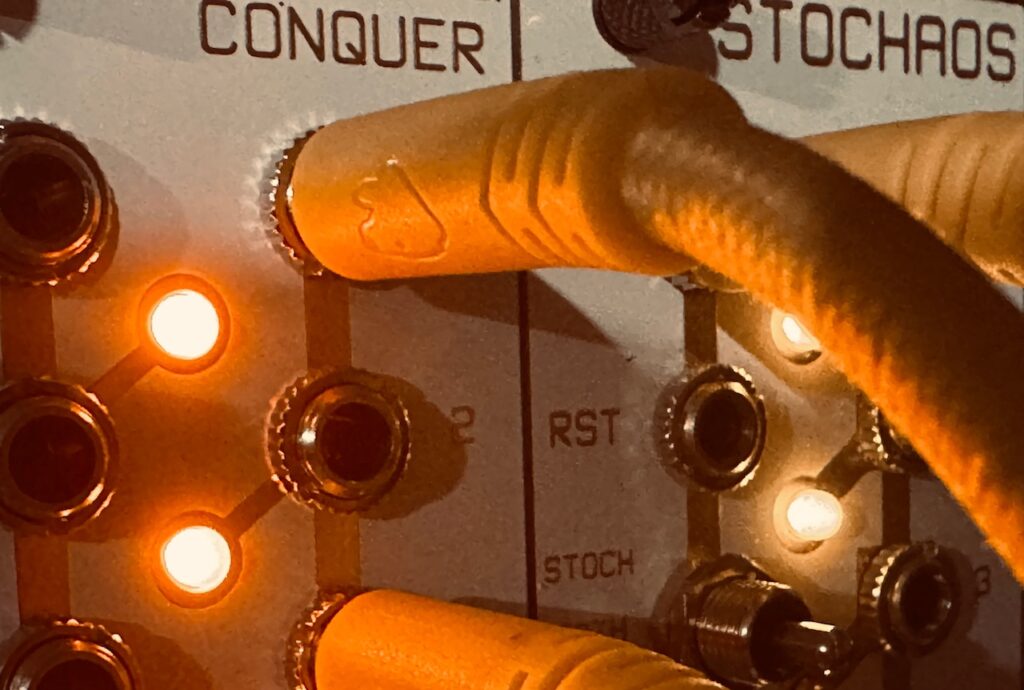
These now dynamic triggers pinged four Rabid Elephant Natural Gates, which does register dynamic triggers, where I used four Frap Tools Falistri generators as oscillators before being mixed and sent to the Venus Instruments Veno-Echo.2 There are a lot of patch cables, with plenty of mults and Stackcables throughout. Triggers were flying everywhere in the patch. From Sapel to Missed Opportunities, Amps to Stochastic Function Generator, and Ornament & Crime’s legendary Quantermain quad quantizer algorithm. And that’s just to create notes. Other triggers went to the Nonlinearcircuits Divide & Conquer and Stochaos (to trigger its rather excellent stepped CV outputs), Veno-Echo, and Calsynth Changes, which modulated a lackluster kick and the very very cool Optotronics Stereo Lockhart Wavefolder.
The wavefolder was surely the high point in this patch for me. I really only understand how half of it works, but it’s ultra-fun. It adds harmonics in really interesting ways, fed by sharp envelopes to each side from a Calsynth Changes, triggered by a Calsynth Twiigs quad Bernoulli gate based on the Mutable Instruments Branches. This creates some exceptionally cool stereo movement that I’ll have to explore more of.
I also used the Industrial Music Electronics Malgorithm Mk2 for part, which was cool, but was overshadowed by the wavefolder once it was added.
I actually used all eight VCAs in my Amps chain to dynamically control four triggers and four snappy, stochastic envelopes from the Addac506 Stochastic Function Generator which were patched to the Natural Gates’ Control CV inputs. ↩︎
I meant to mix these down in a slightly stereo orientation, but I simply forgot to turn the pan knobs. 😕 ↩︎
Today I decided to go back to a technique I’ve rarely used, and on a much grander scale. I don’t use noise very often, and when I do it tends to be for the obvious use cases. Hit hats, wind and ocean sounds, sprays, etc. I seldomly use it for modulation, and only once have I used noise of any flavor to amplitude modulate an oscillators wave. Today I would do it again, times eight.
I conceived of using noise to modulate all eight harmonics of the Verbos Harmonic Oscillator this morning as my wife was talking to me. I even popped up a bit at the idea, and she took notice.
Wife: “What?”
Me: “Nothing. Just had a thought occur to me. Not even sure if it’s worth a shit.”
I spent the better part of the morning and early afternoon thinking about how I wanted to do this patch. I knew that just noise into each harmonic’s VCA wasn’t it. Then it occurred to me: Chaos! As soon as this though hit my brain I knew what to do, and immediately went to the synth to start patching.
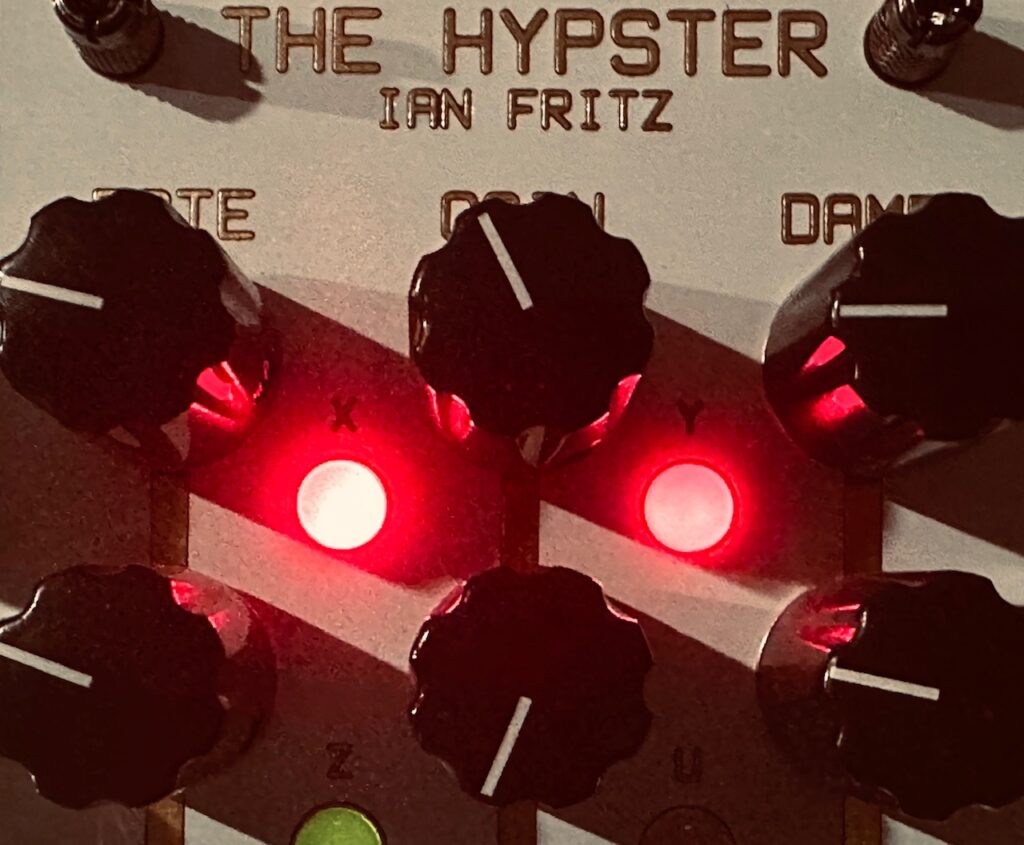
I ran blue noise from Sapel to input 1 of the Intellijel Amps. Amps is a special sort of VCA. Everything cascades. All inputs cascade, as do CV inputs, and there are mixing outputs as well. It’s incredibly flexible. I have four of them chained together to be an eight channel “super VCA/submixer” and it’s been a great choice. Since each input cascades, I only needed one noise input to run this entire section of the patch. Every other channel received that same blue noise input as well. Into each channel’s CV input I patched one of the eight outputs from Nonlinearcircuits The Hypster to chaotically modulate the noise levels of all eight channels independently. Once that was patched, I ran each Amps output to its own Harmonic Oscillator VCA input at random. The only part of this patch that was planned were the first and fifth harmonics, which received their noise modulation from the U and -U outputs on The Hypster as they’re the outputs with the highest amplitude. Each harmonic was slowly brought in by slowly adjusting each CV attenuator individually at random until they were all playing. The nature of chaos means that cycles, even if semi-regular at times, don’t repeat exactly the same, and the harmonics never played the same twice, which kept movement interesting. There were often pauses or redirections in motion for each harmonic. Wonderful.
The mixed HO output was patched to the Multi-Delay Processor. I’ve been taken in by the earthy sound of the Harmonic Oscillator. Each harmonic sine wave has a little hair on it once you give them a little push. The drive in the MultixDelay Processor, both on the input and on each tap output, accentuates that hair in all the right ways. This Verbos ecosystem is warm and inviting, but it can also roar. Taps four and eight were patched to the Verbos Scan & Pan, hard panned left and right, and the output of the MDP, which only had the dry signal, was patched to be in the middle of the mix. This mix created a strong signal with some subtle stereo movement which ended up being fantastic. This stereo signal was then patched to the stereo matrix mixer to be spread around to different effects.
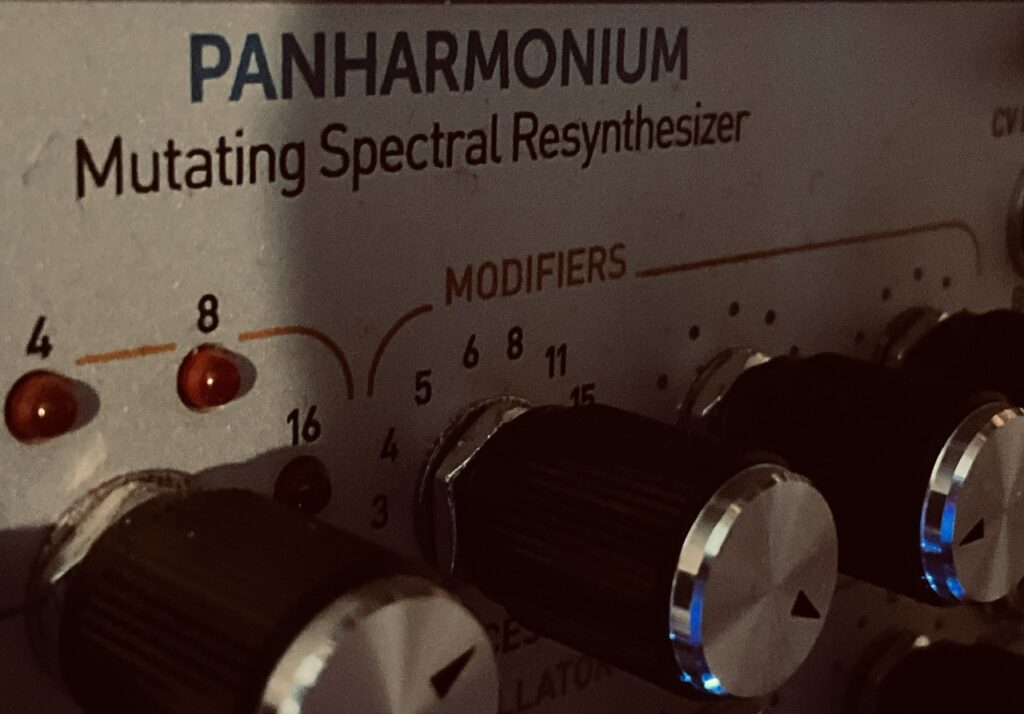
The Rossum Panharmonium fed the Holocene Electronics Non-Linear Memory Machine, which was set with a fairly slow delay and full clockwise smearing, which really smoothed out the Panharmonium’s output for an accompanying drone that floats along beside the ever moving Harmonic Oscillator. This output then fed the Dradd(s), which did its thing in Grain Mode (although I think I forgot to turn on the modulation to both P1 and P2 on both Dradds 😬 – I’m also not convinced it isn’t lost in the mix).
I’m very pleased with how this patch turned out and was a great success at using this technique which I’ll be sure to use more often.
I like wavetables and I like drones. Jamuary 6 saw both. A modulated quad wavetable LFO modulating the levels of a quad wavetable oscillator. It’s a patch I’ve been wanting to try for a while, and Jamuary is the perfect time to experiment with new techniques.
There are a lot of moving parts in this patch. The base creating the ever-changing drone is four unsynced LFOs from Kermit Mk3 controlling the levels of the four outputs from the E370 in the Intellijel Amps. These four outputs were patched to the ST Modular Sum Mix & Pan and then to the mixer. The pan CV inputs of the latter three channels were modulated by the Addac506 Stochastic Function Generator. The stereo signal from Sum Mix & Pan went to both the output as well as to a second mixer for summing to mono before being routed to the Verbos Multi-Delay Processor. The mono output of the MDP, which only has the dry signal,1 went to the output mixer, while two of the taps were routed to the Verbos Scan & Pan for hard panning left and right. All three of these signals were mixed and sent to the output.
Although I like the drive the MDP created, it largely defeated the panning of the three E370 outputs. I’d have been better served to run the stereo signal from the Sum Mix & Pan to a stereo distortion for some added drive so as not to throw a cover over subtle movement in the stereo space, but I do like the overall result. The MDP is a fantastic source for overdrive, and is a different sort than a full blown distortion like Mimosa. It’s deep and warm, like a fuzzy blanket on a cold winter day.
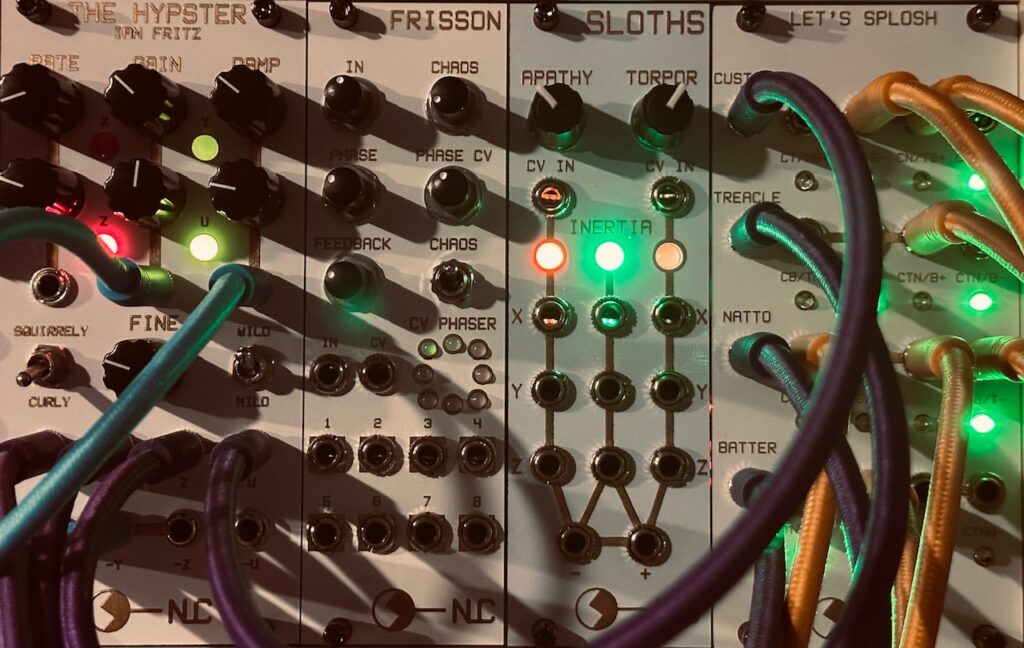
There’s lots of modulation too, with the bulk of it being supplied by the Nonlinearcircuits The Hypster fed a Let’s Splosh, with its outputs modulating the waves in both the E370, and three of the four channels of Kermit. Let’s Splosh self-modulated both Gain and Damping to keep its outputs in constant flux.
To accompany the drone proper, I sent the panning wavetables from the Sum Mix & Pan and stereo delay taps from the MDP to a pair of unmodulated Dradds. Both are in Grain Mode, and both are time stretching, with the left channel in reverse at about 20% speed and the and the right channel in forward at a slow crawl. It’s a bit difficult to pick out in the mix, but the overall sound is very different without it, and the final result benefits greatly with it.
The final touch to the patch are the drips and crickets. This oscillator and envelope are both from Falistri, sent through the Holocene Non-Linear Memory Machine. Pitch and random triggering was provided by Sapel. The last free channel of the Addac506 controlled both the Freeze and Scanning of the buffer. Its EOF trigger turned Freeze on and off, with the EOR gate output gating the function output in a VCA, which was scanning the buffer. This little sub-patch took a little while to figure out, but the results are rewarding. I’d been wanting to mess with scanning the buffer of the NLMM ever since I heard this patch by Ras Thavas, and today seemed like the day. It was a fun patch that I’ll be sure to explore further in the future.
I was always sure that a Verbos system could do ambient, but it’s not what I read in their brand identity. Mark Verbos, the owner of Verbos, has noted several times in interviews that his main inspiration in both making music and instruments is his love for techno. The sounds his instruments make are raw, and there doesn’t seem a clear path to ambient paradise when I look at Verbos module faceplates. But in an interview I recently watched, Verbos mentioned that one of the first questions he was asked when the Harmonic Oscillator was whether it can do ambient drones, something he hadn’t considered at all when he was designing it. Nearly a decade later we know Verbos systems can used to perform ambient music, but it wasn’t until today, after a couple of days using sequencers and rhythms, that I finally decided to see what I could do.
The patch began with the Polyphonic Envelope, each of the four outputs to a different harmonic of the Harmonic Oscillator, with the All output patched to the fundamental. In a new technique for me, I decided to use blue noise from Sapel as an amplitude modulator for the fifth harmonic, which ended up being fantastic. I followed that up with very short, randomly generated pings to the eighth harmonic. As a means to more beef, I also frequency modulated the HO with its own second harmonic. The Mixed output of the HO was sent first through Amp & Tone for a bit of conditioning and resonance before going to the Multi-Delay Processor. The MDP was set to output the dry signal and some volume level delay taps, while I patched four separate individual delay tap outputs to the Scan & Pan for stereo-ification.
After some fuddling around with the Polyphonic Envelope, I finally got to a nice flow of envelopes, each triggered once the decay stage of the previous envelope begins in a beautiful cascade that cycles over and over. After a bit of figuring out some movement for the patch, I decided it was ready to record. Only this time, I decided on using some final reverb, my every trusty Walrus Audio Slöer, instead of relying solely on the reverb from the MDP. This was a great choice.
Having recorded the patch and still wanting more, I decided to process the Verbos voice through the Panharmonium (crossfaded saw waves) > the Bizarre Jezabel Pkhia, as well as the Dradd(s) to add some movement and edge, and recorded it again, so today we get another bonus patch.
I’m quite happy with how this patch turned out. This is definitely a route I’ll be exploring more in depth this year.
As a result of acquiring both the Synthesis Technology E370 and the Flame Instruments 4VOX, after also getting the Humble Audio Quad Operator and RYK Modular Algo earlier in the year, I’ve been stringing together a series of chord-based polyphonic patches using various forms of slow modulation to control the volume of each chord tone. From standard LFOs to chaos, and stochastic functions to ocean wave simulations, I’ve tried at least a dozen of this style of patching over the last several months. Some of these have used static chords that don’t really move anywhere. Different notes of a chord come in and out chaotically (in most cases), but the chord itself doesn’t change. Others are based on the harmonic series, where only one pitch change of the master oscillator affects all of the individual harmonics resulting in chord changes. All of those were composed using chaos or random as a pitch source. But, with one exception, it wasn’t until this patch that I used the NOH-Modular Pianist with real intent and composed a chord progression to move the piece along. To set a mood and provide some tension and relief with harmonic motion in addition to volume and timbre changes. And this time I went big with using all eight CV outputs, rather than just four.
The NOH-Modular Pianist is an interesting module. It promises a world of harmonic movement in an environment where using chords isn’t a simple proposition. Polyphony in Eurorack is equipment and labor intensive. Each separate note of a chord requires its own separate oscillator, function generator, and VCA, at minimum. and requires its own discrete signal path. That’s a lot of patching for what is an easy task in a DAW or by using keyboard-based synths. It’s a lot of tuning (and re-tuning); lots of signals to tweak, and lots of modulation to account for. Before the Pianist, ways to get this sort of advanced polyphony was hard to come by. You could use a MIDI > CV converter, which has its own challenges, or else by painstakingly programming a pitch sequencer note by note, which requires a level of music theory knowledge that most don’t possess.1 MIDI > CV converters require careful calibration, and there are few sequencers with more than just four channels. But the Pianist is different.
Rather than programming chords note by note, Pianist uses standard western music shorthand for identifying chords, and the module does the rest. When you program it to play a CM7 chord, for instance, it knows to send out pitch data for C E G and Bb. It’ll even repeat chord notes in a different octave if no color tones are used. You can add two chord extensions beyond the 7th, called Colours in the Pianist, or use chord inversions to designate the third or fifth as the bass note in the chord. If a up to six note chord can be played on a piano, it can be played by the Pianist.
Users can freely enter chords from scratch in Free mode, or, to make the job even easier, set it to Scale mode and choose only from chords within your chosen key. The scale can be set to Major, Minor, or any of the modes2 and Pianist does the rest. So, for example, if a user in Scale mode were choose A Major as the scale, Pianist would present you with only AMaj, Bmin, C#min, DMaj, EMaj, F#min, G#dim, the diatonic chords in A Major, in order to facilitate easier chord progressions for theory novices. As long as your oscillators are tuned, your chords will be in key. Nifty. For those who want to use chords outside of a key, or if your composition isn’t really in a specific key, Free mode allows for creating chords from scratch. Virtually any chord is possible (up to six notes). In both modes, harmonic complexity is simple, with up to two color tones available, and made even simpler in Random Gate mode where each gate received will add random colors automatically, and choose colors that make harmonic sense within that chord. The workflow in creating chord progressions is intuitive. I was quickly making fairly complex progressions with repeats and skipped chords with ease.
Though Pianist is a boon to those of us seeking access to polyphonic 12TET harmonic movement in our Eurorack patches, it does have its weaknesses. Though you can move notes up and down in octaves to create chord depth, it’s done in a haphazard way. Rather than setting each note for the exact voicing you’re looking for, you have to rely on functions Pianist calls Shift and Spread in order to get full, rich chords that don’t clutter a particular part of the audio spectrum, but it’s not exactly clear how that affects the chord as a whole. I can hear changes, but can’t always identify them. Easy variety, however, can be achieved when the Gate mode is set to Spread. No chord will be voiced exactly the same which creates intrigue.
The calibration for the module, at least in Version 1.0, is straight funky. This patch uses eight discrete oscillators. While tuning I sent a C from Pianist to set a baseline. But in order for the oscillators to play the C being sent, they each had to be tuned to G, which I found odd. The newest firmware, 1.2, addresses tuning and scales in a way that version 1.0 does not, which is a great improvement by all accounts, even if I haven’t used it yet to note any changes. Since I’m using Pianist in Free mode in this patch, however, there wasn’t a compelling reason for me to upgrade, though I certainly will now that I’ve finished recording it, even if I have an aversion to the upgrade processes of most digital modules.
The screen has a lot of information, and not a lot of room. However, navigation is still reasonably simple and the information on the screen laid out such that it’s not hard to read. It’s easier to read and use than many far more established modules like the Disting Ex, Kermit Mk3, or uO_C, even if there isn’t a lot of screen real estate. The interface is super easy to navigate using the mini joystick/push button. Version 1.2 is reported to have an even more streamlined navigation and menu system. Though altering global settings like the Scale, Gate or Spread behavior requires some menu diving which is never fun, programming chords decidedly does not. It’s a point and click operation made easy with the joystick, all done on one level. Move the cursor to what you want to change, click, move the joystick to the desired value, and click. Done.
A major issue with version 1.0, which may have been changed, is that it always boots up with the first saved sequence. Unless you save your progression to one of the user slots, you will lose your work if the module power cycles. If you don’t have much in your progression, or it’s a super simple that’s no problem. But if it’s long or has a lot of direction you might be losing a lot. Ask me how I know. 😕
Pianist has its own clock that will change on each beat, along with a clock output to trigger envelopes or some other event as chords change. But it also has a clock input, which will move along the chord sequence with every rising edge like any standard step sequencer. Being that I rarely use a steady clock, I haven’t tried the internal clock, and have instead used clocks created by chaos or some other irregular source. This patch used a fairly complicated sub-patch in order to derive the chord changes. I didn’t want haphazard pitch changes in the midst of notes actively being played, but only when nothing was being heard. Finding an approach for this was time consuming, and although there are probably (certainly?) other methods that would work as well, I settled upon an approach using two comparators, one analog and one digital.
The four waves from Swell Physics first went to the Xaoc Devices Samara II. Samara compares all four inputs, and outputs the Maximum signal (AKA Analog OR). Being that these four waves were controlling the volume of the individual chord tones, it occurred to me that once the Maximum signal went below 0v meant that all four parent signals were below 0v, which meant no volume at all from the chord voice. This is exactly when I want to trigger the next chord in the sequence. I then sent that Maximum signal from Samara II to a digital comparator, the Joranalogue Compare 2, with its compare window set to anything below 0v. So once that Maximum signal went below 0v, it would spit out a gate that would trigger a chord change in Pianist.
The eight chord tones created by the Pianist went to eight different oscillators. The root, third, fifth, and seventh (or fifth if there is no seventh) form the base of the chord and all go to one of the four Flame Instruments 4VOX oscillators, while the color notes and two additional root notes, one that follows chord inversions and one that does not, all go to a self-frequency modulated Frap Tools CUNSA, where each filter is set to self oscillate, and pinged in a Natural Gate.
The Flame 4VOX has been around a long time. My brother, a house sound engineer, producer, and DJ who’s been into Eurorack a long time, lusted for one long before I even knew what Eurorack was. It’s a fully polyphonic, wavetable oscillator beast, split into four sections of up to four oscillators each. Each oscillator can create detuned swarms, chords, or be unison. Each oscillator can be controlled by v/oct CV or midi, and is fully polyphonic with its own output. It really was a very advanced piece of gear for its time. It still is, even if it hasn’t been updated in several years and is showing its age. There are two pots and two CV inputs per oscillator that can control several parameters including scanning the wavetable, detuning, amplification, and more. It has internal VCAs to control volume, but I did not like how they functioned at all, and opted to use external VCAs, which worked to my benefit allowing me to modulate two wavetable parameters rather than the volume and only one parameter. There are also separate FM and reset/sync inputs per oscillator, along with its individual output. Even if CV-able options seem to be limited, virtually every facet of the 4VOX can be addressed via midi, although I haven’t used it with midi at all. It’s a very powerful oscillator bank that can cover lots of ground.
Although I wouldn’t say programming the 4VOX is difficult, it’s not as easy as most more modern interfaces. The screen is bare bones with low resolution and a slim viewing radius. The encoder is a little weird. You have to push it down and turn CCW to move downward in menus, while you simply turn it CW to change parameter values inside the menu. As a unit, it’s impressive. There are lots of options, plenty of stock wavetables to choose from, and it sounds good, but it shows its age. Upgrading firmware is a laborious process with modern computers. Although you can install your own wavetables, the processes to convert them to the right format and get them loaded can be a nightmare, particularly if you’re a Mac user. All of the computer-side software is a decade or more old, and workarounds are sometimes needed. I’m not a “I need to load my own wavetables” kind of guy, and my unit came to me with the latest update, but if I were that guy or my unit hadn’t already had the latest firmware, it would not be an easy task. I’ve had similar problems with older gear before3, and they’re no fun.
The 4VOX forms the base of the chords, brought in and out by the four waves from the Addac508 Swell Physics. The sound is both powerful and delicate, with each quadrant set to four slightly detuned, unison oscillators, each one being slightly modulated by the Nonlinearcircuits Frisson. Although I was pleased with the 4VOX’s performance, the Synthesis Technology E370 is a better overall option. Although the E370 is also based on nearly decade-old technology, it’s still a better user experience. The screen is in color, fully customizable, bigger, and gives more information. The stock wavetables are a gold standard. The software UI is easier to navigate using a more standard encoder. The physical UI is also far better arranged. With the 4VOX, the screen is in the middle of the module, knob locations are not symmetrical, and are more difficult to wiggle once everything is patched up. The E370 has everything laid out very neatly. The screen is on the far left, I/O on the far right, with knobs in the middle, leaving more than enough room to wiggle. It’s really a premium user experience. The only advantages the 4VOX has are its price, size, and complete polyphonic midi capabilities. The 4VOX has always been less expensive than the E370, and that remains true on the secondary market. However, the price differential on the used market is much closer than their respective MSRPs, as the E370 can be purchased for well under 50% of the original retail cost. The price difference on my units, both purchased used within a week of one another, was $100. The size, however, cannot change, and in that regard the 4VOX has the E370 soundly beat. At 29hp the 4VOX is still large (and odd hp 😕), but it’s dwarfed by the massive 54hp E370. It’s the massive size, however, that makes the E370 such a pleasure to wiggle.
Once mixed to mono in the Atomosynth Transmon, the 4VOX chords went through the venerable Industrial Music Electronics Malgorithm MkII, a powerhouse FSU-type module with bit crushing, sample reduction, and various types of waveshaping available to have anything from subtly crunchy through completely mangled audio at the output. Using Malgorithm was an absolute treat. Most of the lo-fi effects I tend towards are of the vintage variety, tape sounds, record pops, etc, vs just slightly old sounding digital artifacting, so it was a different sort of experience. On any other day I likely would have chosen distortion in this role, but the day I started this patch I precipitously chose to go with a different kind of dirt. And it was perfect. I was still able to get some nasty distortion via the “Axis” waveshaper (whatever that does), with the bit crushing and sample reduction playing a slowly increasing role. It’s starts clean, then moves to understated digital artifacting, and finally waves of full blown destruction, ending clean once again. One aspect of Malgorithm I enjoyed was the interaction between input level and the waveshaping. It responds similarly to tube distortion circuits, where the harder you drive the input, the more distortion there will be ranging from just barely there to outright obliteration. Each of these waveshaping circuits has three different levels, red, orange, and green, and all of them have their own character. These waveshapers can even interact with each other for nuking your audio from orbit if that’s what you want. I rode faders on the very awesome Michigan Synth Works XVI to control both the input level as well as the wet/dry mix in order to provide a performative aspect to this patch. Both the bit crushing and Nyquist parameters were modulated by the Addac506 Stochastic Function Generator, with a fairly wide range of both rise and fall times between medium and long. Each of the parameters were set to moderate crunchiness with the knobs, with their modulation moving towards a full-resolution signal. This created an absolutely amazing effect from the sound of dying batteries to the fabric of the universe being unzipped and sewn back together. I would highly recommend Malgorithm to anyone, but you’d have to find one first.
Once through Malgorithm and into the stereo matrix mixer, these now buzzy chords went to the Holocene Electronics Non-Linear Memory Machine, with a very light perfect fifth shimmer in the feedback loop. I initially went with a full octave shimmer, but decided against it as it was too prominent and spiraled too far out of control too quickly. This created a very subtle sheen on the chords that isn’t noticeable much of the time, but is a nice effect nonetheless. Feedback and Spread were both modulated by attenuated versions of the Average output from Swell Physics.4
The color tones of each chord were all sent to the mighty Frap Tools CUNSA, a quad filter extraordinaire, and pinged in a pair of Rabid Elephant Natural Gates. Though I was tempted to use the simple sine waves from each LPF output, I later decided to use the HPF output as a means of each oscillator frequency modulating itself in order to add some harmonics, which worked a treat. In retrospect, I could have simplified the patch significantly had I pinged CUNSA itself instead of running the output to Natural Gate, but I chose the Natural Gate route because Natural Gate.
Using a patch technique I’ve used often, the gates that pinged the Natural Gates were created by running the four waves from Swell Physics into the Nonlinearcircuits Numberwang. But rather than simply choosing four gate outputs, I ran several Stackcables so that each strike input on the Natural Gates were each derived from three Numberwang outputs. This filled in space much better. The notes are still sparse, but they’re triggered at a much better pace using three gates each rather than just one. These notes fill out chords in interesting ways. They’re very short, but combined with delay and reverb, those colors hang around long enough to create intrigue in the overall sound without being intrusive.
These notes were sent to what is becoming one of my favorite delays, the Chase Bliss Audio Reverse Mode C, a re-imagining of one of the modes on the legendary Empress Effects Superdelay. Although it certainly does standard stereo delay stuff, it excels at being a quirky sort of delay, able to output normal delays, reverse delays, and octave up reverse delays, by themselves, or in a mix. Mixing delays creates a beautiful sound space of echoes bouncing all around the stereo field, at different speeds and octaves, which is an incredible aural treat. I haven’t yet learned to properly modulate the Reverse Mode C, but that’s a function of not having a firm grasp on midi. As I figure that out, things ought to get very interesting, with different sorts of delays fading in and out in very creative ways.
The last synthesized voice in this patch is the Good and Evil Dradds as an effects send, sending both the chords and ornamental color notes for some granular action. The Dradd(s) outputs went to separate EF-X2 tape echoes with different settings. Ever since getting a second Dradd, I’ve been infatuated by what I can do with them, and this patch may be the best result yet. Both were set to Tape mode with similar P2, but different P1 knob positions, with the P1 parameter on both being modulated by an attenuated version of the Average output on Swell Physics. The Dradds, in some ways, steal the show. They create all sorts of movement in the stereo field and fill the space between chords and color notes in ways that keep the piece from becoming still. They’re the wake left after a large swell passes by. The bio-luminescence after a crashing wave.
The spoken voice is a set of three samples that were triggered in Koala on the iPad. Triggers emanated from the gate outputs on Swell Physics combined in the new Nonlinearcircuits Gator, sent to the Joranalogue Step 8 and then the Befaco CV Thing and converted to midi notes that were sent to trigger Koala samples on the iPad. It took me a while to figure this one out, though it worked exactly how I envisioned. Gates from Swell Physics were combined in Gator, which triggered Step 8. Each of the first three steps sent its individual gate output to a different CV Thing input. This ensured that the three samples were always triggered in the correct order. The samples themselves were then sent to a new collaborative delay plugin, Moon Echo, by AudioThing and Hainbach.. Moon Echo is a modeled simulation of bouncing sound off the moon, and has a very distinct character. The delay was set to fully wet, and has a delay of about 2.5sec, though that changes depending on the day. The moon is not at a fixed distance from the earth, and the plugin reflects that. By “pinging” the moon upon startup, you will get the current distance to the moon, and a new delay time down to five decimal points (1/100,000 of a second). Fucking cool.
One thing I did differently with this patch paid off high dividends, and will absolutely become a staple in my recordings. I’ve been patching for a few years, but am still an absolute novice at standard studio stuff. Mixing, EQ, compression, and everything else in that sphere evades me. I’ve used some very basic EQ in the past, but really only on the final output, which, as I’ve discovered has several drawbacks. This patch was the first I’ve ever recorded using EQ, the highly regarded Toneboosters TB Equalizer 4, on individual channels as they were being recorded. The chords, ornamentals, and reverb send received EQ that greatly improved the sound quality, even if it could still be better. I did, however, neglect to put EQ on the Dradds, which proved to be a mistake, as there is a very occasional pitch that pierces through in what can’t be far from dog whistle frequencies. It’s not eardrum busting, but I can hear it, and it annoys me. I didn’t catch that behavior when recording, and never EQ’d it out. That said, it was also the first time I’ve recorded a modular patch in separate multi-tracks, including the chords, ornamentals, Dradds, spoken voice, reverb return, and the mixed stereo signal (presented here). I can go back and make changes or additions should that be something I want to do, or send the parts to someone else for mixing and mastering should I ever choose to release it.
Overall I’m very pleased with this patch. It was originally composed in a different key and completely different chord progression, and for a special group of online friends. The chord progression I used in this recording wasn’t composed, as such. At least not by me. I asked ChatGPT for a “sad progression, yet with a sense of hope.”5 I asked for it to be more sad, and it changed key from Amin to Dmin, and ended in a non-diatonic chord (DMaj), which I found a wonderful “choice.” Then, as a means to test the Pianist, I asked for several chord extensions and inversions, and ChatGPT complied, giving us what we have in the recording.
Improvised and recorded in 1 take on iPad in AUM via the Expert Sleepers ES-9.
I studied music performance in college, and have a decent grasp on music theory. The last 30 years, however, have pared that knowledge down to basics. I’m certainly no expert, but I can read chord charts and identify chord notes, even if I have to think for a second. ↩︎
The Humble Audio Quad Operator I purchased did not have the latest firmware update, and the internal VCAs all bled badly. I was unable to install the latest firmware with a modern Mac. I was fortunate to have an older one available to me that I was able to use. ↩︎
There are no fewer than seven modulation points in the patch that are all modulated by an attenuated version of the Average output from Swell Physics. ↩︎
This was literally the first time I’ve ever considered purposefully using AI for anything. ↩︎
It had been a while since I used my Xaoc Devices case for anything beyond reaching for a couple modulators like Zadar and Batumi II. I’ve always loved the Odessa, even with its faults, and I had an itch to use it.
I’m not going to detail this patch too much.
A square wave from Batumi II acts as a clock for Erfurt’s forward counting. A second square wave output hits Erfurt’s reverse counting input. Four gate outputs from Erfurt (Gates 1-4) are patched to Samara II, with each gate being attenuated to a particular note. As these gates go high, they sent pitch to the five v/oct inputs on Hel, Odessa’s expander, creating a mix of full and arpeggiated chords (no idea what Odessa is tuned to). The Fundamental, Even, and Odd outputs are mixed down to stereo, and sent to Zagzreb. Zagzreb’s Bandpass L/R outputs go to the mixer, while the L High Pass output is patched to Sarajewo for some analog delay, with Taps one and three output to the mixer.
In a mood to try something new, I ran the dry signal to the the Optotronics Stereo Lockhart Wavefolder. I wish I had sent that signal to the delay as well. It’s a pretty cool module, though I’m not really sure what everything but the fold knobs are doing. Looks like it’s time to dg into that one.
All three signals, Odessa/Zagzreb, Sarajewo, and the Wavefolder go to the Vongon Ultrasheer for some reverb.
Uncharacteristically, I also did a smidge of post processing, running the recording through some compression and EQ. I’m new to using both, but I am very happy with the sonic results.
Although I’m not fully clear on what might make a module beastly, what I am clear on is that the Synthesis Technology E370 Quad Morphing VCO is a beast. One might call a module beastly because of the sound it makes. Others might be termed a beast because of its sheer size. But then sometimes there are a few Eurorack modules that strive for something grandiose; so technically complex that to have it function at all is a major coup in engineering. It’s these sorts of tools that have the capacity to change the dynamic of one’s rack. To change how we go about playing our synthesizers. Not many modules fall into this category, and those that do tend to be bulky and expensive. I’ve only had this experience with a small handful of modules. The Synthesis Technology E370 is one of those modules.
I tend mostly to live in ambient-world when patching my synthesizer. In some ways it’s an extension of the mental state patching places me in. When I patch, I get lost; completely immersed in the algorithm. Not the shitty-type algorithm like those on social media, but that state of constantly thinking my way through the patch step-by-step. Sometimes that thought is speculative (I wonder what will happen if….), while other times I’m thinking through a problem (or set of problems) that are keeping me from achieving some goal within the patch (How the fuck do I do X?). Modular synthesis is a puzzle. It’s a technical exercise far exceeding putting the right notes in place, and one that rewards deep thought about how to approach the next step. The puzzle is what initially attracted me to modular. It’s like playing Myst, only with the real life reward of beautiful music for solving the puzzle correctly.
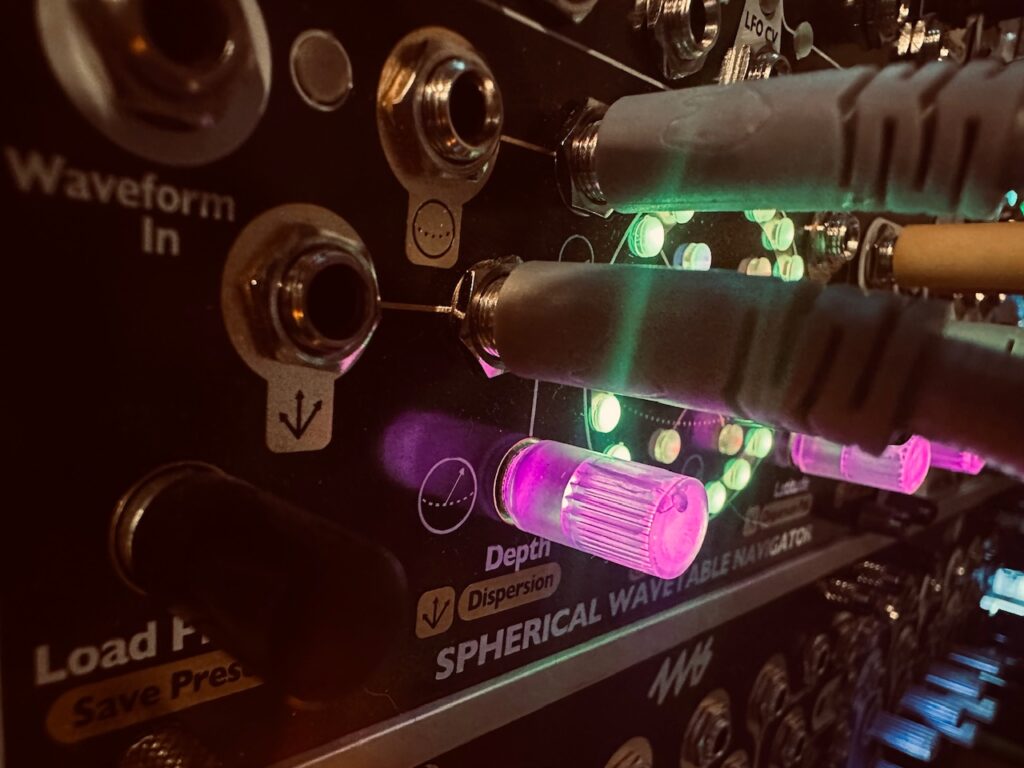
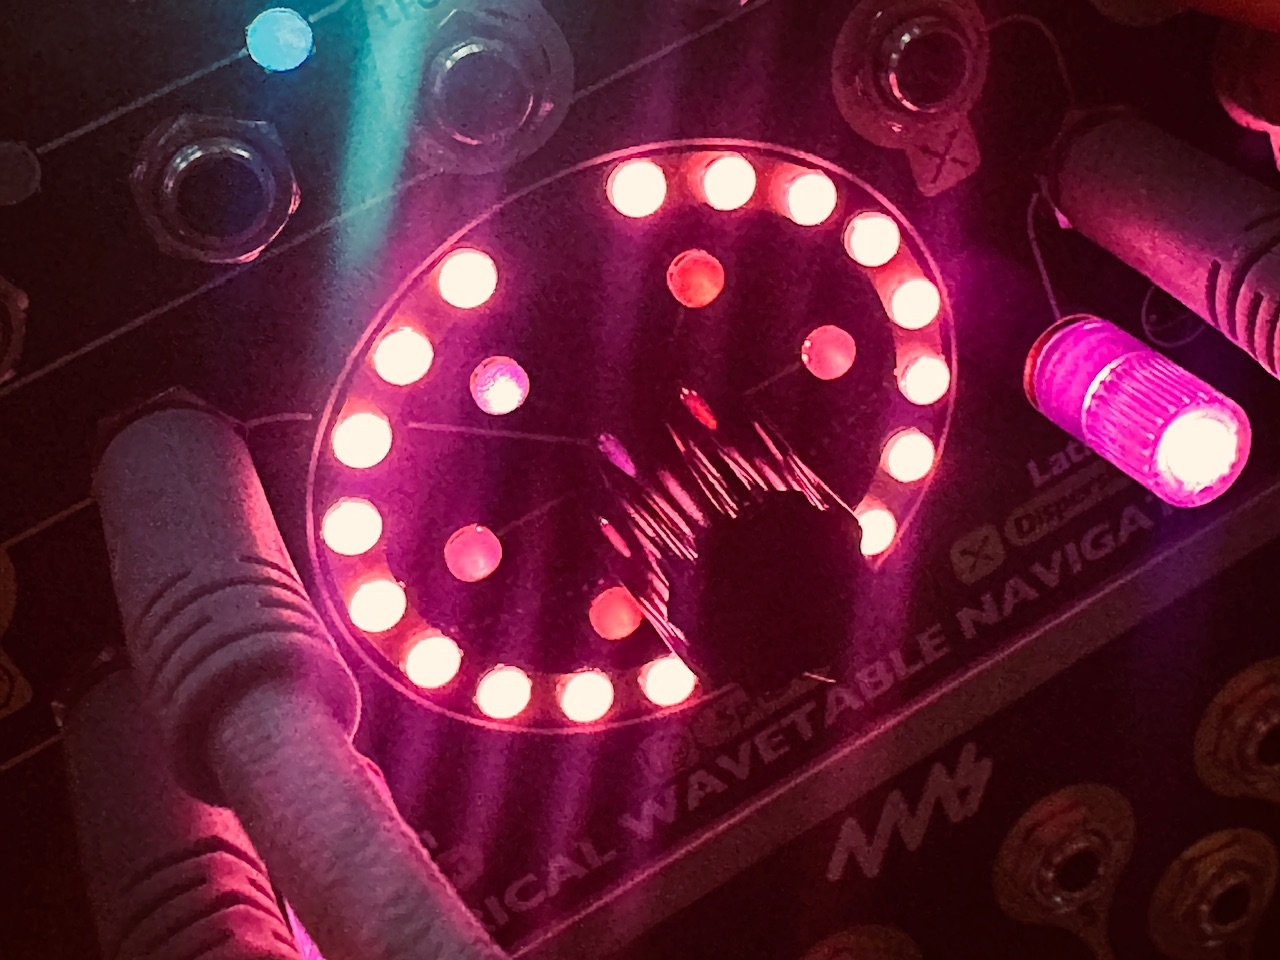
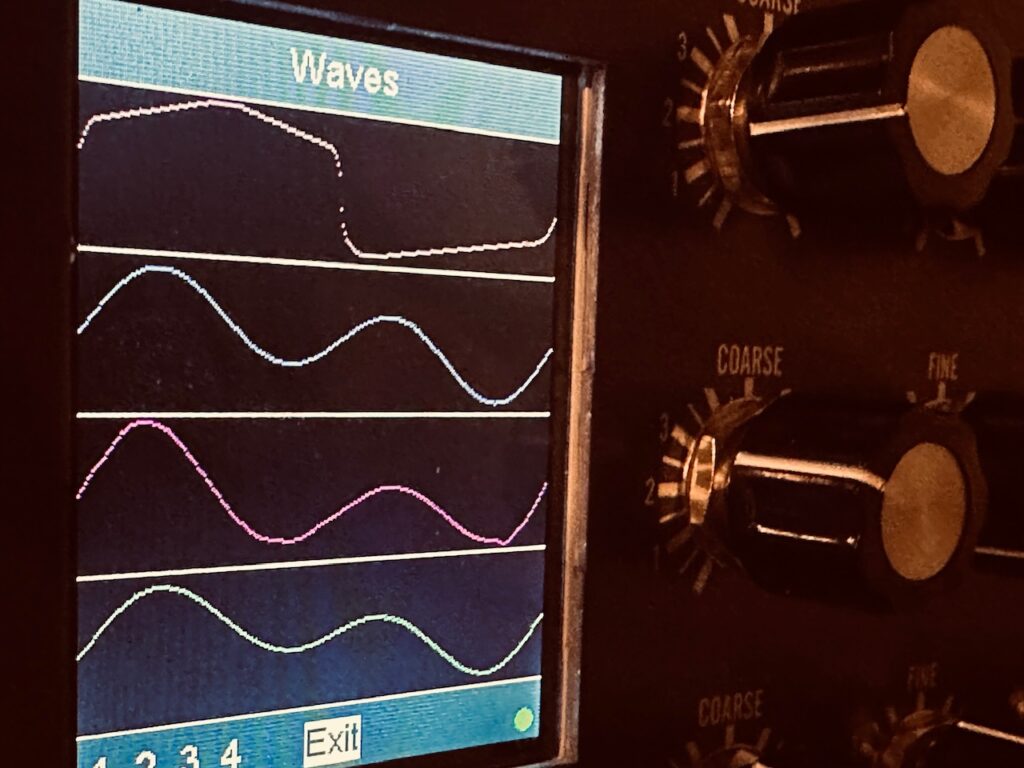
This quest for ambient has landed me with several oscillator banks in a search for the perfect cloud of notes. A few minutes that might have a chance to reflect the state I’m in while making the patch. I’ve used several of these in my practice. The Humble Audio Quad Operator, RYK Algo, Frap Tools CUNSA, dual Frap Tools Falistris, 4ms Spherical Wavetable Navigator, and 4ms Spectral Multimode Resonator can all be used as oscillator banks, and I’ve used them all in that capacity. But as nice as those tools are, none come to level the E370 strives to achieve. A full 4 oscillator wavetable oscillator with just about every bell and whistle one could desire to customize your sound. Oh, and each oscillator can be eight oscillators, either stacked and detuned, or with chords. That’s a total of 32 oscillators swarming around. That’s quite the tool.
Although this post is not an attempt to write a comprehensive review of the E370, it’s only my first patch with it, and after only a couple of not-terribly-thorough glances at the manual,1 I do want to note that it’s immediately apparent that the E370 is one of those transformative modules. The kind that will affect how I patch the modular in the future. Despite experiencing a couple of frustrations during this first patch,2 it’s clear that the E370 is ultra-powerful, able to deliver a wide assortment of sounds and timbres. The interface is beautiful, well laid out, and at 54hp definitely large enough to easily use it. Despite having a deep menu system, navigating is relatively simple and changing parameters is no problem. Where the issue lies is in understanding what each parameter within the menu system is and what it does, and that will come with practice. What’s the difference between MorphXY and MorphZ? What is Phase Interpolation? But those are different problems to be understood and solved with practice, not obstacles that need a workaround or compromise. This module is deep, yet despite not being quite as easy to navigate as something like the Doboz T12, it’s not difficult by any definition of the word. It’s quite easy to get going in a hurry.
This patch is a combination of several patches I’ve done recently. The Addac508 Swell Physics is the heart of the patch that controls almost everything, from the levels of each oscillator, to panning, to wavetable modulation, and more, even if not directly. Oscillator levels are controlled by Swell Physics indirectly via the Nonlinearcircuits Let’s Splosh, using the very excellent Jolin Labs Agogo LPG/mixer extraordinaire. Each oscillator output is patched to inputs 1, 3, 5, and 7 of the Agogo, with white noise patched to inputs 2, 4, 6, and 8. Four CV outputs from Let’s Splosh modulate the levels of each oscillator and its noise pairing in CV inputs 1, 3, 5, and 7, with the mixed signals being taken from outputs 2, 4, 6, and 8. This sort of usage really highlights the Agogo’s proverbial girth. With all inputs and outputs cascading, it’s a mixing powerhouse, with the ability to create all manner of different submixes to suit any patch. This patch made four separate outputs, each with one oscillator mixed with white noise that then went to the ST Modular Sum Mix & Pan for a mix down to stereo. Each of those signals was individually panned in the stereo field by outputs 1-4 of Swell Physics, with the L/R output of Mix & Pan patched to the matrix mixer. Swell physics also modulates each oscillator’s wavetable.
Another part of the patch I’ve used recently, and repeated here, is panning between delays in order to get contrasting patterns or textures and keep the sound progressing. I first learned this patch while watching a DivKid video about the stereo strip, even if I’ve adapted it to be able to pan a fully stereo signal between delays using chained Intellijel Amps, rather than sending them a mono signal to be stereo-ized by the delays. Although I don’t use the Stereo Strip for that specific purpose in this patch, I do use it to EQ the audio before going to the delays.
The first delay I used is the Venus Instruments Veno-Echo. It’s a staple in my synth, and might be the most versatile delay in Eurorack. I often use it in patches like this because it has reverse delay that can be triggered, and that leads to interesting textures that are able to contrast with whatever other delay I decide to use. It’s fully controllable per side, and highly modulate-able. I added some sample reduction (it does that too) for some slight crunch which really brings out the wavetable nature of the E370. Add in probability gated triggers to turn reverse on and off per side, and the first delay is set.
The second delay I used was a pair of Echofix EF-X2 tape delays. With this delay I added some drive using the preamp(s), and for the first time with the tape delays, used CV to control the Speed, creating a beautiful tremolo that sang almost like a voice in the feedback, particularly once run through the octave up reverb in the Walrus Audio Slöer. I hadn’t set out to CV control the tape delays, but I was reminded by the CV input sitting on the control panel and decided to give it a go.3 I’m glad I did. For me one of the highlights of the patch is this vibrato and how it interacts with the feedback of the delays. I spent a good chunk of time while playing the patch riding the feedback knobs, never allowing it to gather too much accumulated sound and run away, but at times enough so that it doesn’t really go away, even when the tape delays aren’t receiving any input. It’s a halo of entropy sitting atop everything, singing. It’s a time when a delay is more than just an echo, but an instrument unto itself, becoming its own voice.
These delays generally take the lead in the full mix. There is certainly dry signal present in the mix, but it ended up taking a supporting role in the patch, being about a 80/20 mix in favor of the wet delays, and that dry signal was to keep some kind of coherent shape to the patch. Without that wee bit of dry, it felt like it was falling apart. A loose blob.
Another highlight in this patch is The Dradds. I’ve had a Dradd since not too long after its release. I’ve long been a fan of Pladask Elektrisk. I’ve had all, or almost all, of his pedals at one point or another. Although all of them were unique, none were stereo, and I’m a guy who (irrationally) believes all of his time effects, like delay and reverb, should be in stereo. Despite also being mono, as soon as I learned of Dradd I knew I would give it a chance. After several plays, I was frustratingly underwhelmed. Not that it didn’t sound great (it sounded awesome), but that it too wasn’t stereo. I know There Are Ways, but I’d rather just have stereo effects and not worry about it. They can always be patched in mono if need be. As I was on the verge of selling it I saw a video by Matt Lowery featuring dual Dradds. Gratuitous as it may be, I was quickly convinced on the merits of two Dradds and rushed to the Pladask Elektrisk website, elated to see that they had them in stock, and purchased a second one, the first’s evil twin.
The Dradd, despite its innate ability to stumble into happy accidents with virtually every knob twist, is a module that confused me. I’d kept it for so long because of how easy it is to find sweet spots. Flick a switch, turn a couple of knobs, maybe add in some modulation (or not), throw in some delay and/or reverb, and something beautiful happens. But I never used it with an intention that requires understanding. It’s one thing to turn a couple knobs until something pretty comes out. It’s another thing entirely to understand the controls, and intentionally use them to create the sound you want, or meaningfully transition into something different. Having used Dradd several times I was becoming frustrated that I couldn’t play it. It was an exercise in happy accidents. I hadn’t run into any sort of problems that kept me from decent enough results so there’d been no rush to the manual, but I was at a point where I wanted more than luck determining the output. Having run into this realization, I finally decided to really dig into the manual to finally understand what the module is doing with all these these knob twists. And the outcome is the first time I’ve been truly happy with the results. Dradd had certainly put a smile on my face before, but the sense of creating a sound with intention rather than happing upon it is far more satisfying. I’m a long way from Dradd mastery, but the first step is often the most intimidating, and that’s now done. From here it’s about ingraining my understanding of the instrument by practice, which will surely lead to an even greater understanding.
This patch also put the Jolin Agogo to use in a capacity far more involved than as a simple LPG, instead using it as a complex mixer for eight signals (four oscillators and four sources of white noise). The Agogo is my favorite kind of mixing VCA/LPG. It does a special trick that most don’t: every input, both audio and CV, as well as every output cascades to the next channel if unplugged, making the creation of complex submixes, both mono and stereo, a simple task. If you’re not using all eight channels, you can add saturation simply by moving down a couple of outputs. The Agogo is also chainable, making a 16, 24, etc. channel LPG/mixer with almost endless possibilities. The mixing flexibility it offers is truly incredible. It’s possible to mix entire patches with the Agogo, and the slight filtering it does in the odd channels brings just the right amount of vactrol-controlled goodness to any mix. It does have a drawback, however. Being that it’s vactrol-based, any slow moving CV like LFOs (or simulated ocean waves) must reach a minimum voltage level before the vactrol can start to open. Like all vactrols, and sometimes me, it’s a little slow. You are, however, treated with beautiful decays when there are sudden voltage drops (or indeed pings), provided by eight vactrols on the PBC.
The Oto Boum also made a first appearance in this recording. I’ve never really been a huge fan of using compression. Not because I didn’t think it was good for producing music, but mostly because I don’t really understand it all that well, and most compressors are decidedly not happy accident machines like Dradd. I never had the patience to mess with it, especially when the differences and improvements you’re listening to are often very subtle. But, as with Dradd, I became frustrated at not using the heralded Boum much at all, much less in the capacity for which it was designed: an end of chain compressor.
In this exercise, the manual was no help, even if it is quite good. I needed real guidance. Basically, something that could be a crutch and tell me exactly what to do. Compression is a debated topic in ambient music. You want everything to be heard, but since dynamics play such a pivotal role in ambient music it’s paramount that you maintain a high dynamic range. Having turned to YouTube for some direction, I found a video with the perfect title: “INCREDIBLE OTO Boum – Dawless Mastering Chain part #3.” Although the video is dedicated to mastering live club music, virtually the entire video is on compression and how to apply it using the Boum as an end of chain effect. Using the approximate knob positions and general guidelines in the video as a starting point I finally decided it was time. After some careful (read: very conservative) knob turns and A/B listening, the Boum worked a treat. Although the differences are admittedly small, there is more obvious clarity and sharpness across the soundstage with compression than without.
Although the Oto Boum is also a distortion, I decided to use the ever-beautiful Bizarre Jezabel Mimosa so that I could isolate it to the main voice and not the entire mix. Plus, although I’m sure the Boum is a wonderful distortion, the Mimosa is the most beautiful I’ve heard outside of high dollar tube amps.
This patch was a lot of fun to make, but it’s not perfect. The Dradds are a bit forward in the mix, and get a little busy in spots. Some more care with the settings and in the mixer ought to clean that up. I’m also not convinced that using Let’s Splosh as an intermediary for Swell Physics was executed as well as it could have been. I tried using different outputs, but to call those efforts half-assed would be a disservice to genuine half-assed efforts. I’m also not sure about the result of panning the individual signals in the Sum Mix & Pan with Swell Physics. Although the waves are spread, they’re still close enough to each other to keep too much of the audio to one side of the stereo field or the other at a given time. Inverting one of more of those signals would probably help balance out the soundstage.
After a fantastic morning of sailing through Glacier Bay, I decided to spend the afternoon and evening patching while I watched the beautiful southeast Alaskan coast float by outside my cabin window, door ajar for the the sound and smell of the sea as inspiration. The first patch started simply enough, the Swell Physics four wave outputs into Quad Operator’s four gain inputs, through some delay and reverb, and out for your pleasure. But this time I decided to add a bit of variation via Batumi’s various wave shapes to modulate the wave shape of each of the operators. This modulation had the unanticipated effect of also modulating the apparent volume of the output as well, which created a very cool phasing effect of the individual waves as both their levels and wave shapes were being modulated at separate rates.
The four Quad Operator outputs are mixed down to stereo, then sent through QPAS which had moderately heavy modulation to the cutoff, both Radiance CV inputs, and with gates to both !!¡¡ inputs. I mixed both the LowPass and Smile Pass outputs at about a 75/25 ratio for some very cool stereo imaging, and sent the signal to Nautilus.
Although I’ve used the Chroma feature of the Qu-Bit Nautilus a lot, I’d never used the wavefolder in the feedback path. I’d never used it because I never said to myself, “Man, what this feedback path needs is wavefolding!” Overdrive, distortion, and bitcrushing sure, but unfortunately wavefolding was ignored. A pretty aqua color in the kelp light show on the panel between the orange overdrive and red distortion. This oversight was a dumb and tragic mistake, alleviated by the conscious choice to use wavefolding in this patch. Wavefolding in the feedback path sounds fantastic! Controlling feedback and the Depth of the Chroma is crucial because wavefolding, like distortion and bitcrushing, can create runaway feedback quickly if the balance between feedback and wavefolder isn’t closely watched. The effect, as modulated by a highly attenuated triangle wave from Batumi, created a mix between a nasally and almost fuzz-like tone where there are some edges of the sound starting to leak and sputter, particularly on lower tones.
As accompaniment I went with the LABS Choir samples in the Disting Ex SD Multisample algorithm, using three of the Swell Physics wave outputs for pitch, and the 1 < 2 and 3 > 4 gate outputs through the CuteLab Missed Opportunities as triggers. What I was watching go by as our ship rolled along the grand Alaskan coastline called for drama. Something that could create tension and with some occasional resolution. Although I might better tune the gates to get just the right amount of action if I were to record this patch again, it’s often too sparse, and with not enough harmonization, I feel like the Choir more or less created the effect I imagined, even if it sometimes veered from dramatic to an uneasy suspense. It’s a feel as much as anything else.
Both the Quad Operator > QPAS > Nautilus and the Disting Ex voices went to the mixer, and on to the Stratosphere Cloud Reverb.
Overall I like the direction of this patch, but it needs work. The waves from Swell Physics are often way too slow (a common occurrence once the simulation has been running for a while), and although the modulation from Batumi created some very cool phasing effects, it all combined into a slow moving soup. A soup with promise, but a soup nonetheless. There’s just no pace. Perhaps that’s a reflection of the glaciers I’d been watching all morning, but by the time I’d hit the Stop Recording button in AUM the patch seemed to have come to a crawl, begging for an ending. With time, this patch can be exquisite, but I need to put in the work to get it there.
The Night Time Patch
Once I’d hit stop recording on the daytime patch, I’d become slightly frustrated that I couldn’t get it where I wanted to take it. Either through lack of food, time, patience, feel, or some combination thereof, the patch ended with a whimper. I wasn’t satisfied. Having done several slow, ambient patches for the last several weeks, I knew I needed a change. I needed something to shake that ass to. Something to temper my disappointment in the daytime patch, and something to quell my desire to create something. But only after a visit to the buffet to both feed my body and cleanse my musical palette.
When I started patching again that evening I wasn’t exactly sure what I was going for. I knew I wanted something rhythmic and fun, but started in a way similar to how I’ve started lots of patches recently: four Batumi outputs going to the four gain inputs on the Quad Operator. But this time was different. Rather than using slow, randomly paced waves, as I would do in an ambient patch, I used clock divided LFOs to create a rhythm. Not only did each individual LFO create individual notes directly by lowering and raising the gain on each operator, but also created a rhythm via FM modulation.
With the Quad Operator, when you’re using the Gain CV inputs, each operator is available at its output when the gain input has positive voltage, just like with any VCA. Likewise, each operator is also only able to act as a modulating oscillator for Frequency Modulation to the other operators via the Quad Operator’s FM Matrix when its gain is positive (or the Gain CV input is not patched), making each Gain CV input have an effect on more than just that operator’s output. Each Gain CV input also controls timbre in other operators’ outputs as well, drastically changing the complexion of the overall sound as these various LFOs fade in and out at different, but related speeds, and with differently shaped waves. Sometimes an operator is being FM’d. Sometimes not. It’s a nice way of being able to use all four of the Quad Operator’s outputs, even if tuning can get complex, rather than sacrificing operators to modulation duties only. It doesn’t make sense to use a FM synth like the Quad Operator in this fashion very often, but it works well in some styles of patching. The four operator outputs are routed to the Mutable Instruments Veils for a stereo mix down before going to the final mixer. From there it’s sent to the Blue Mangoo Stratosphere Cloud Reverb.
If I were to do a patch like this again, I would probably process one or more the Quad Operator outputs individually to add some spice, rather than immediately mixing them to stereo. To treat each of those outputs as individual entities unto themselves, rather than assimilating them into a larger body immediately after their creation, never allowing each to have their own existence. Sending one output or another through a separate effect or process than the others might help create something special that is lost once an individual signal is married to another in a mixer.
The kick drum is about as simple as it gets. A /2 square wave output from Batumi to Plaits, twist the knobs a bit until you find the timbre, decay, and pitch you want, and turn the FM trimmer to taste. One of the wonders of Plaits, and Braids before it, is its versatility. It can be almost anything you want it to be. From a FM oscillator to speech synthesis to kick drums and plucked strings, Plaits can make a whole lot of sounds and be the main voice in any patch. If you have something like the Jasmine And Olive Trees Traffic, or if you’re savvy with CV processing, Plaits can be many things at once. Today, however, Plaits was just a humble kick drum.
I had hoped to use QPAS in a more exciting manner. One of my favorite ways to use QPAS is by pinging it. But because QPAS normally lives isolated in a Make Noise only case, I haven’t really experimented much with pinging it without the using the nice, wide gates of both Tempi and René v2. But my clock in this case, the Sitka Gravity, doesn’t have any of those, and my sequencer, the T12, was already being used. Gravity outputs short triggers, about 15ms, which are great for telling something else it’s time to do its thing, but virtually useless as direct modulation, and the ability to use the gate’s length to help control modulation, such as with an ADSR envelope, is lost. I could ping the input with a trigger easily enough, but instead decided to use a probability gated square wave from Batumi via the CuteLab Missed Opportunities, which wasn’t quite the same as using the 50% duty cycle gates Tempi spits out. Although the developer of the Gravity has said that a gate mode, wherein the duty cycle of the gate will be adjustable, for now it’s all triggers. I could (should) have just used the triggers from Gravity to sync to Batumi and trigger envelopes from that unused Changes sitting there wondering why he was left out of the party, but it just didn’t occur to me until I was too deep in the patch to bother with changing it. With the Batumi square wave, the pronouncement of the modulation and ease of switching up the gate patterns just wasn’t there. You can hear the modulation well enough in isolation, but it’s almost nonexistent in the mix.
Despite my lack of imagination in modulating QPAS with unfamiliar tools, its role in the patch, however, is crucial. Its LP outputs add a marimba-like percussive element (thanks to feedback patching the left HP output to the highly attenuated Freq 1 input) to accompany the kick drum, and contribute a party-like atmosphere in the patch.
There are also two new-to-me elements to this patch that I hadn’t yet tried. The first is to use the Doboz T12 as an arpeggiator. Since the T12 is brand new, there are a lot of new things to try. It’s a deep, highly versatile module. I’ve used it as a sequencer, and as a touch controller (my over-70 mom also had a great time using it as a touch controller). In this patch I’d use it as an arpeggiator with the second new-to-me element: using the Poly Wavetable algorithm on the Disting Ex.
The T12 is turning out to be something akin to the greatest in-case touch controller in Eurorack. Of course I haven’t used many others, and those that I have used never tried to be quite as much as the T12 strives after, but the T12 seems to have some serious chops in terms of immediately challenging Eurorack mainstays like the Make Noise Pressure Points or Doboz’s own TSNM MKII. The T12’s main limitations are its inputs and outputs, and that it requires some level of menu diving . It only has three inputs and outputs. A pitch CV, an AUX CV, and a gate output, with clock and reset inputs, along with one solitary CV input. Something like Pressure Points can put out several voltages from several “channels” simultaneously, which is not something the T12 can do, but the T12 more than makes up for these shortcomings with flexibility, the customizability of each mode, and the ultra-intuitive user interface. The T12 is, by far, the easiest module I’ve used that has a screen based UI. Virtually all of the options for each mode are changed on the surface menu level, without any real diving at all. Doboz did a knockout job with designing the interface to be powerful, expansive, and super easy to navigate.
The T12 in use as an arpeggiator is smooth and ultra-fun. It will arpeggiate as many notes as you can get your fingers on, and the touch plates are very responsive when making changes. There’s generally enough space to maneuver use three or four fingers of one hand to make your note changes, but there are some button combos that require some serious hand dexterity, or the use of two hands. But once you get a feel for how to move your hand in the space, muscle memory starts to take over, and it’s nothing but pure fun. As with most arpeggiators there are several directions or patterns you can choose. This patch started with a forward pattern, and a 20% probability that a gate will be skipped, then, at some point, switched to a random direction, with a 20% probability that a gate will be skipped. There are many options I could have investigated, like the probability and range of pitch variability (by step or overall), or transposition, or using the AUX CV output, but I chose to keep it simple, and, quite frankly, I was having a really good time spending my night doing something simple and performative.
If I’m being honest, this patch was the first time I’ve used the Disting Ex in any algorithm other than the SD Multisample. The Disting Ex too is a deep, highly versatile module, to put it lightly, but I traded away a 1010 Music Bitbox Micro for a Disting Ex because of its capability as a multisample player, specifically that it can play eight simultaneous voices of polyphonic multisamples via pitch CV and gate inputs. No other module can do that in quite the same way. But I’d already used SD Multisample in my first patch on the trip, the Daytime Patch before this one, as well as my test patch before leaving. Every patch I’d made with this case included SD Multisample, and I wanted to try something new with this synth.
Because the patch was lively, I wanted to use a lively sound source for my arpeggios. Quad Operator was already in full use, and Plaits was thumping along as a kick drum, so I knew I needed to find another algorithm in the Disting Ex. If QPAS could self oscillate (without help), and if it could follow v/oct pitch CV, I probably would have used it as the arpeggiator voice either by pinging it (which QPAS does fantastically, as this patch shows), or as a sine wave oscillator through a VCA using the envelopes created by the T12. But QPAS doesn’t self oscillate or follow v/oct pitch CV, so the Disting Ex was the way. I could have chosen a completely unpatched CalSynth Changes, a very excellent MI Stages 1:1 clone, loaded with the latest quimem firmware in Ouroboros (Harmonic Oscillator) mode, but by the time I decided I wasn’t going to use Changes as a modulation source I was already set on using the Poly Wavetable algorithm in the Disting Ex.
Fortunately, Poly Wavetable is very similar to SD Multisample in how it functions. Poly Wavetable can take 3 CV sources and 3 gates and play up to 8 simultaneous voices polyphonically. That said, the weakness of the Disting UI and very small display becomes glaringly magnified when you need to make parameter changes, especially with nearly-50 eyes. You get a slew of options, several dozen, and a very tiny screen with which to navigate and make changes. I would have greatly preferred to control envelopes and such with a dedicated envelope generator outside of the Disting in a VCA or LPG, but I elected to use the internal envelope because I didn’t have any more VCAs to use, much less two of them. The 8 VCA channels (plus VCAs within modules like QPAS and Quad Operator) I brought with me were already in use doing other things, so fumbling through the menu system was the only way. Don’t get me wrong: the Disting Ex is incredibly powerful, and each algorithm is highly customizable. It sounds fantastic, and it can do dozens of operations from polyphonic multisample player to a pitch to CV generator, matrix mixer, or lots of other tasks. The Disting line, but particularly the Ex, is truly is the ultimate Swiss Army knife of Eurorack. Such a broad tool, that is also quite deep, is bound to be awkward sometimes. Since they’re built to do everything, it’s impossible to also have a UI that will match a good workflow for all of the algorithm functionality (perhaps, some might argue, for any of them). That said, the UI manages to be fairly simple to navigate. If you can see it. Most of the options are controlled on the surface level of the menu. You turn one encoder to change options, a second to change a parameter within that option, and click a third to save it.
Having listened back to the recording several times, I definitely wish that I had a pair of LPGs available to me in the case. That attack and intoxicating decay from a LPG would have been just the thing. The arpeggios in the Night Time patch are enunciated, but only just adequately. I never really got to shaping the internal ADSR envelope beyond shortening the release a bit, and the UI is actively hostile to changing while trying to perform. The UI really hindered me there, (I was trying to booty shake, not squint my eyes at a tiny screen trying to optimize my envelope), and that unused Changes was still staring at me with that sad face one gets when everyone except you were invited to the party. I know there are 3rd party screens for the Disting that alleviate the problem, this one came with one when I traded for it, but of the ~2200hp in my synth, my only 1u row is in the Make Noise 4 Zone Bus Case, which is occupied by a CV Bus Mk2, so it’s out of the question unless I decide to get two Distings.
This patch was a lot of fun to build and perform. I hope to patch in this same vein on my full synth soon enough.
One last tool that I used on this trip that I hadn’t really written much about, and that I bought specifically for this trip, is the Bolanle PH400 4-Channel Headphone Amp. Since the plan was to use this synth with my brother, I wanted a means to have independent volume control. I loathe having to share volume control of headphones, and so decided on a small headphone amplifier. Although the PH400 is certainly not something I’d call studio worthy, I can say that it’s a good piece of kit, and it met all of my requirements. It had to be powered by USB C, small and portable, and it had to have individual control, and it had to sound good or better. I wanted something with both sized headphone outputs for each channel to avoid adapters, and the PH400 has that. Each channel also has its own mute button. As an added bonus, the LED light show is cool. This thing works great.
The first night at sea was as eery as I can remember seeing on the water. Like a scene from a dreamworld that was real, but didn’t always seem like it. Like we were traveling between realms. I won’t claim to be some long travelled seafarer, but, having grown up by the ocean, I’ve spent a good amount of time on the water in my life. I’ve been in ocean faring boats on three continents and three oceans from the tropics to the arctic. But one thing I’ve never experienced while on the water is The Marine Layer. I’ve seen fog, even bad fog, but nothing could really prepare me for the enveloping marine layer clouds. It was the kind of dense cloud soup that, in another age, might have been the demise of a ship unable to see any navigation markers whether on the land, sea, or in the sky. The only thing visible in the gloom was the sparkling refraction of the ship’s fog lamps, and the sea rolling off the hull as we slowly made our way through Puget Sound and out to sea. The ship’s fog horns blasting every few minutes, and gentle splashing against the hull 80 or so feet below us, the only things to be heard. The entire experience left a lasting impression.
I spent much of that night and parts of day two scouting the ship for someplace that would be a good spot to whip open a modular synth case later at night. I wanted to be as out of the way as I could, but still in a spot that has adequate electricity to power the synth and a small USB hub connected to my iPad, the Michigan Synth Works XVI, and a small 4-channel headphone amp I bought in a lieu of a passive TRS splitter for using with more than 1 person (I loathe not having individual volume control).. Although I ultimately found a couple of good candidate spots, but this first recording I made during some morning downtime in my cabin before arrival at our first port of call. I wanted to give a full test run of the equipment in my room before lugging it down nine decks, the full width of the ship, and nearly its entire length. The setup is not terribly complicated, but it can be fussy, and I didn’t want to waste time futzing with gear in a communal space.
For this first run of the full use of this synth with all of its accompanying support gear, I wanted to use a familiar patch so as not to become overstimulated if I were to encounter problems with my other gear. I spent the better part of two weeks pouring over a patch with the Addac Systems Addac508 Swell Physics and RYK Algo that I quite enjoyed making, and so decided to go with that same approach using the Humble Audio Quad Operator. The four Swell Physics wave outputs to the four operator VCAs (Gain 1-4) to slowly bring their individual voices in and out with the flow of the ocean. This goes straight to the mixer, operators one and three panned left, with operators two and four panned right, where it’s then sent to a reverb bus using the beautiful Blue Mangoo Stratosphere Cloud Reverb.
Three of the Swell Physics outputs also provided the source for pitch CV used in the second voice. In another bid to patch something familiar, I once again used chaotically generated gates with the NLC Stochaos, alongside Disting Ex’s SD Multisample algorithm, this time using LABS Music Box samples. As in my test patch at home, I again used a tempo modulated Sitka Gravity to have the clock float above and below the base tempo of 72bpm. If I were just a bit smarter, I would have thought to use one of the four wave outputs from Swell Physics rather than a random LFO from Batumi II.
The Toy Piano samples output to the Qu-Bit Electronix Nautilus for some delay and with gradually introduced bit crushing in the feedback path. The delay is set fairly slow, with light modulation to Reversal, Feedback, and Dispersal. In a roughly 50/50 dry/wet mix, the Nautilus outputs go straight to the mixer, and are sent to the reverb bus.
The last portion of the modular is an approximation of the ship’s blaring foghorn. I’m using Plaits in (I think) FM Synthesis mode, using the Doboz T12 touch controller to manually play the note. It’s only used three or four times through the ~7 minute recording.
This patch is the first I can recall making where I’ve used post-production processing rather than playing everything live. This synth is limited, and so is time to create patches. Before I left on the trip I knew that my synth was without one of my staples: a granular processor. Earlier revisions of the case had a Mutable Instruments Beads, but it was eventually lost in favor of something else I can’t remember. I do know that I while I was building the synth I was insistent on several modules having a spot. The Addac Swell Physics, Qu-Bit Nautilus,1 Doboz T12 + 3hp module of choice (I chose the Klavis Tweakers), Expert Sleepers Disting Ex, uO_C, CalSynth Changes (MI Stages), Sitka Gravity, and the Humble Audio Quad Operator were non-negotiable for me, despite a couple of them being large for a case this size. But Beads didn’t make the cut because I found an excellent granular processing plugin for iPad, Fluss, by Hainbach and Bram Bos. It can function as a granular instrument, granular sampler to record and process longer samples, or a live granular processor with a 6 second buffer. Because it’s the behavior that most closely resembles Beads, I’ve only used it in live mode, and I can say that I really like it. Because it’s a live processor Fluss is a good substitute for Beads, and despite being a plugin, it leverages the iPad touch environment well, being a very hands-on, playful interface. Sliders and discs can be flicked around, the effect frozen, manipulation of the three voices, and more are all easily accomplished with touch gestures. Fluss also speaks fluent midi, and can be used with hardware controllers should you want even more manual control.
After recording the modular, I played the recorded file in AUM through an effect bus with Fluss as the plugin, with yet another send from the Fluss output to the Blue Mangoo Stratosphere Cloud Reverb. I mixed the original recording with the granular processing and reverb, and recorded that mix, which is what we have here.
I’ve been using AUM as a final mixer for quite a while with my modular. The way my main synth is set up now, I can’t even listen to it without plugging it into my iPad with AUM. An Expert Sleepers ES-9 is my only output module in that synth. Until recently I’d basically been using it as a very basic mixer. Most of the time it would be a simple stereo input mixed in the synth, primarily via the AI Synthesis 018 Stereo Matrix Mixer, while using one send/return bus to go out to a reverb pedal before final mixing. But as I prepared for this trip, knowing I’d need to use plugins in ways I generally don’t, I started making more intricate mixes, utilizing various sends from several input channels to effects plugins and the output bus. Although I haven’t (yet) recorded multitracks on this trip, AUM is certainly set up to easily to do so. Since I haven’t done much post-processing, I haven’t felt the need to, though that may change as I learn to better leverage a mixed hardware-software environment. I’m not terribly interested in moving in the box, but if a plugin has a touch driven interface that’s playable, like Fluss, there’s no good reason to avoid it since I’m already using AUM as my mixer.
Modular synth performed and recorded in 1 take in AUM on iPad via the Expert Sleepers ES-9. Granular effects added during post processing in AUM on iPad.
*****
Yes, both the Swell Physics and Nautilus were chosen specifically for their oceanic themes. An early revision of the case also had the Qu-Bit Aurora, which would fit the destination too, but it was substituted out early on during the revision process for something more practical like VCAs or modulation.