Adagio for E370 in Dmin7

It had been a couple of weeks since I’ve been able to patch, and I was itching. Having just been on a spring break high school baseball trip to the beautiful Emerald Coast, I was inspired by the sea. It was the first trip in over a year I hadn’t taken some music making device, and even if I didn’t really have the time to patch during this trip, I missed not having something.1 I thought all week about what I would be making if I had my synth, and Swell Physics was first and foremost in those musings.

When I first set up this patch it was a mess. A cacophony of sound where each part seemed to work well on its own, but as soon as it mixed with other parts the whole thing turned to shit. As a non-professional musician, I try not to fall into that trap of being too hard on myself when my results are less than what I’d hoped for. Failure, after all, is the key to progress and improvement, and if a recording sucks it’ll just go into the folder of dozens of other recordings that suck. My livelihood is not at stake, and I don’t yet have a reputation to ruin. When I turned on my synth today, I listened to that latest patch still plugged in, and I was unhappy. It was a mess, and only reminded me that the recording I had heard of that patch a dozen or more times that week just wasn’t it. I was resigned to tearing the patch down and starting from scratch, but since I wanted to use the same control scheme I instead chose first to tweak a few settings and see if I couldn’t salvage the patch.

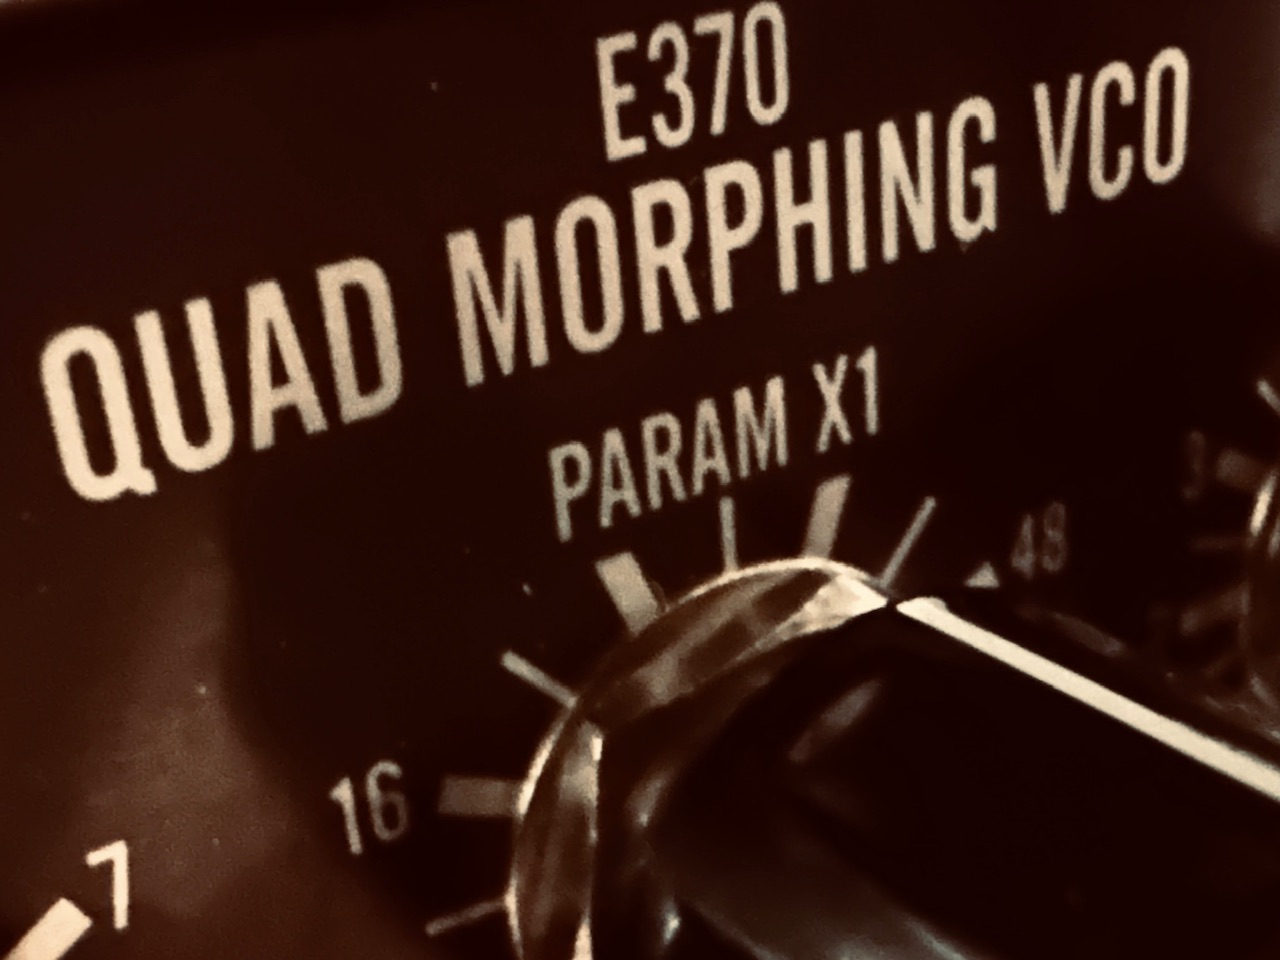
I don’t really like tweaking already-built patches. I mean, I like tweaking controls, but not patch points. It’s generally not been an exercise that has produced meaningful fruit, and I usually find it easier to simply start over rather than navigate a nest of patch cables. Today’s first change, however, wasn’t a physical patch change, but a setting change to the E370. Rather than using one of the User wavetables I’ve taken fancy to, a very cool wavetable leftover from the previous owner, I switched all four channels over to ROM A, and the difference was immediate. In fact, it was pretty much the sound I envisioned before i even started patching. So much for tearing down the patch.

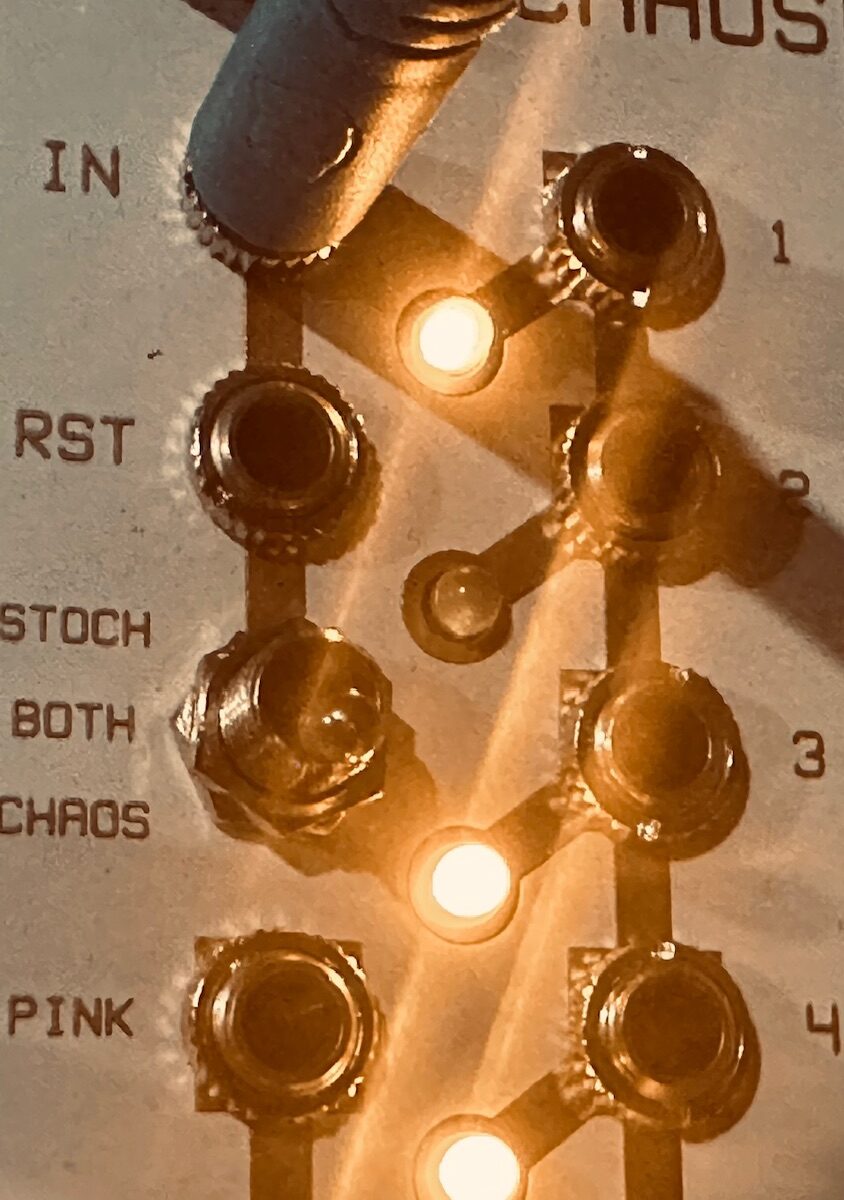
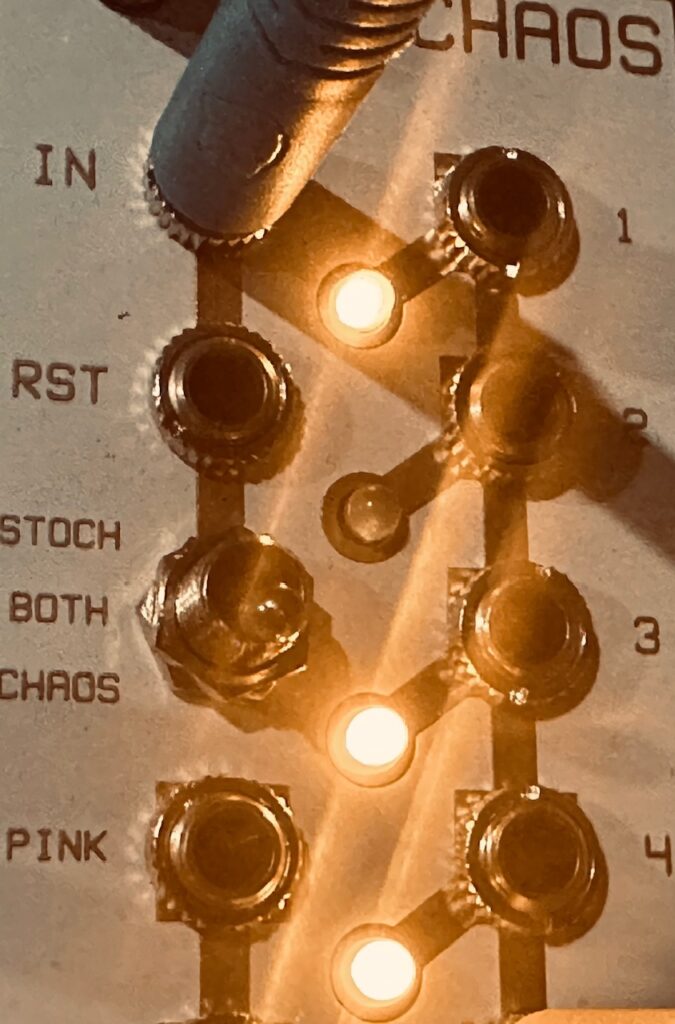
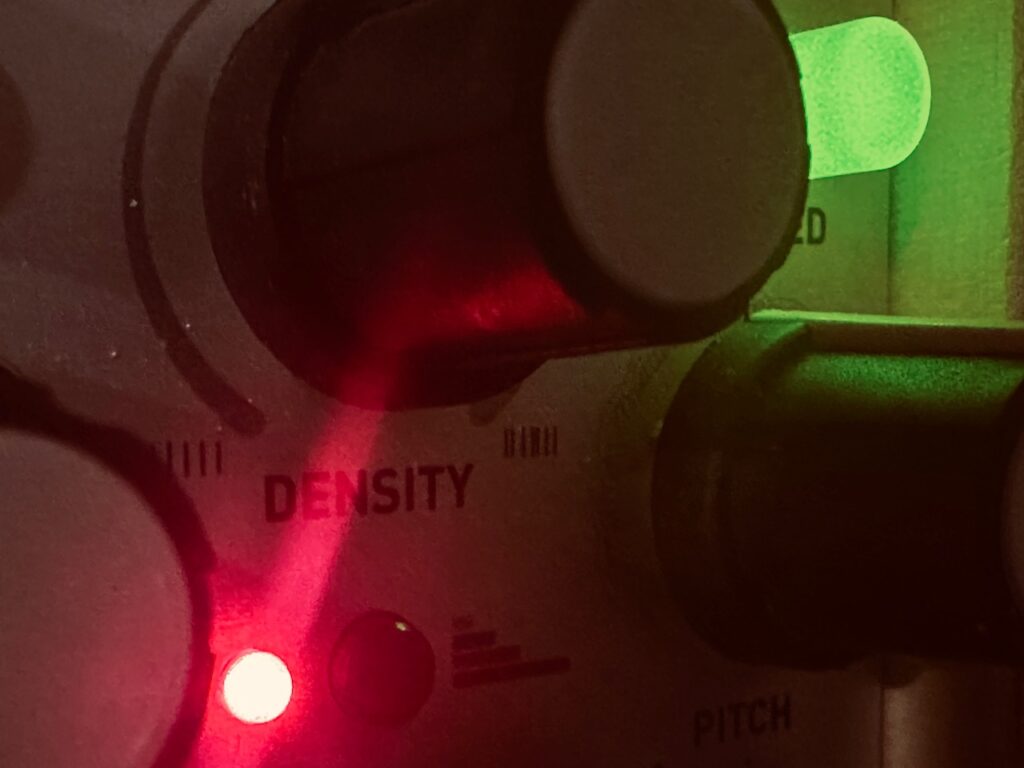
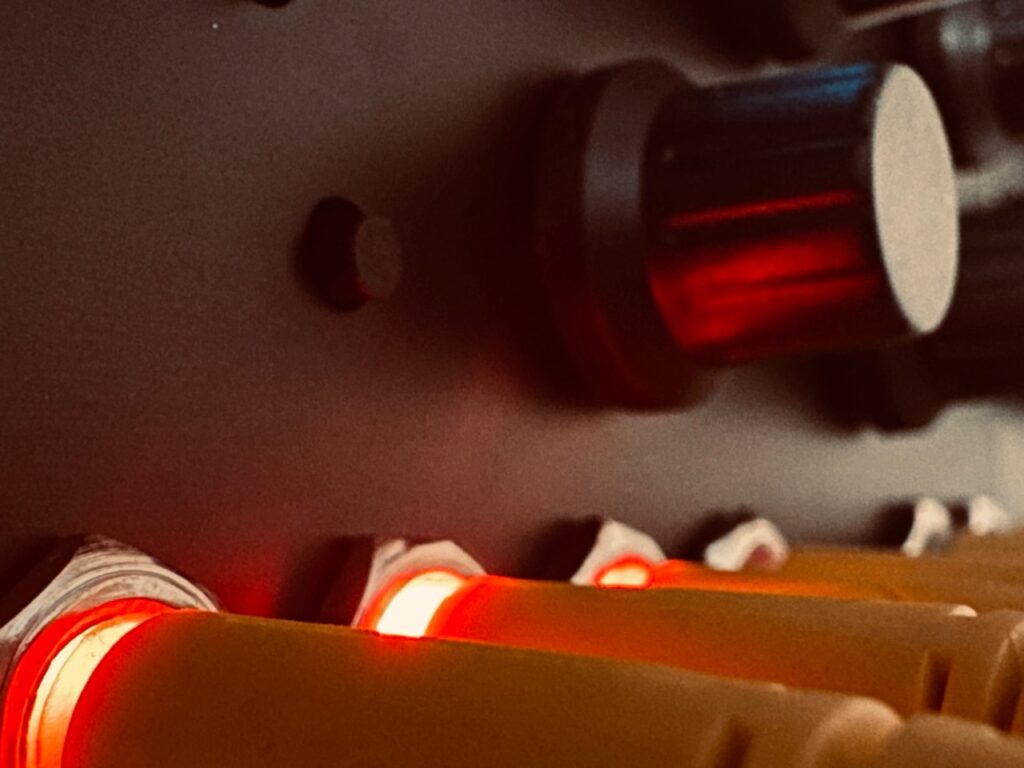
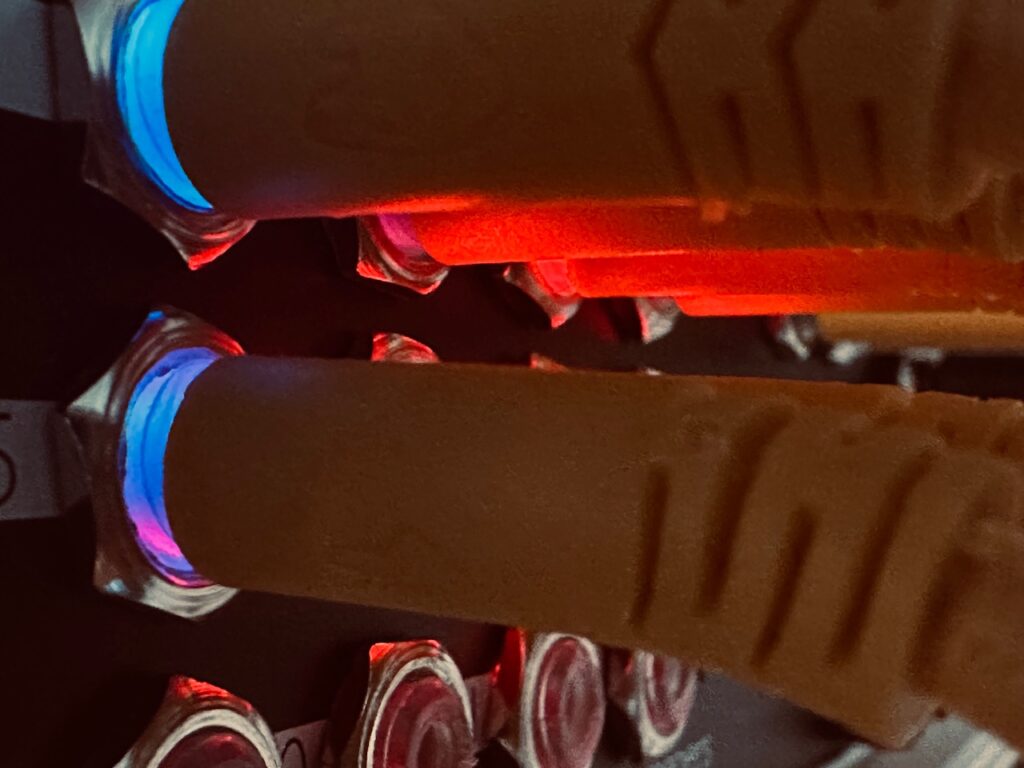
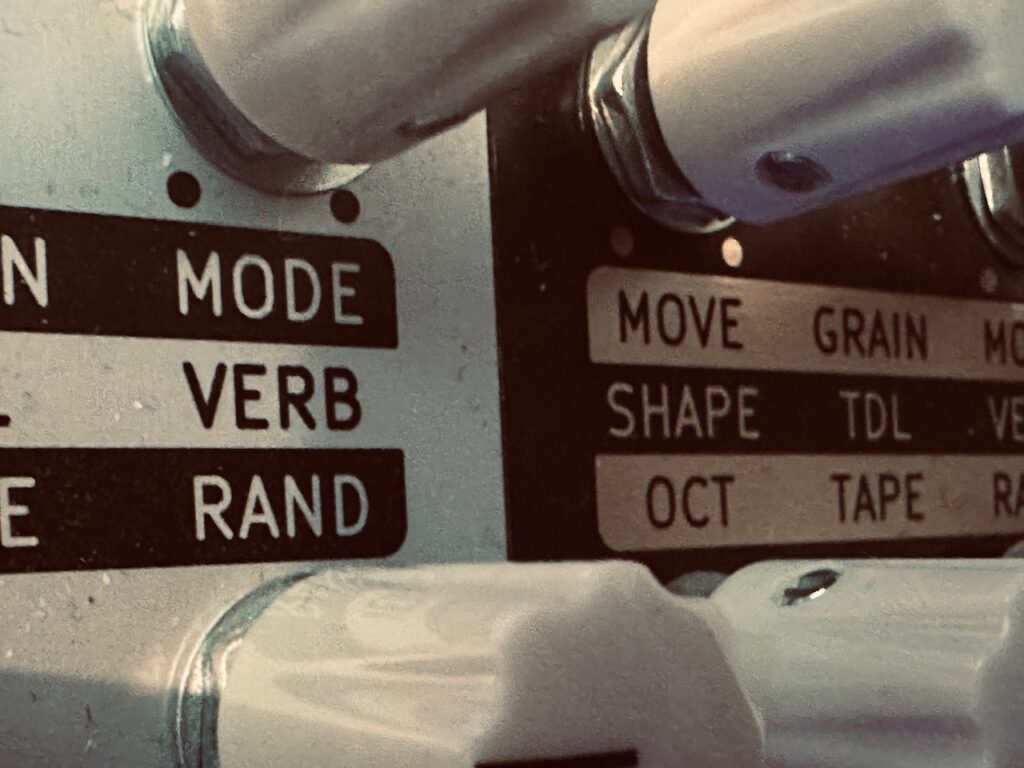
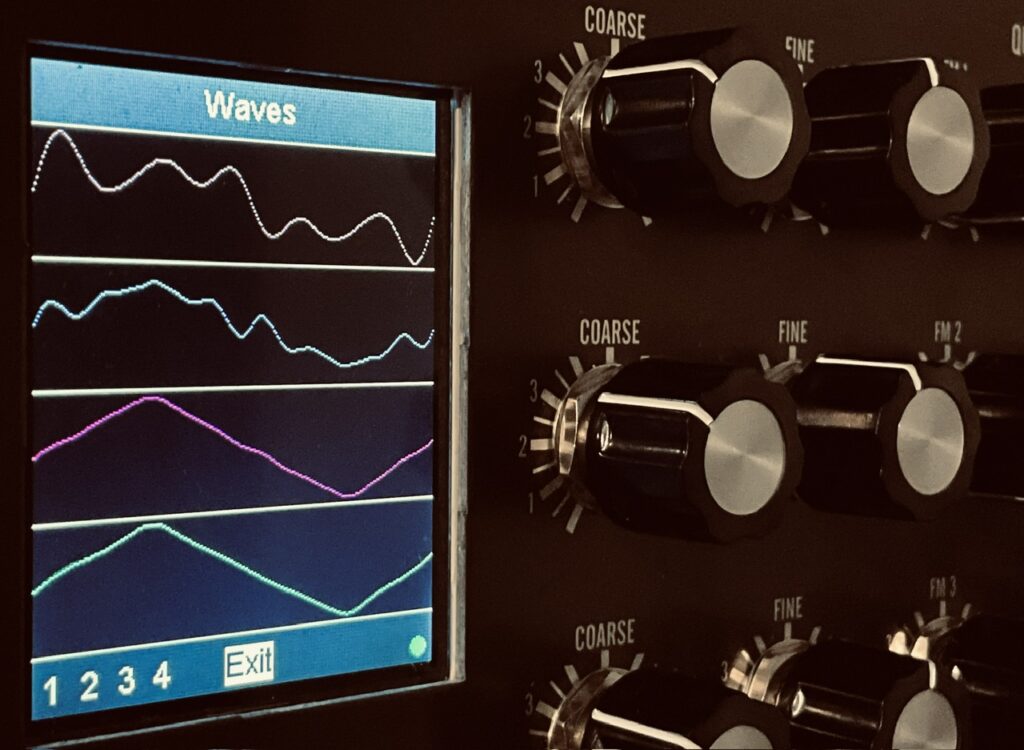
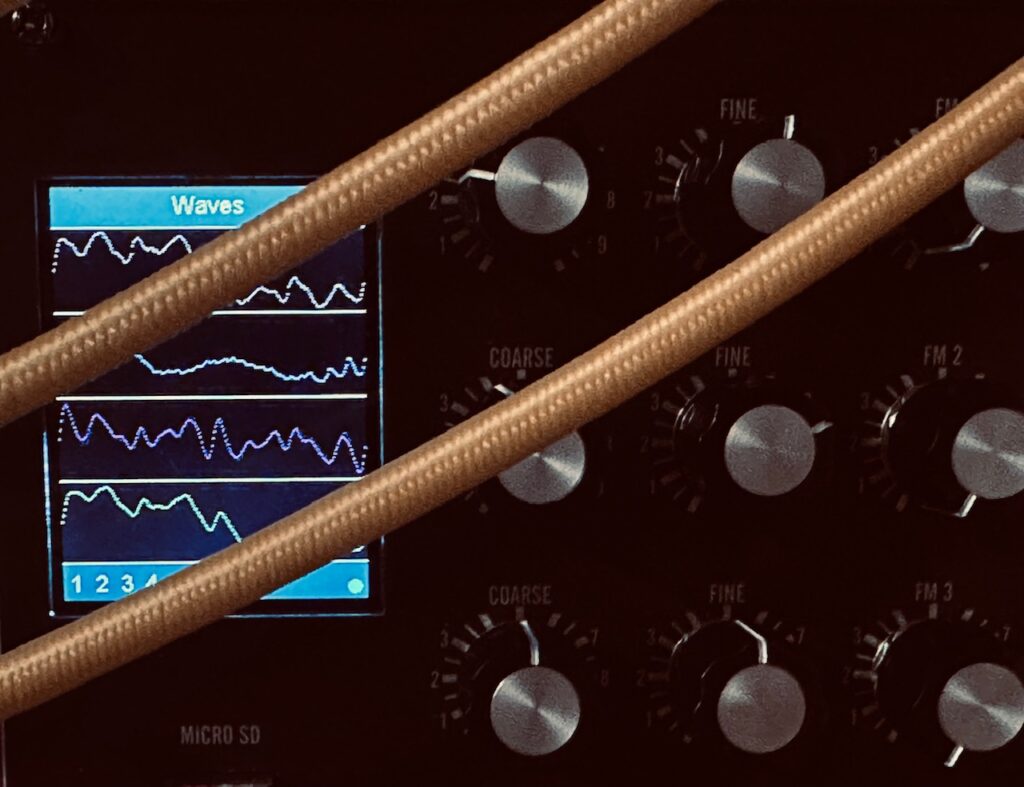
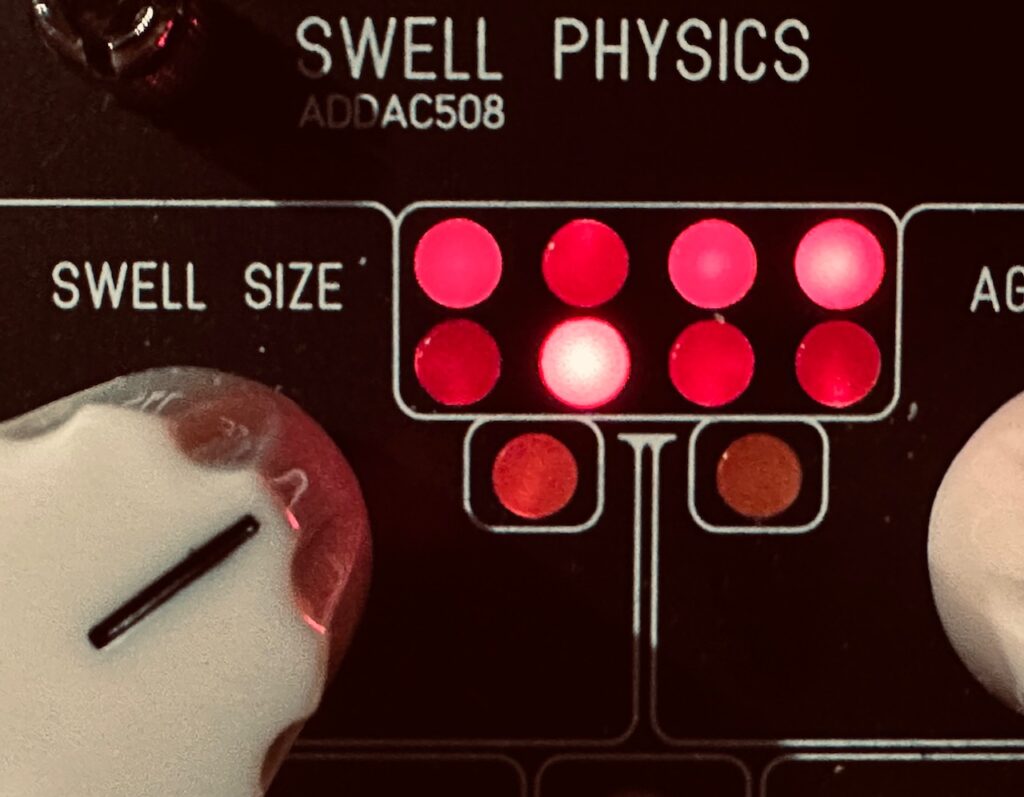
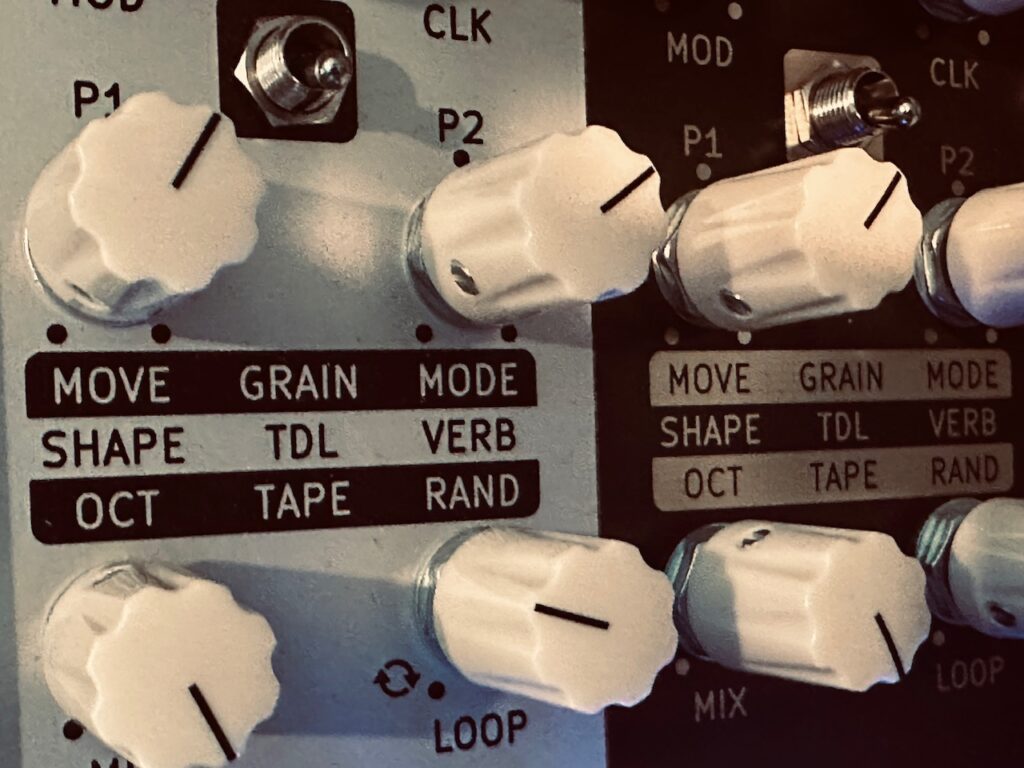
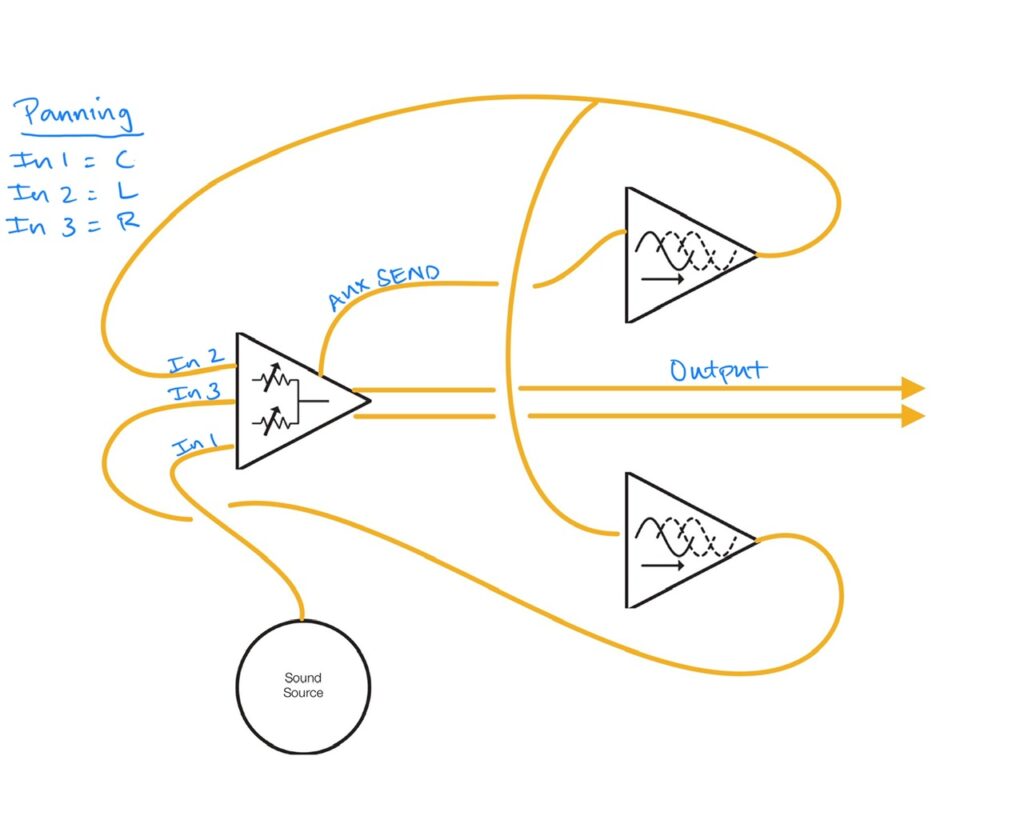
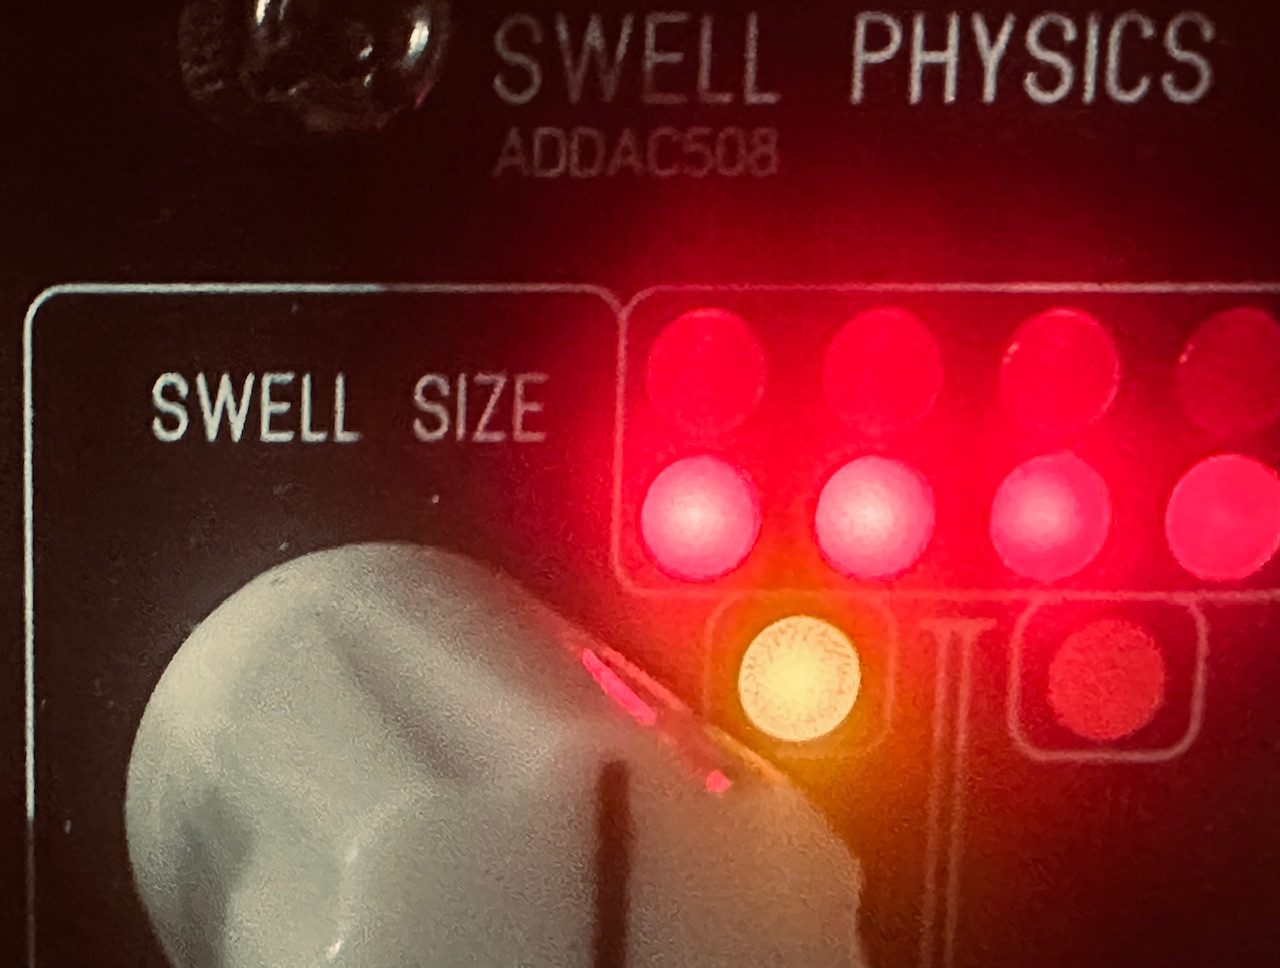
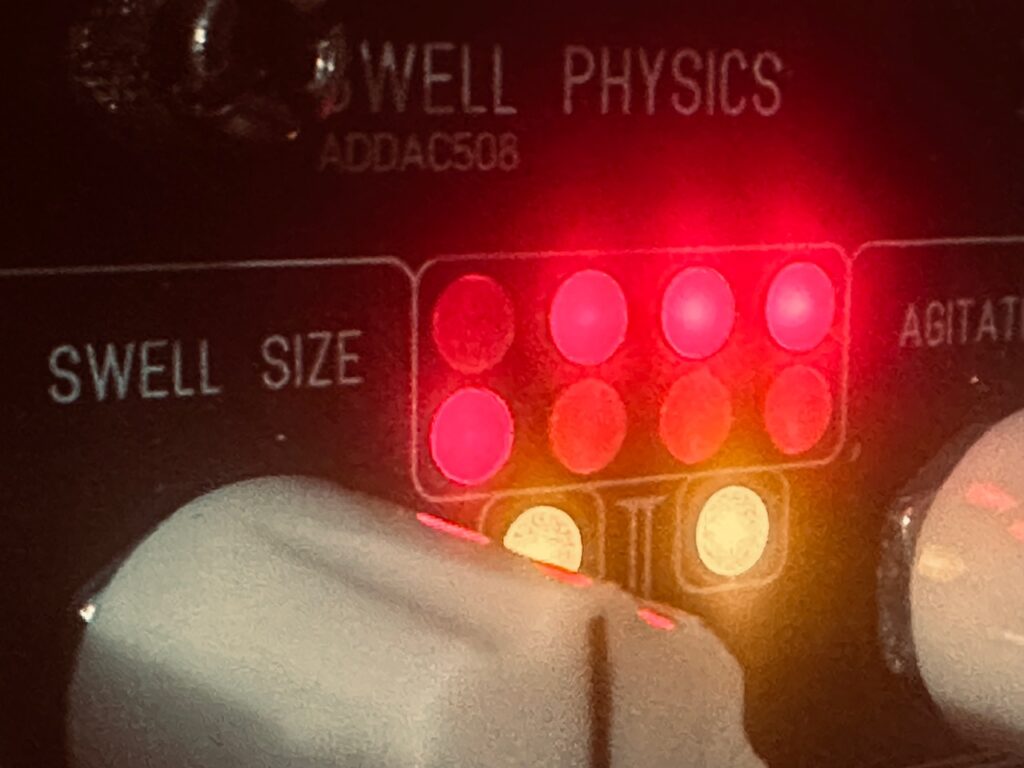
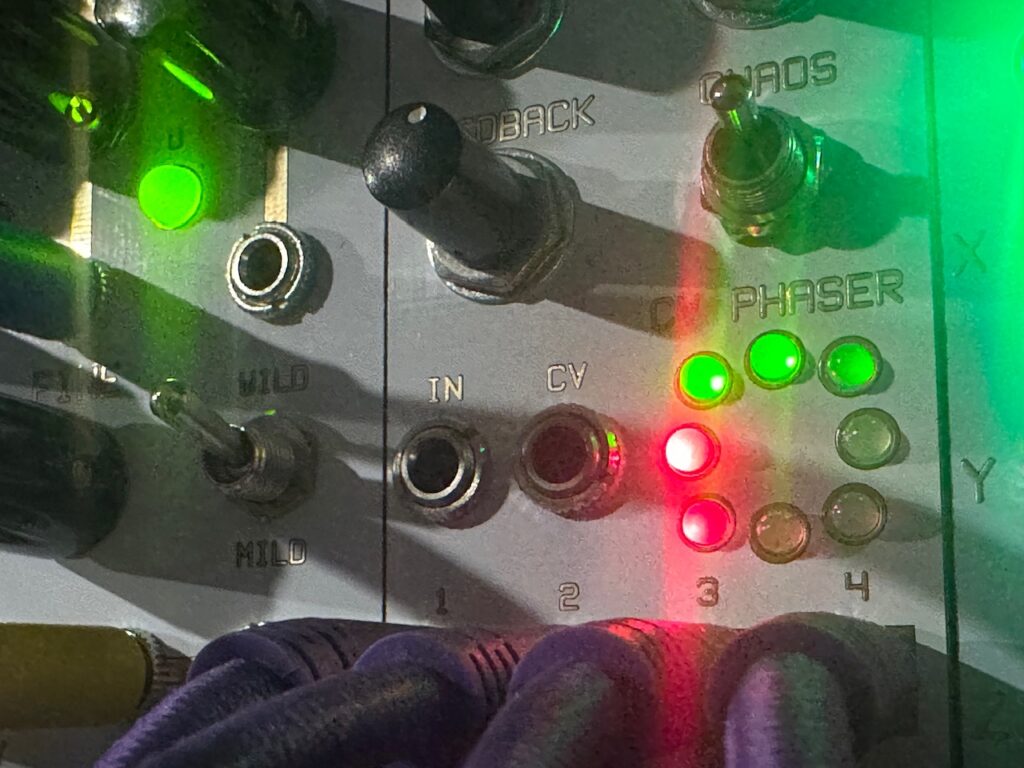
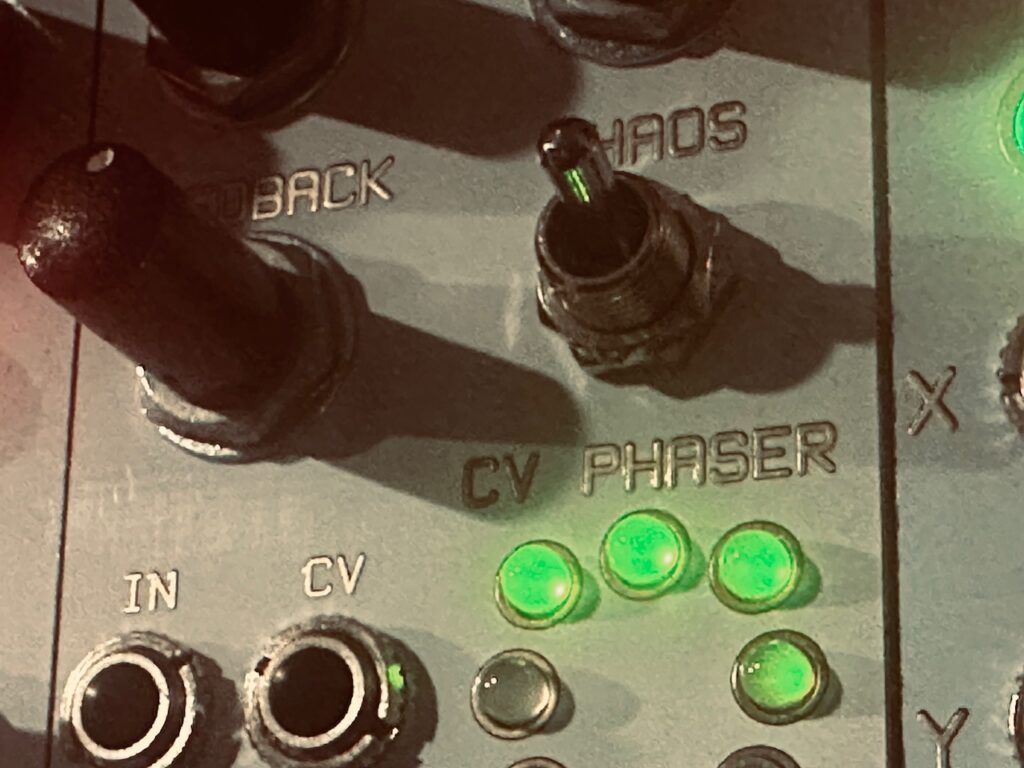
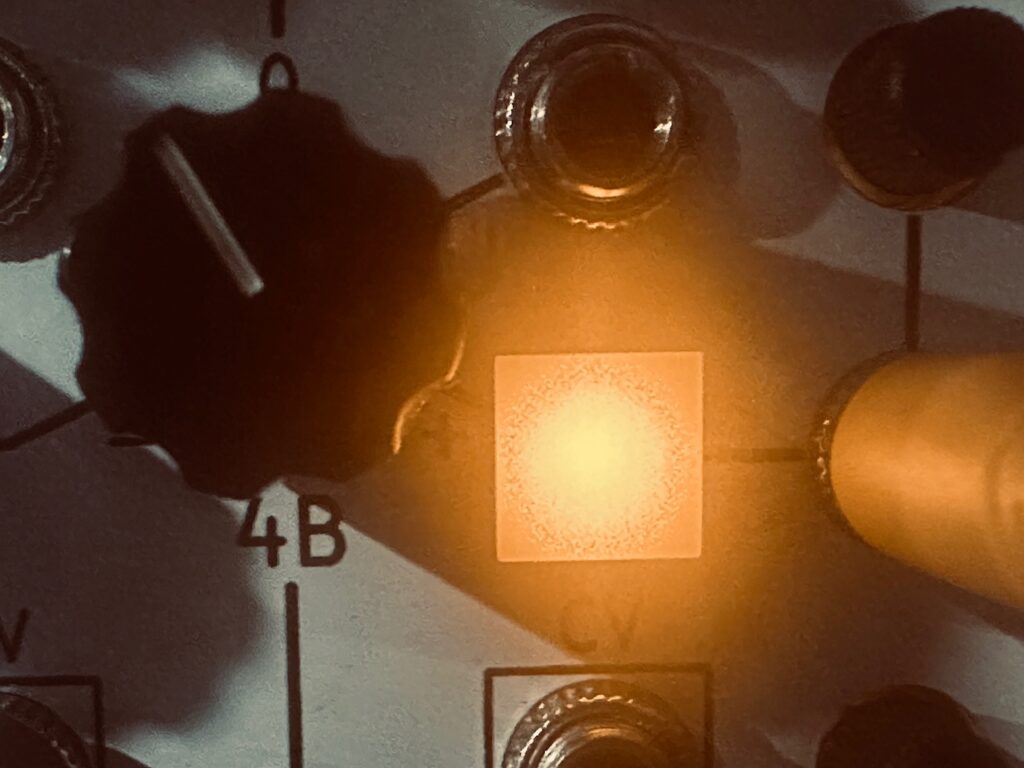
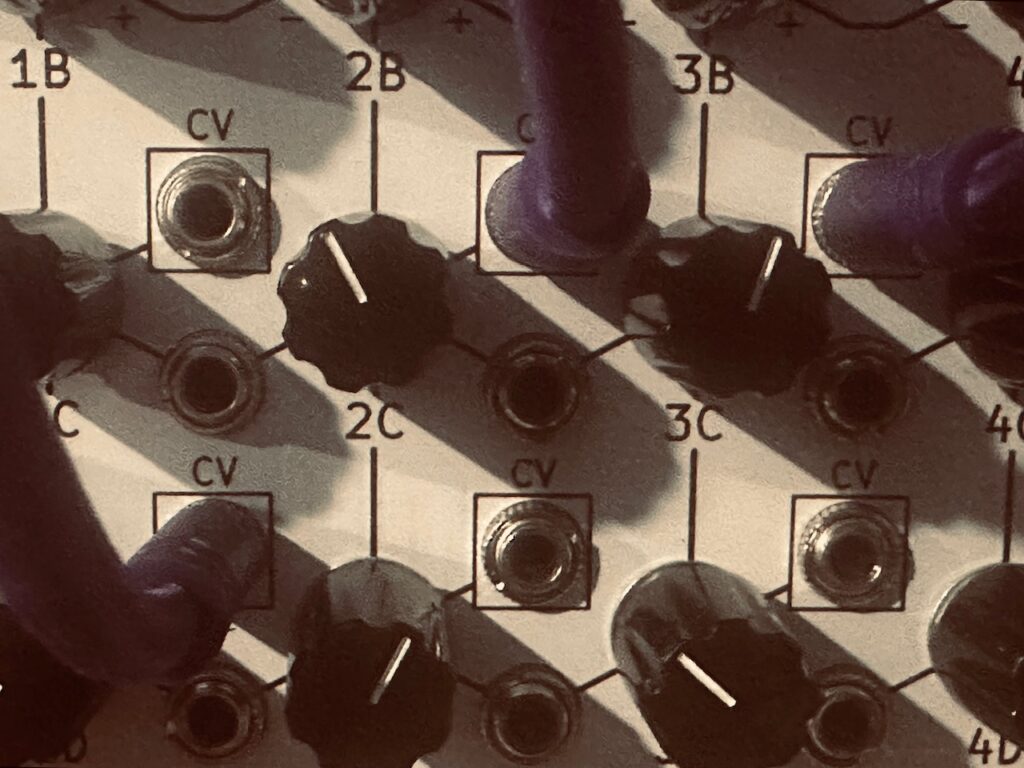
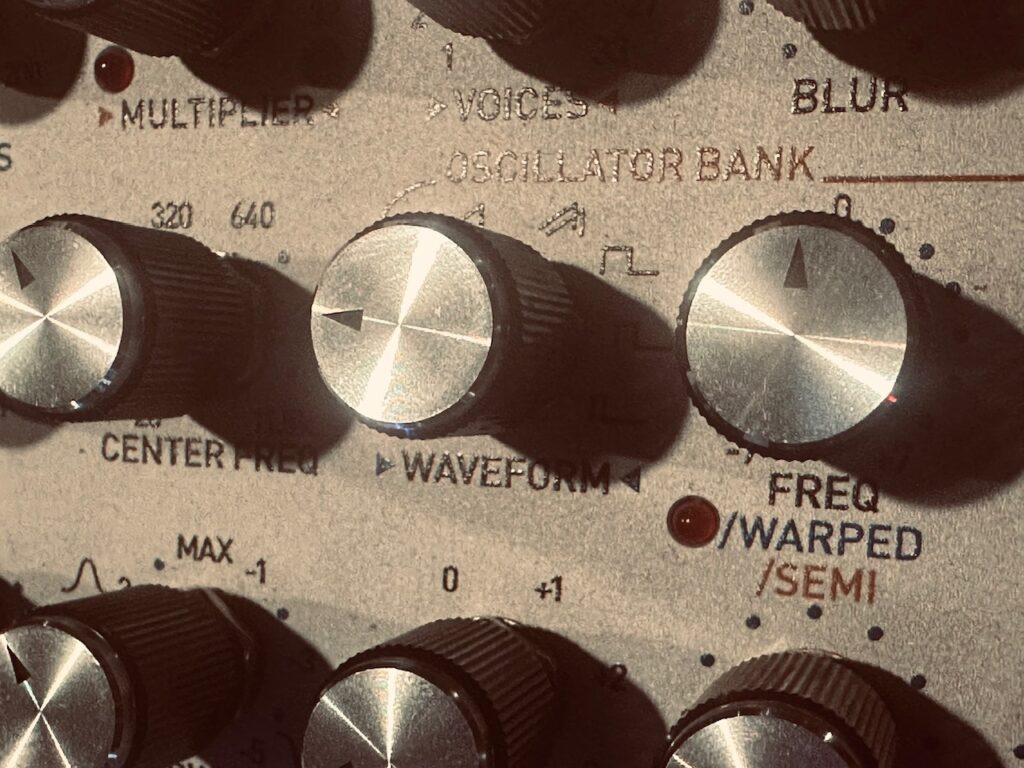
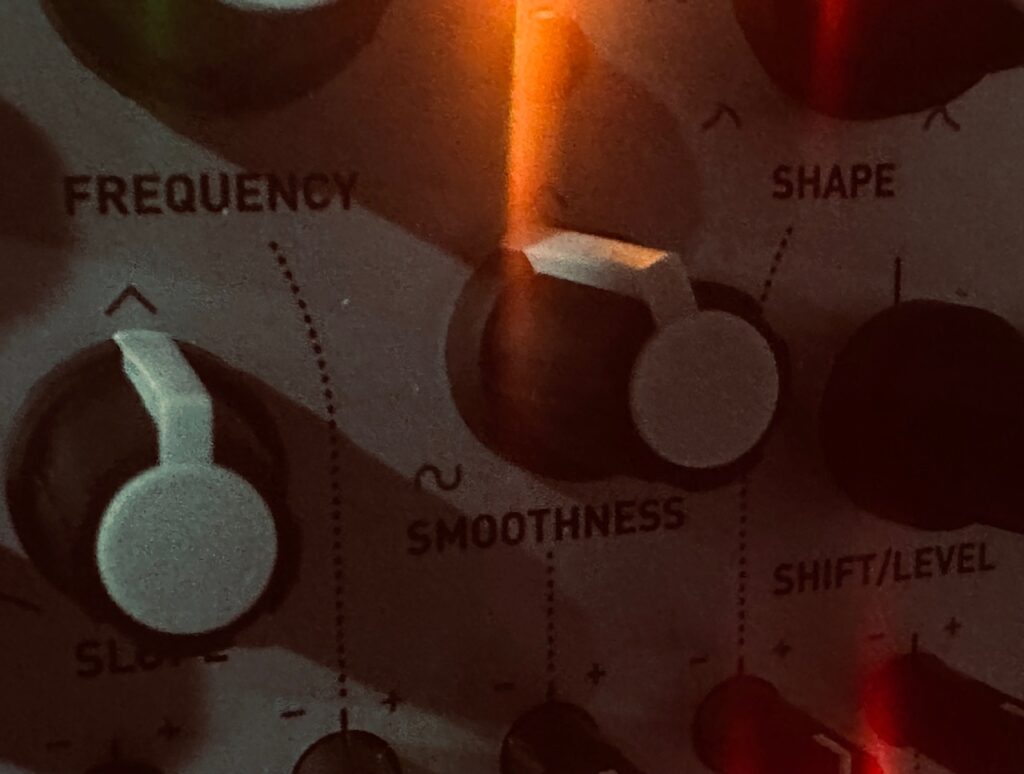
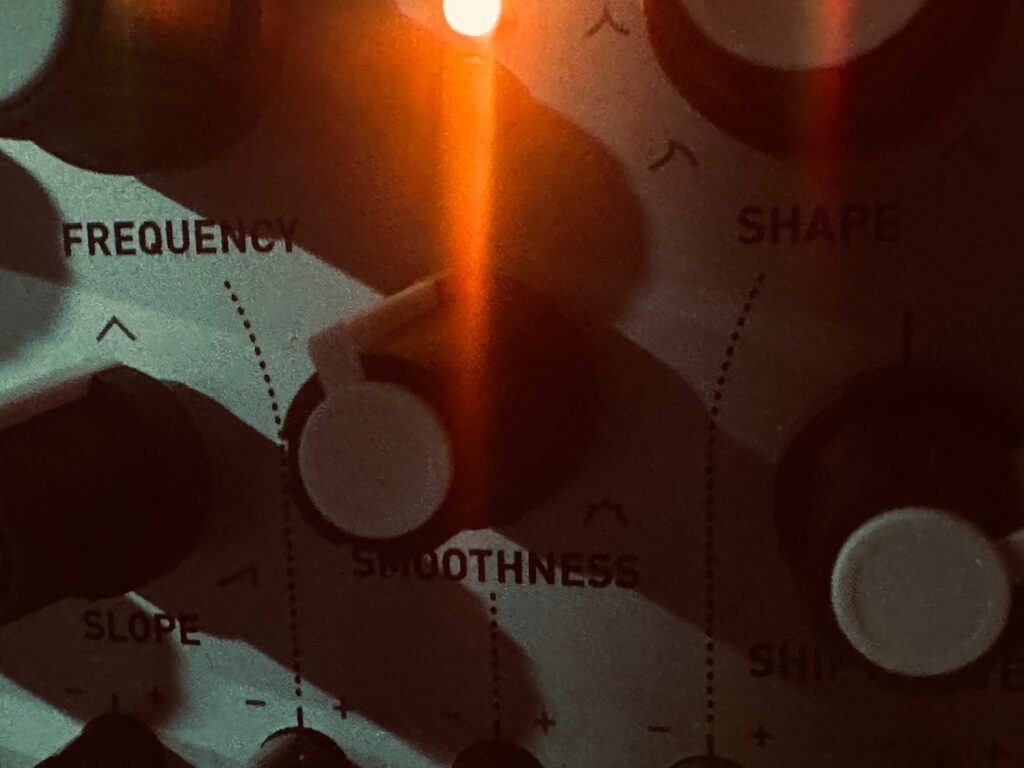
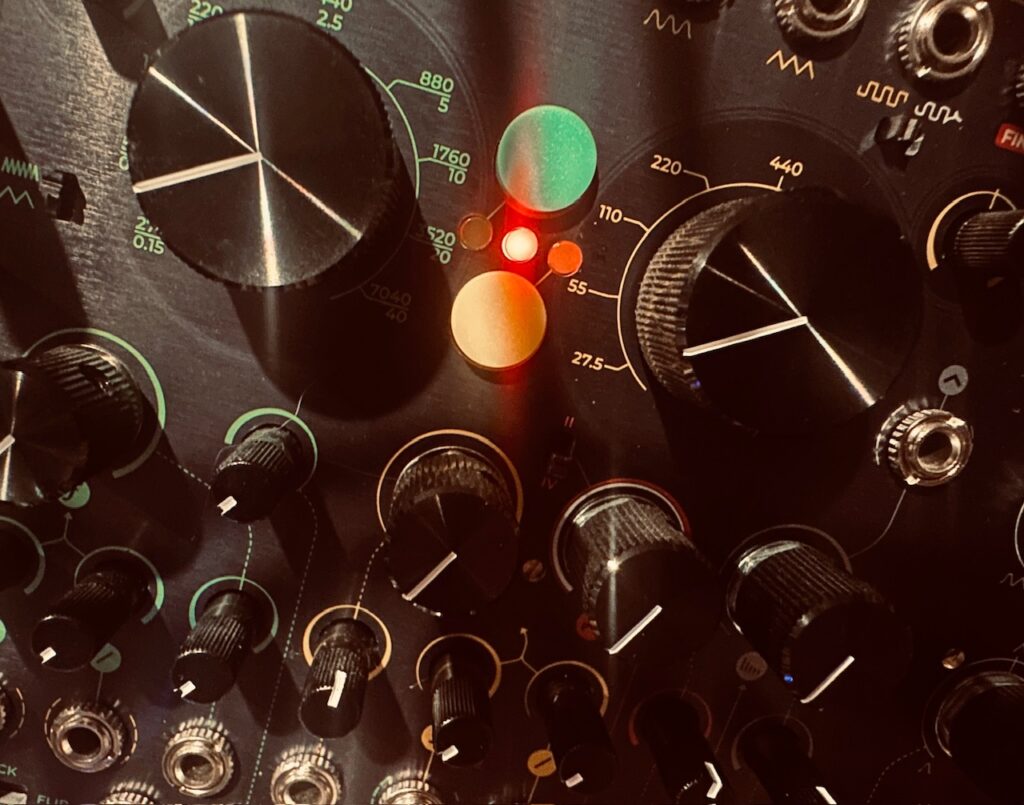
The patch starts, as many of my patches often do these days, with the Addac System Addac508 Swell Physics. Since first receiving Swell Physics many of my favorite recordings are based around it. Whether I’m using the wave outputs directly to control levels, or in conjunction with modules like the Nonlinearcircuits Numberwang and Let’s Splosh to control various facets of a patch, I’m constantly finding new ways to integrate it into my work. The four outputs were sent to an array of Intellijel Amps’ CV inputs to control the levels of four modulated outputs from the always lovely Synthesis Technology E370 quad wavetable oscillators and blue noise to simulate the spray of the ocean. Each oscillator was fed pitch information from the NOH-Modular Pianist, one note each of a D minor seventh chord (though I’ve no idea what the oscillator was tuned to). From the Amps, the mixed noise and audio outputs went to the ST Modular Sum Mix & Pan to place in the stereo field of the mix.

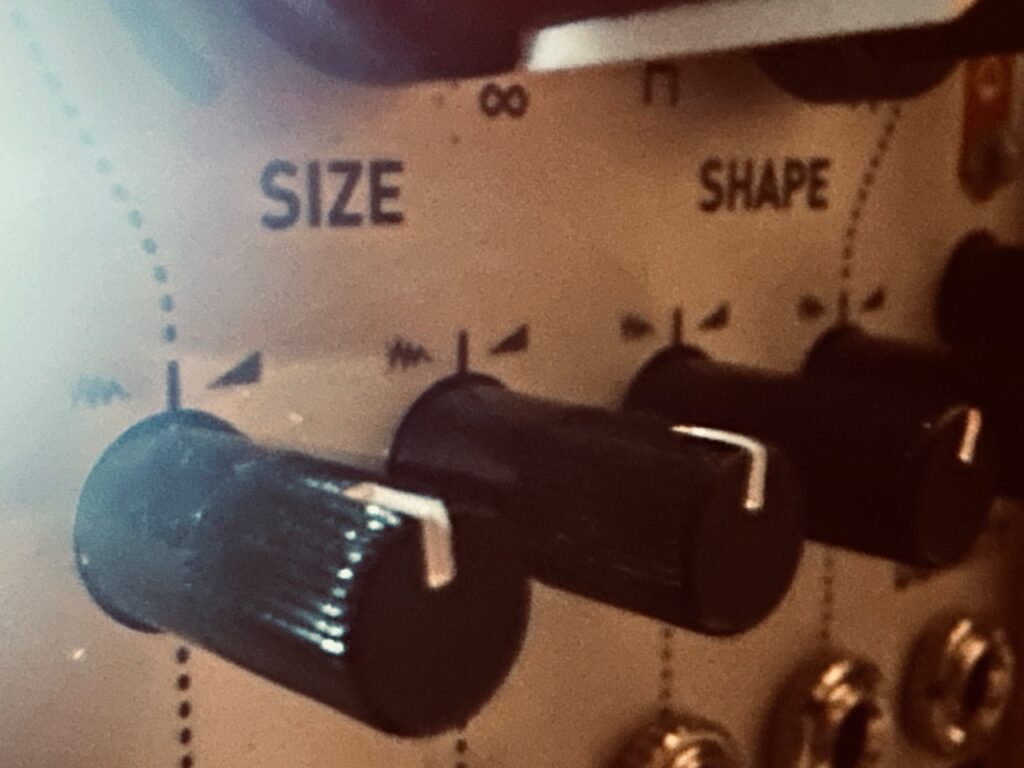
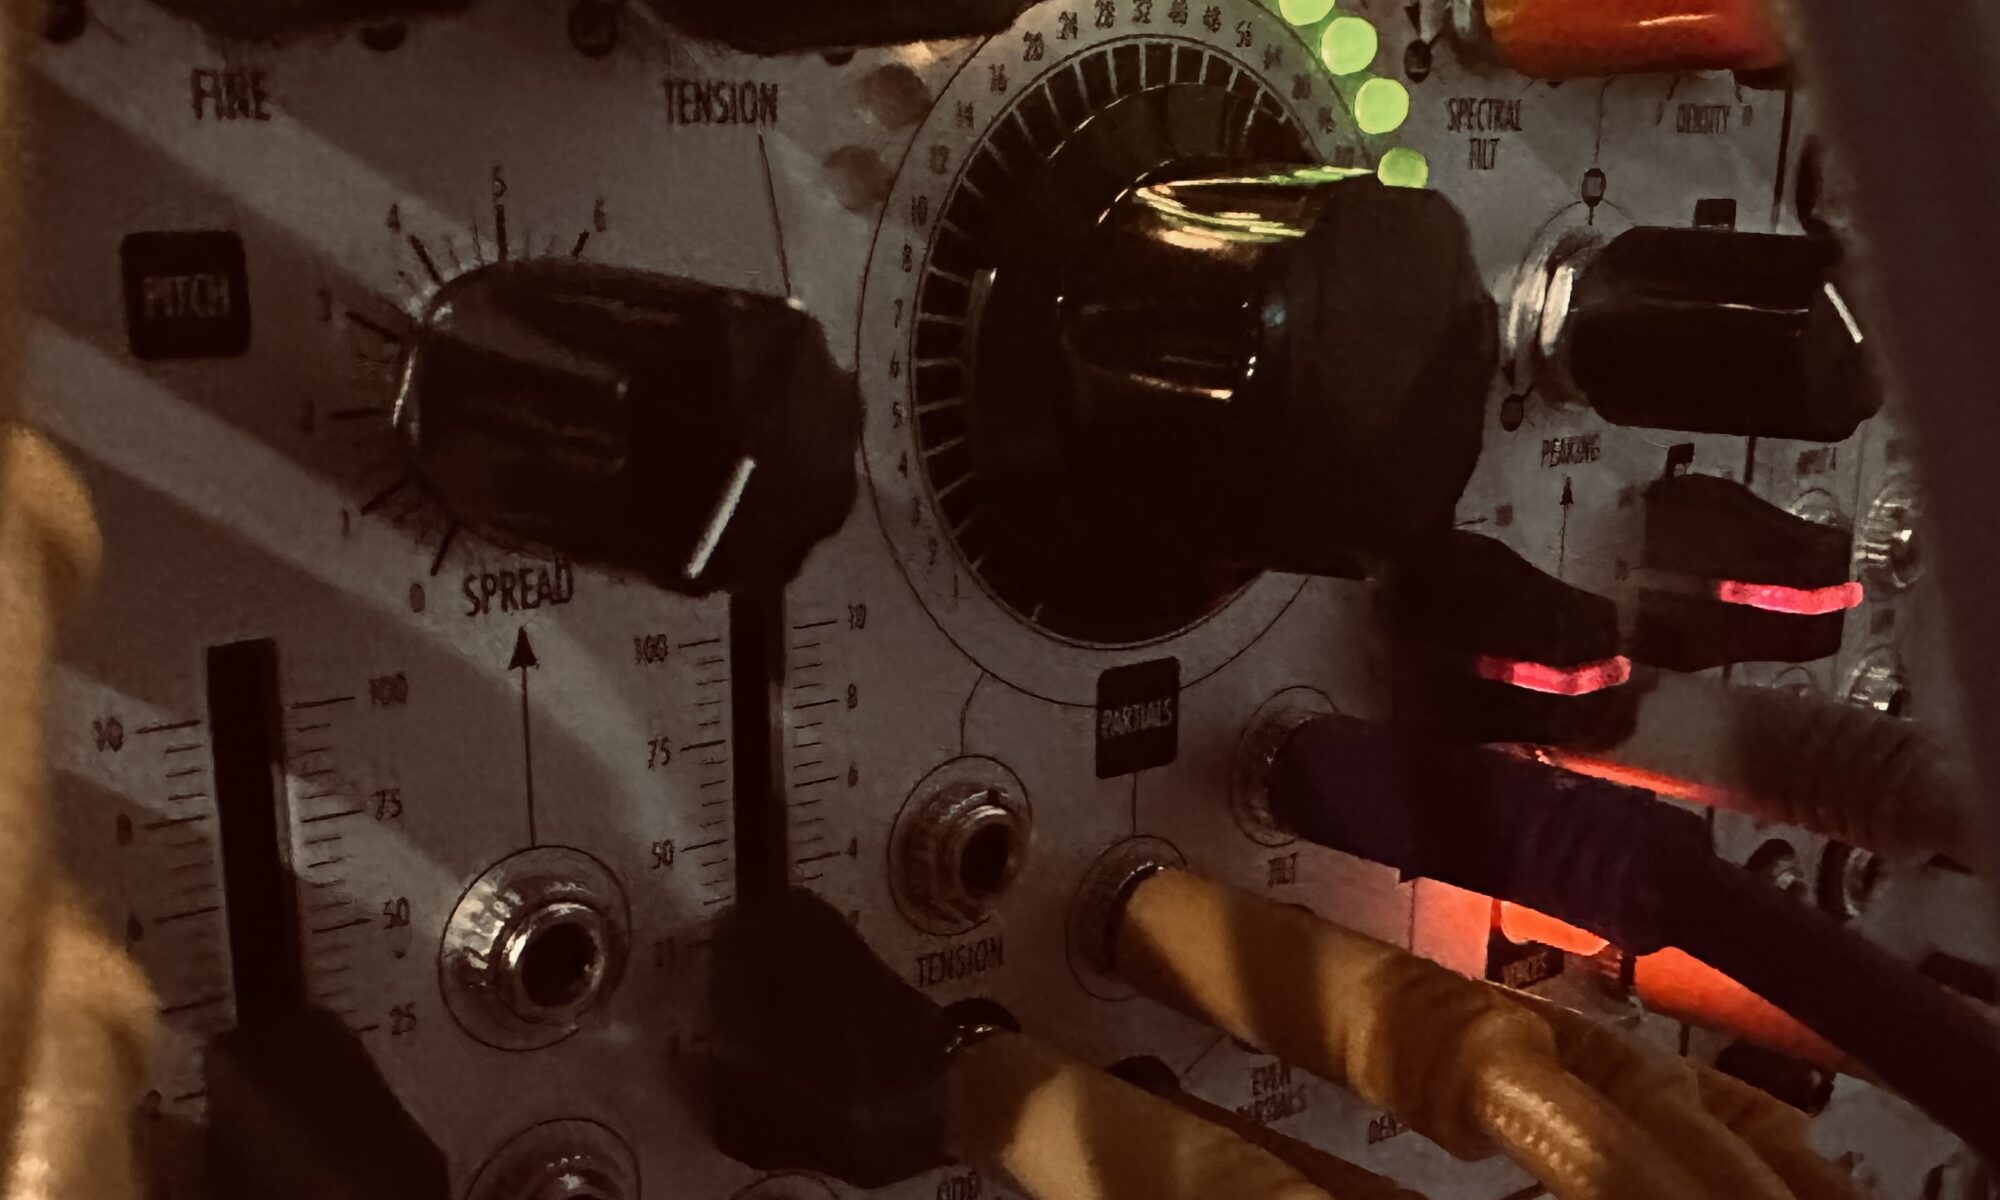
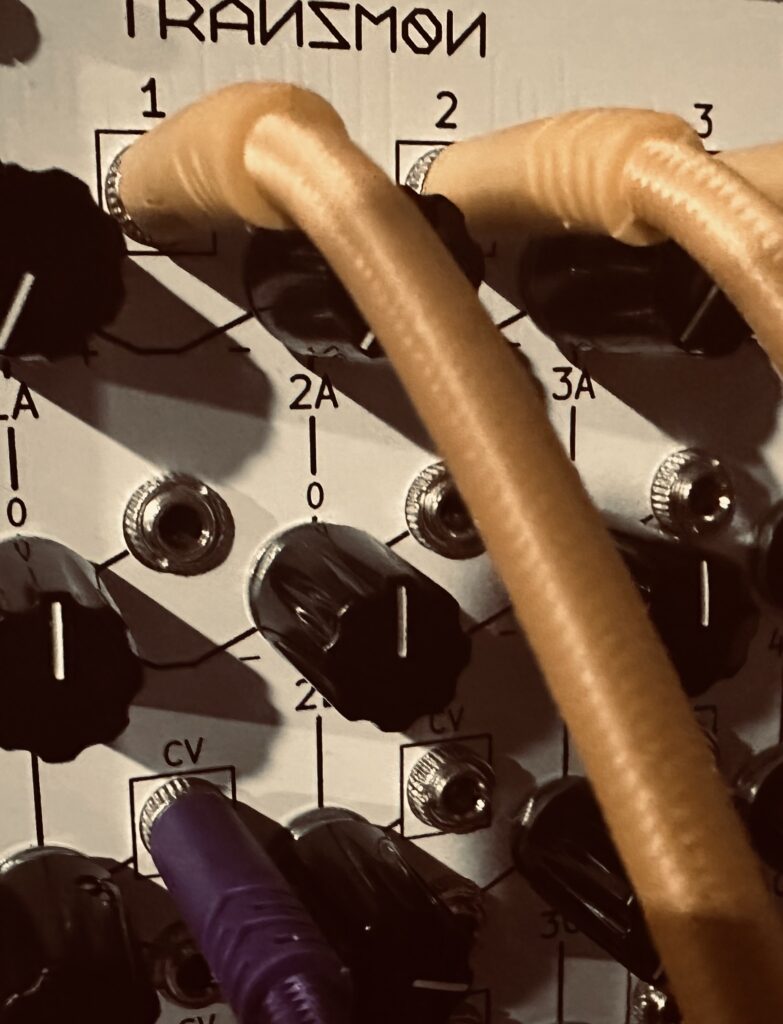
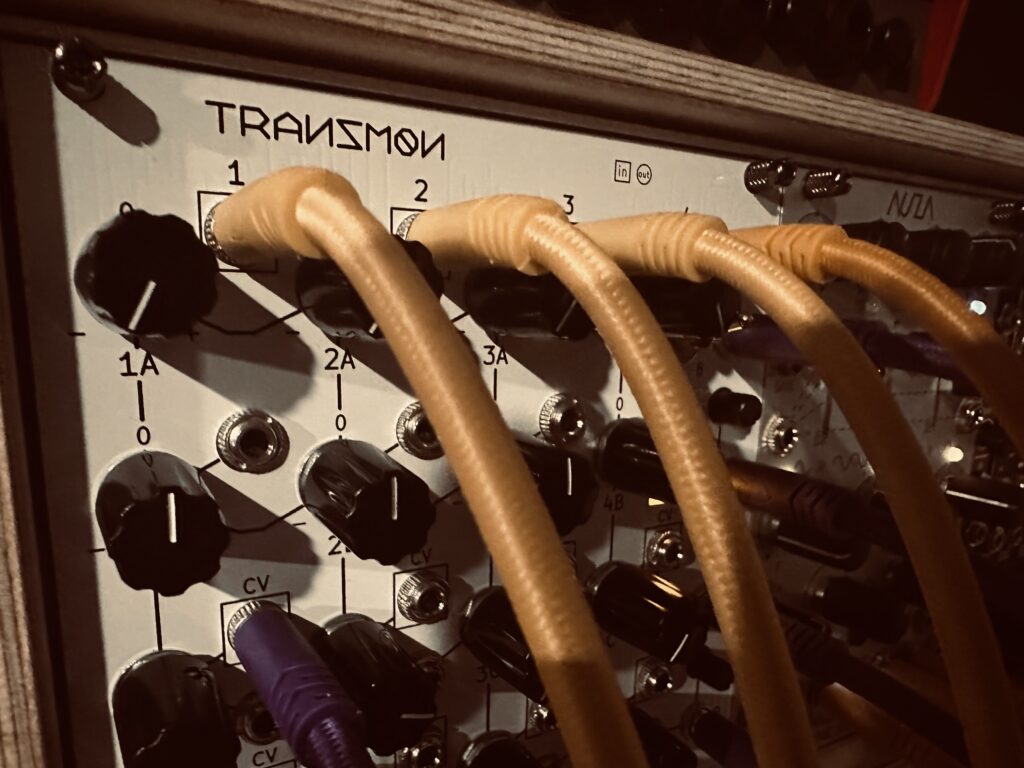
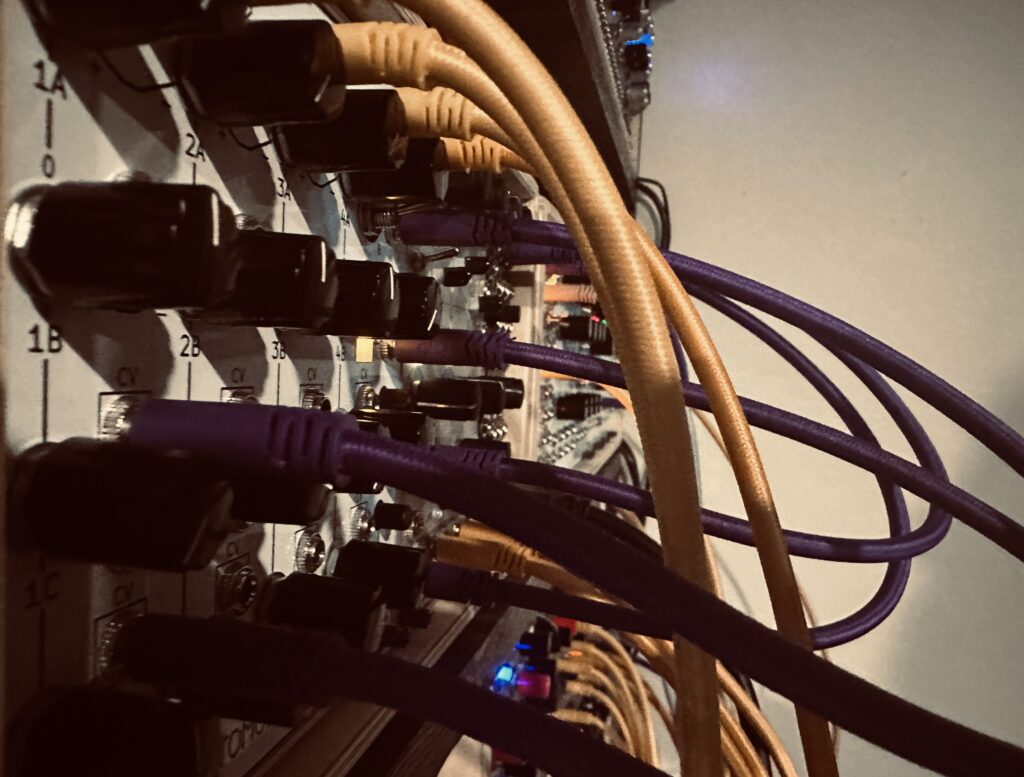
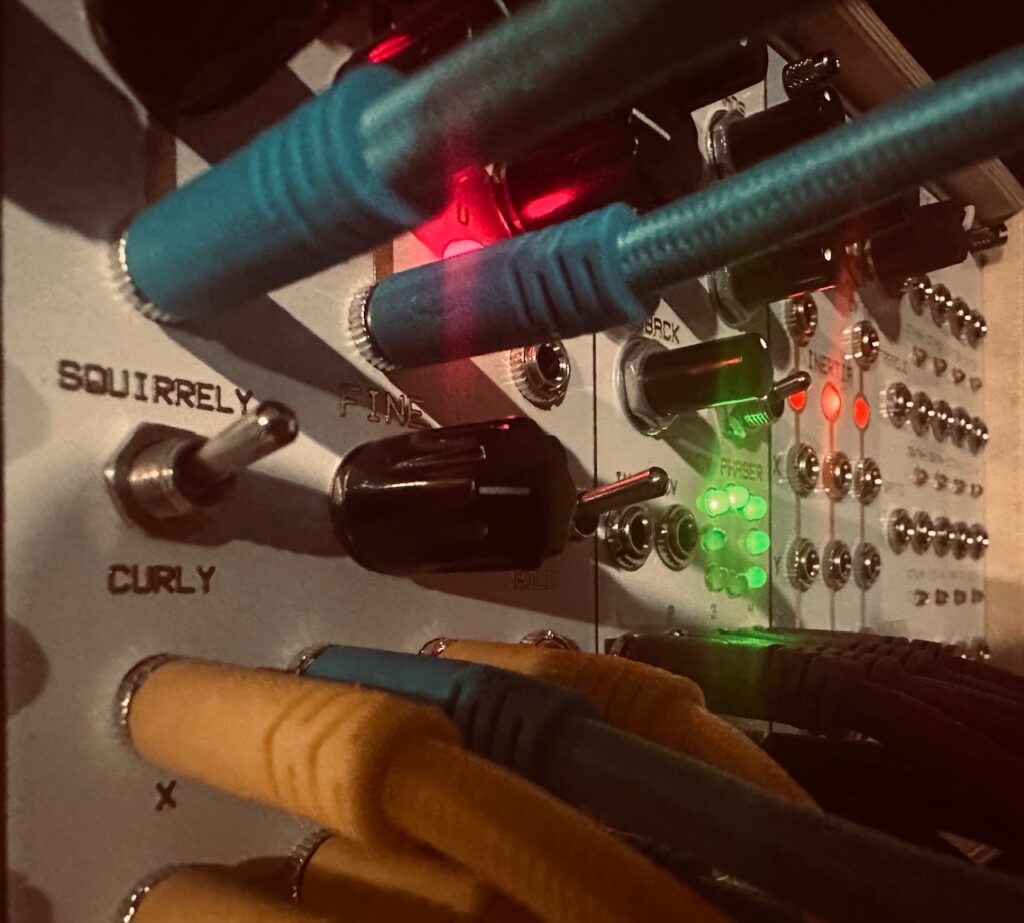
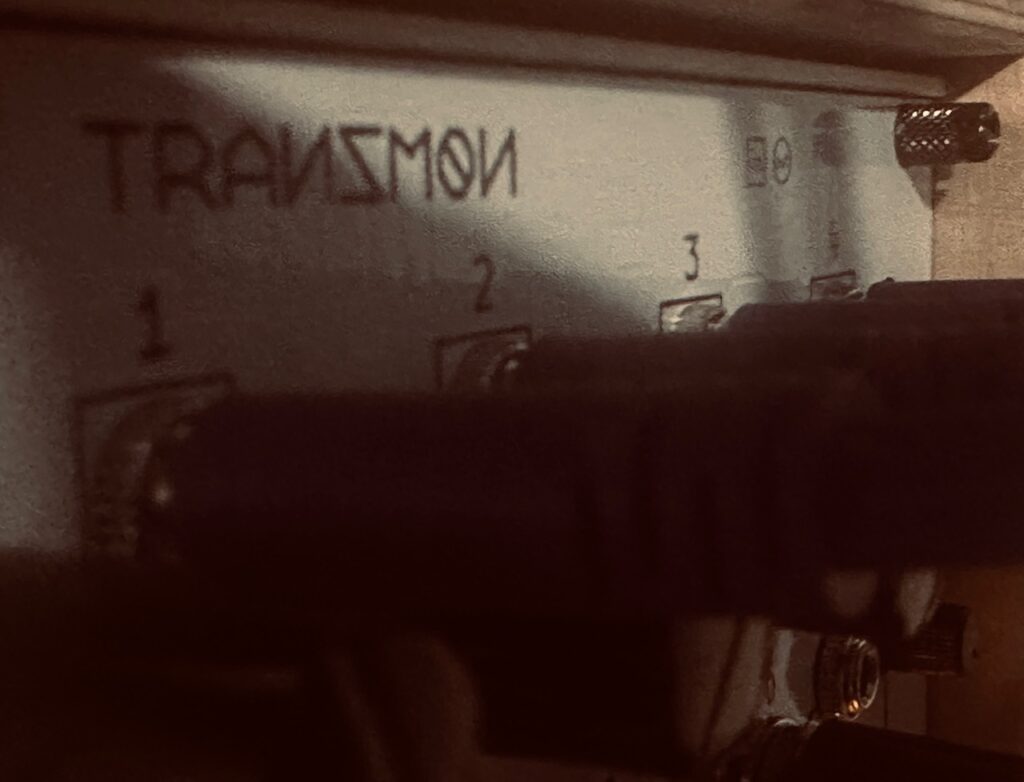
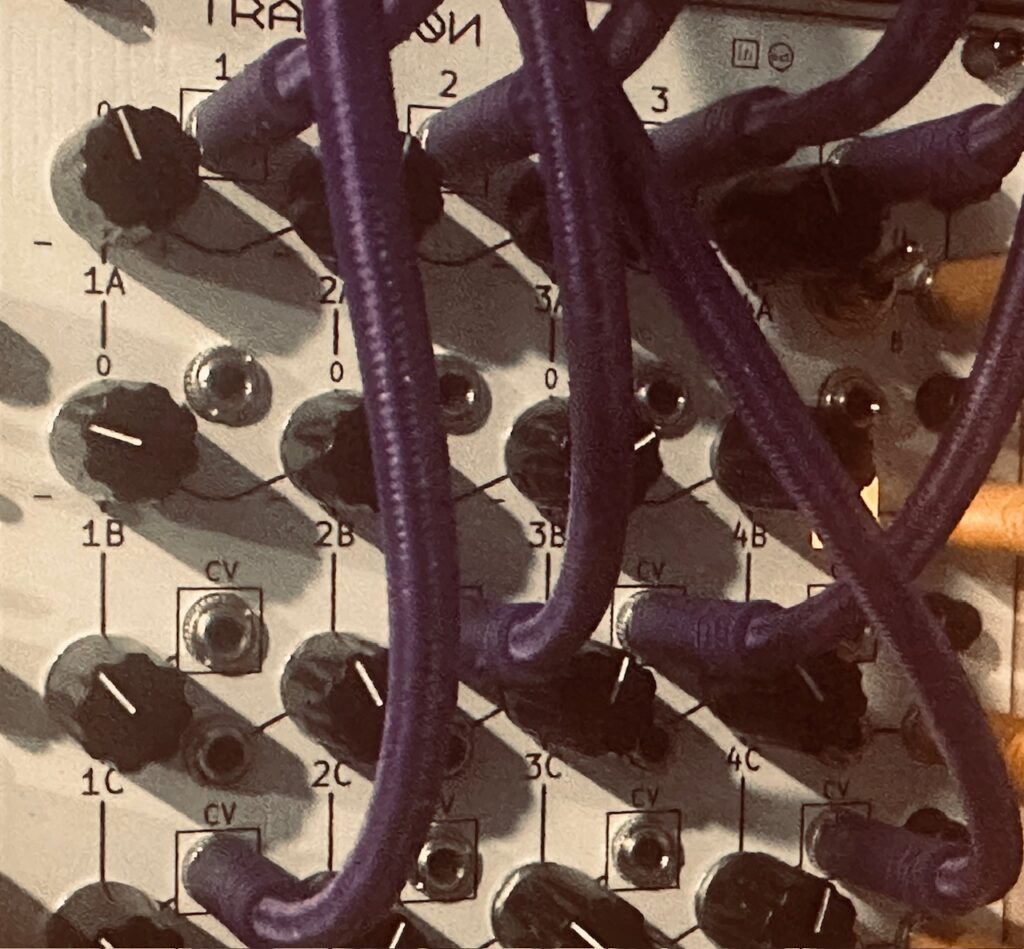
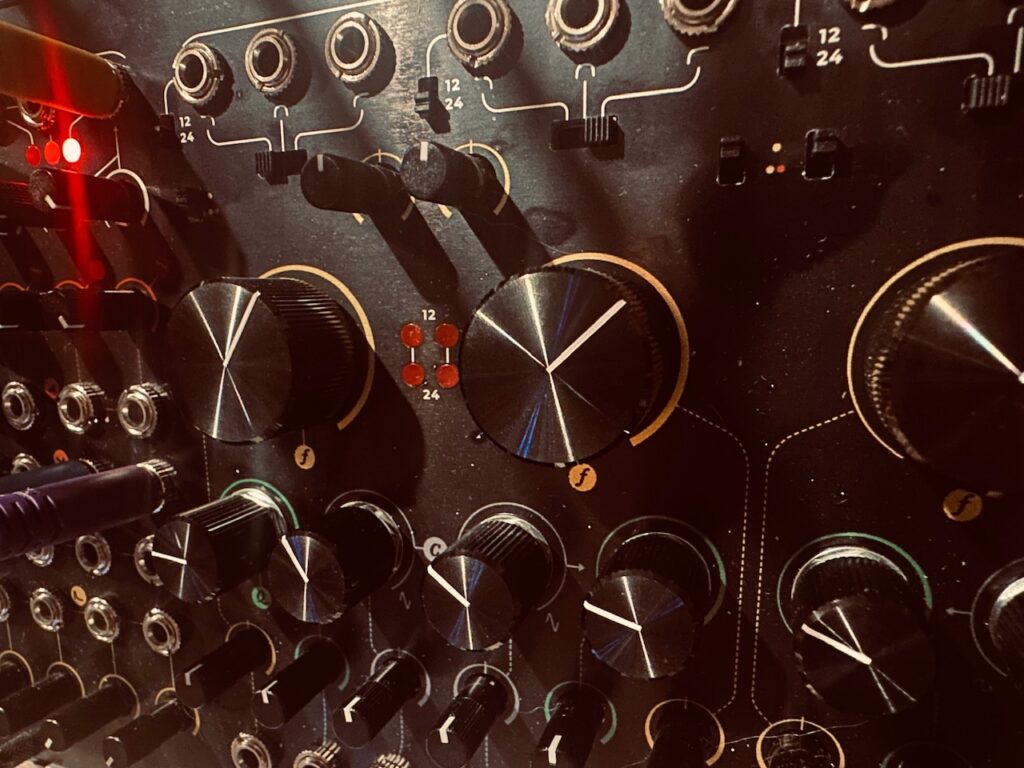
Modulation of the E370 wasn’t particularly heavy in this patch, but each oscillator’s X axis was moved around by a complex mix of CV from the Nonlinearcircuits Frisson mixed together in the Atomosynth Transmon CV controlled matrix mixer. Four randomly chosen outputs from Frisson were sent to the four inputs of the Transmon, with the other four Frisson outputs modulating four separate nodes in the mixer itself. This modulation to the E370’s X axis was at a medium slow speed and moved waves around beautifully, slowly shifting the sine wavetables.

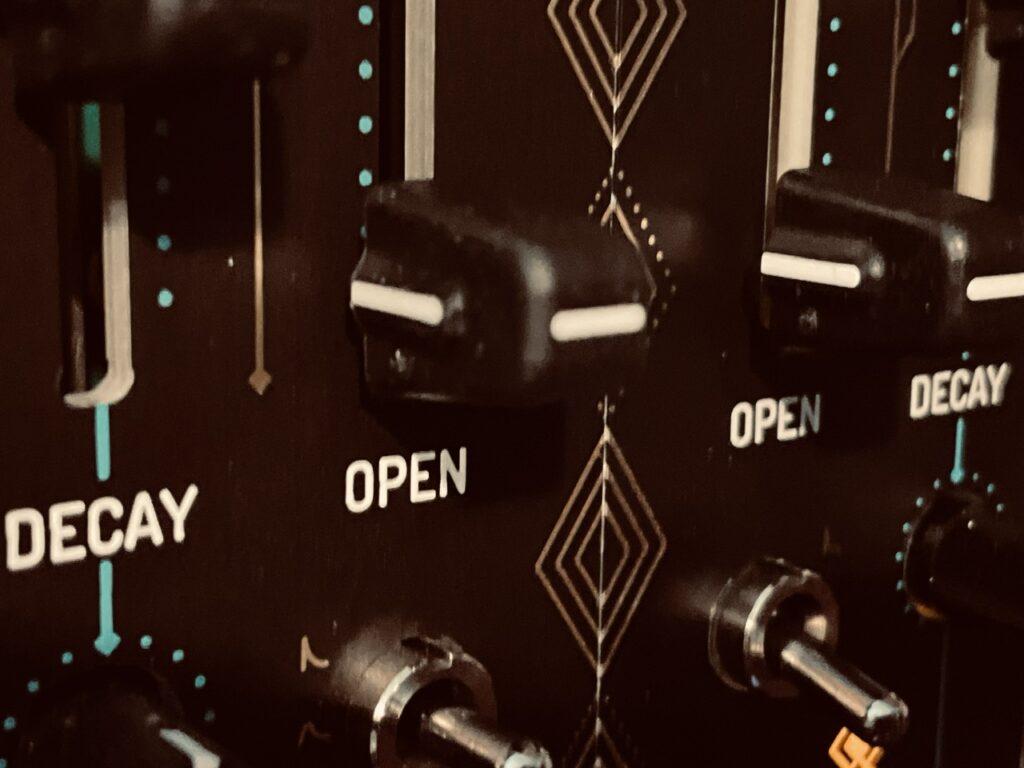
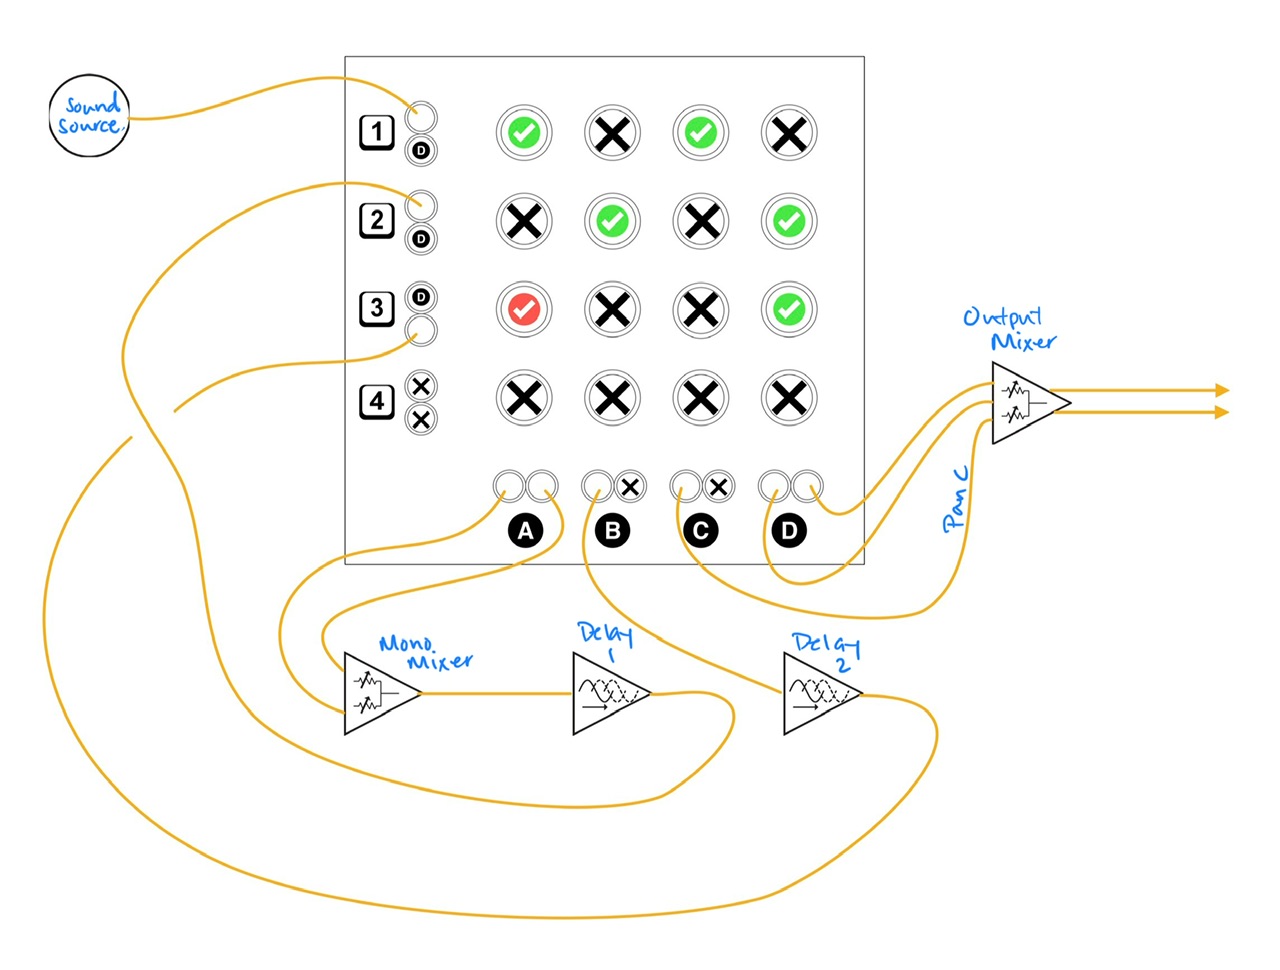
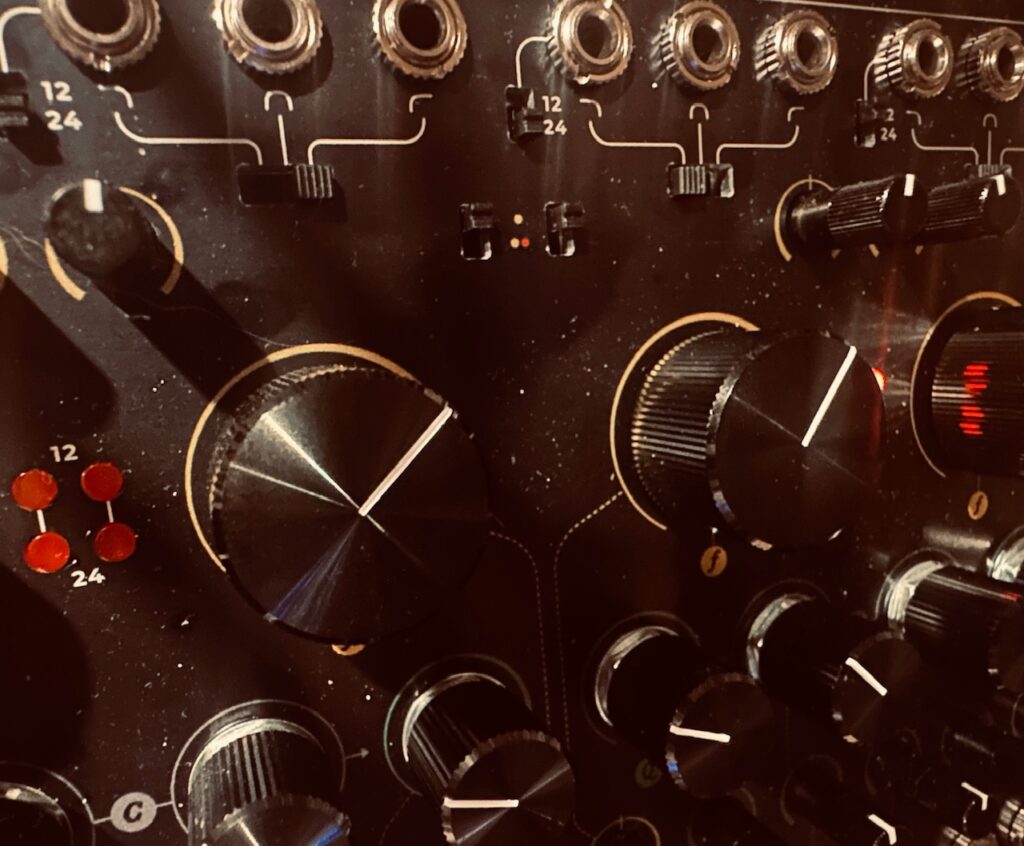
The Atomosynth Transmon is a curious module. Nominally it’s a matrix mixer, made by a very niche maker based in Lima, Peru. But this matrix mixer has several tricks up its sleeve. The first row can be used for the attenuation or attenuversion of signals, a switch controlling which mode is active. The second row can do both, and each node has an individual output. The last two rows each have a discreet VCA input per node, also with individual outputs. If one of those individual outputs is used, it’s removed from the final mix of the row. Each node can also be used as a 12V offset voltage using jumpers on the back. The Transmon is a very powerful and flexible mixer that can be used in a myriad of ways. Most often I use it for simpler mixes, or even as individual VCAs, but this patch called for going whole-hog, mixing four chaos signals, while using four of Transmon’s individual VCAs to modulate my modulation. These new modulated modulation CV mixes create all of the tonal shifts in the E370 voice as they move the sine waves through a series of notes along the X axis of the wavetable. The pitch CV being sent was constant through the recording. I could have manually tuned each oscillator to those notes and the result would have been no different.

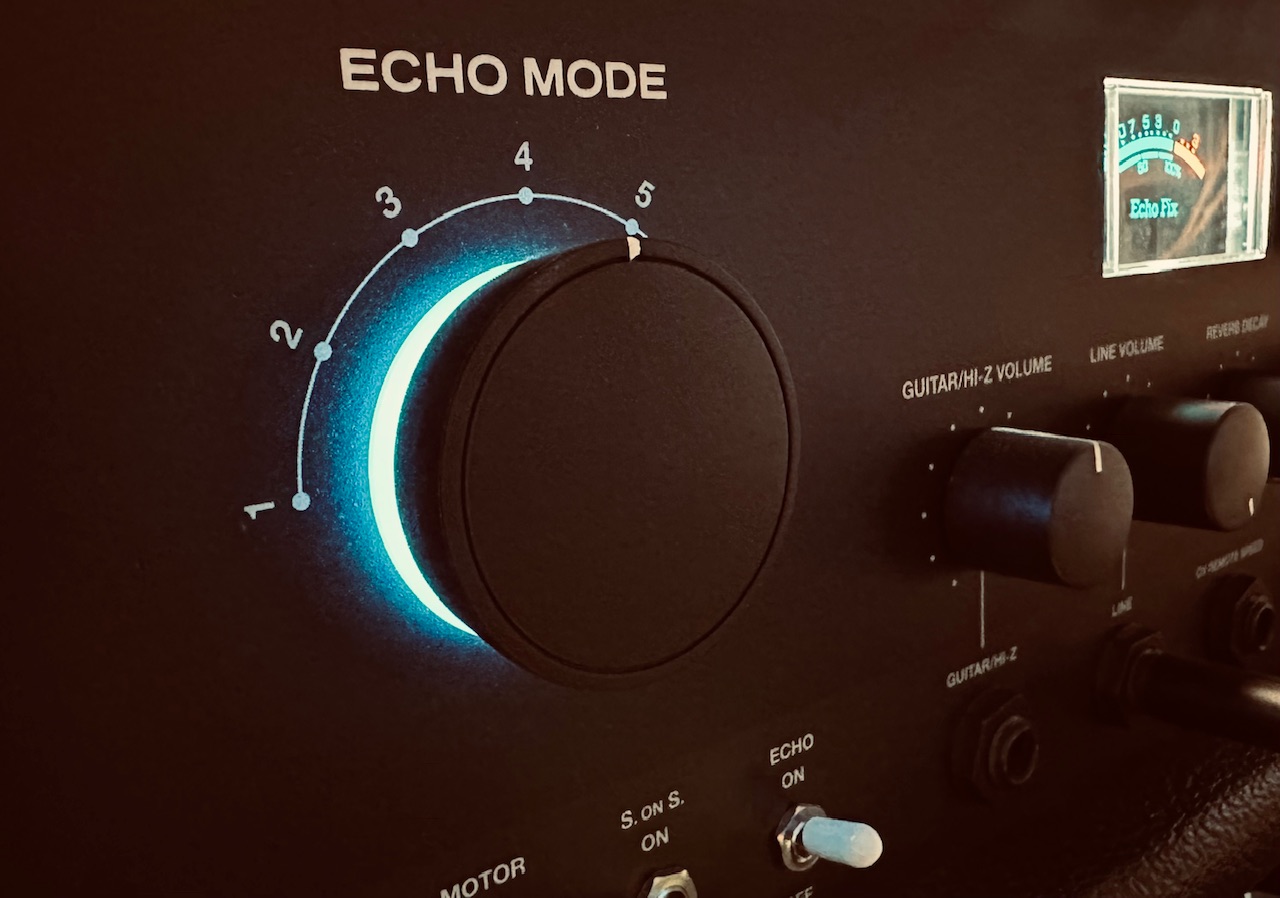
Although I was much more pleased with the result after changing wavetables, it wasn’t enough change. The original delay I had chosen for the E370, the Holocene Electronics Non-Linear Memory Machine, was no longer the best tool for the job. Although its inherent aliasing worked great with the original wavetable, I didn’t like it at all with the much cleaner waves I was using at the time. It created too choppy a repeat, even with some diffusion and without pitch shifting. So I switched over to the very clean Olivia Artz Modular Time Machine, which worked a treat. With a medium length delay time, notes were lengthened and it gave the overall sound a bit of thickness, even if I didn’t pay much attenuation to how I set up each tap.

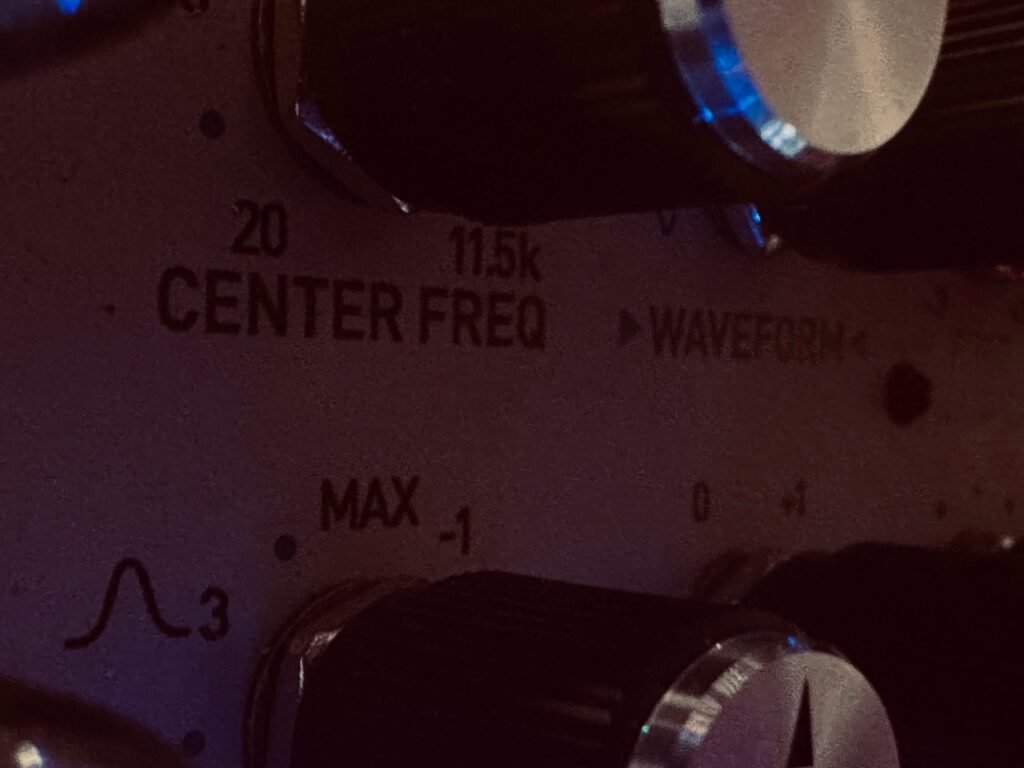
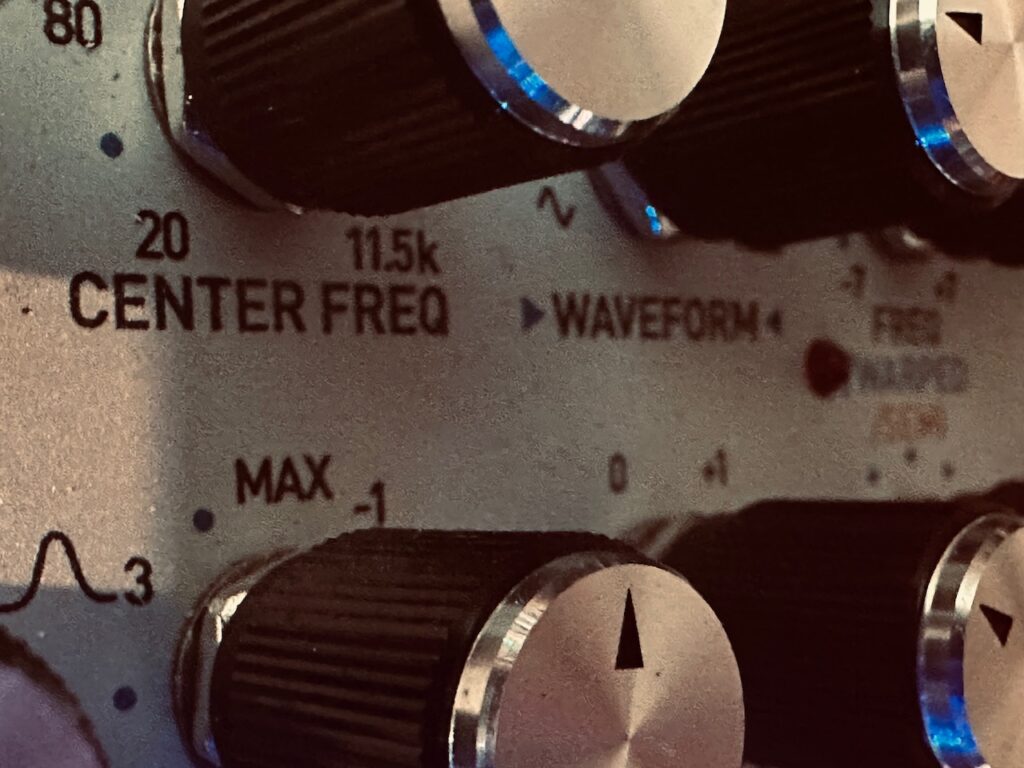
With the primary voice more-or-less set, it was time to fill in the cracks. The flowing waves of the E370-plus-noise mix with its delay and some reverb were beautiful, but lonely. It was heavy on high(er) pitches, and I wanted to add a bit of body to it. In comes Panharmonium. Though it’s highly capable, I very rarely use Panharmonium as a main voice. But I use it all the time as a supplement to the primary voice as a means of reinforcement, most often shifting the pitch in one direction or another so that various frequency ranges are represented. In this patch I initially went with a two octave downward shift. It was deep, but not overpowering, in a beautiful way, though there was simply too much that wasn’t being heard at all because the frequencies were just too low, which too often caused a flutter that sounded like clipping. No good. So I compromised by going down only one octave, (introduced at 1:15), which transmogrified the audio into a warm bath. I don’t normally modulate Panharmonium, I haven’t found it needed, but for this patch I decided to use offset and attenuated versions of the Swell Physics Average output to modulate both the Center Frequency and Bandwidth, which created a slight swirl in the output which added texture.

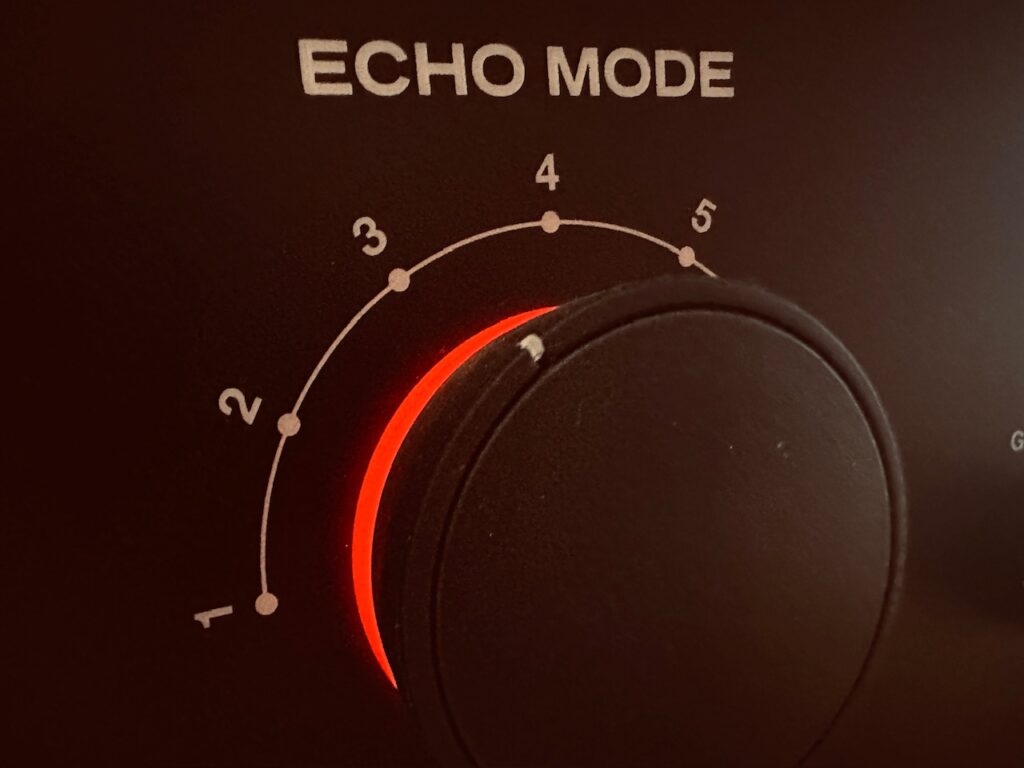
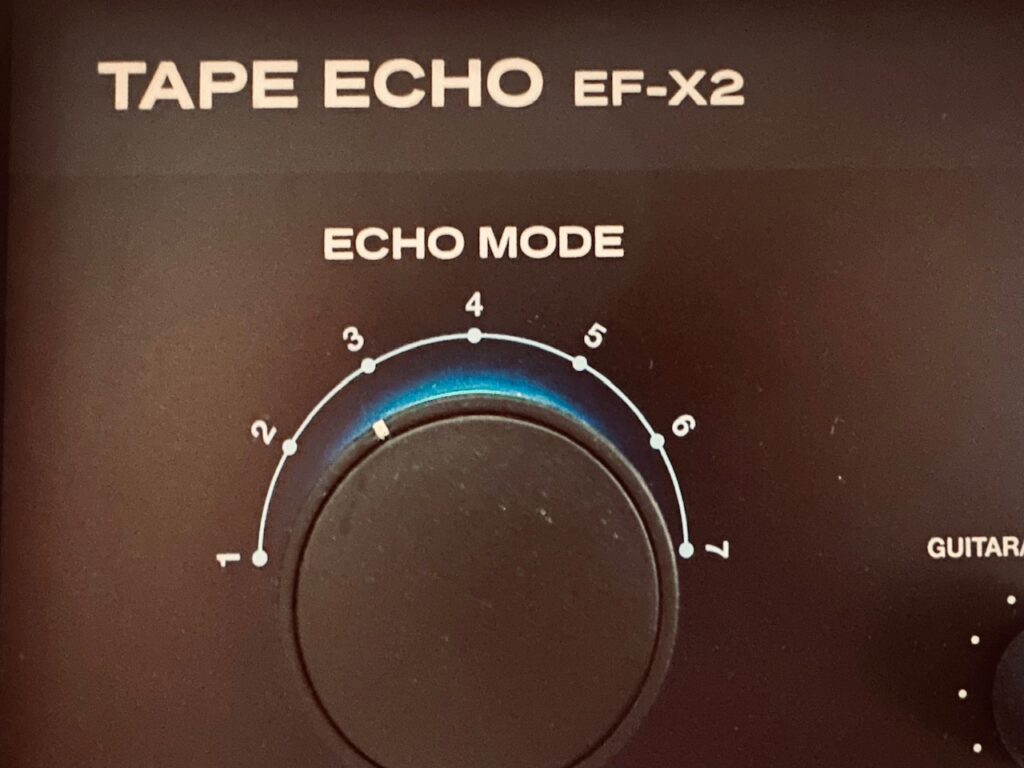
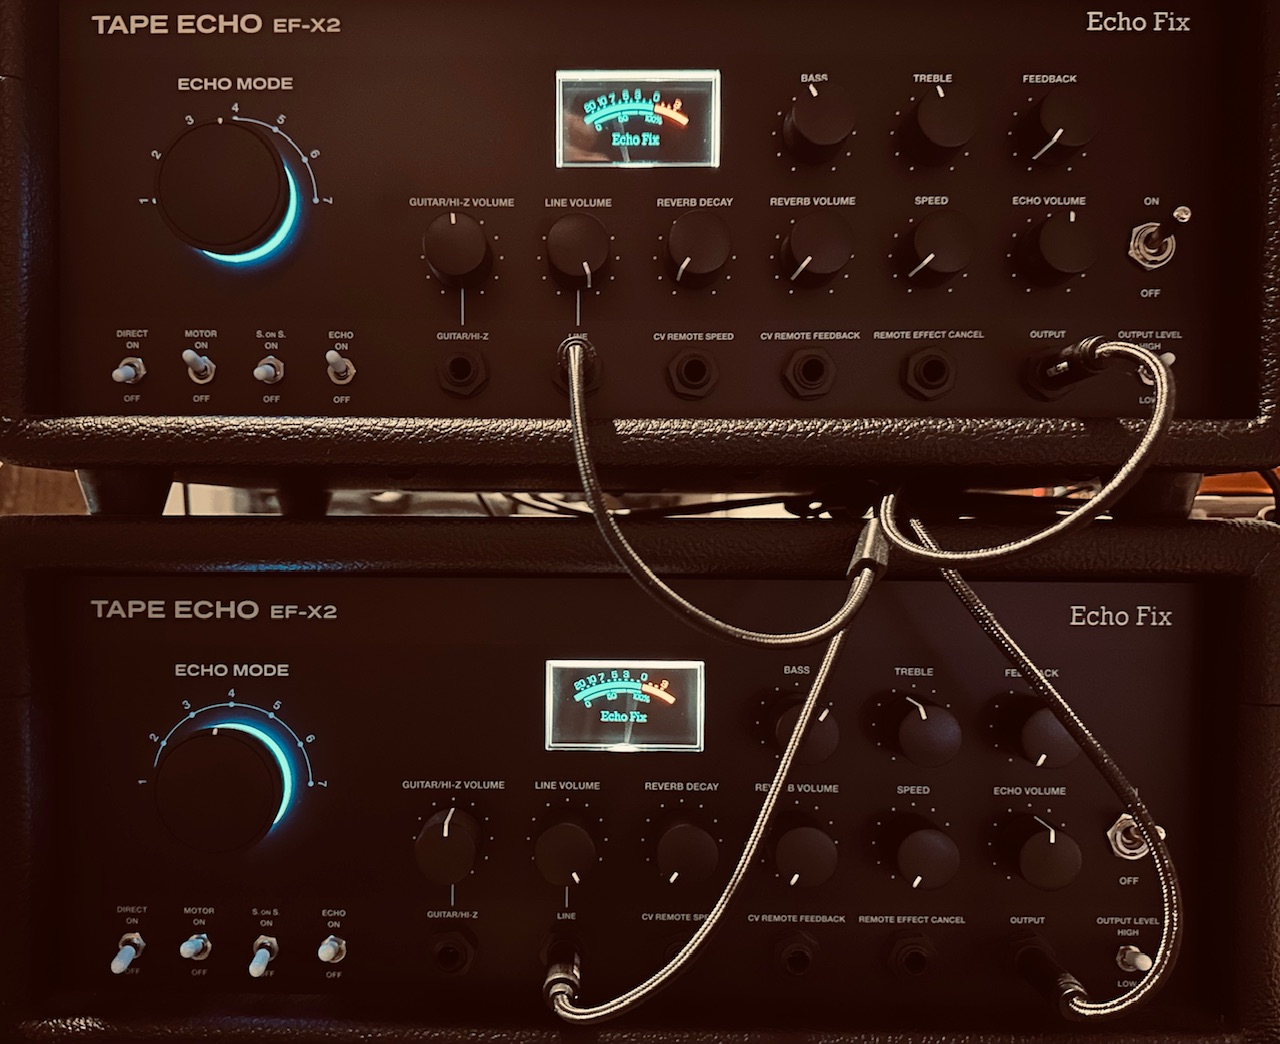
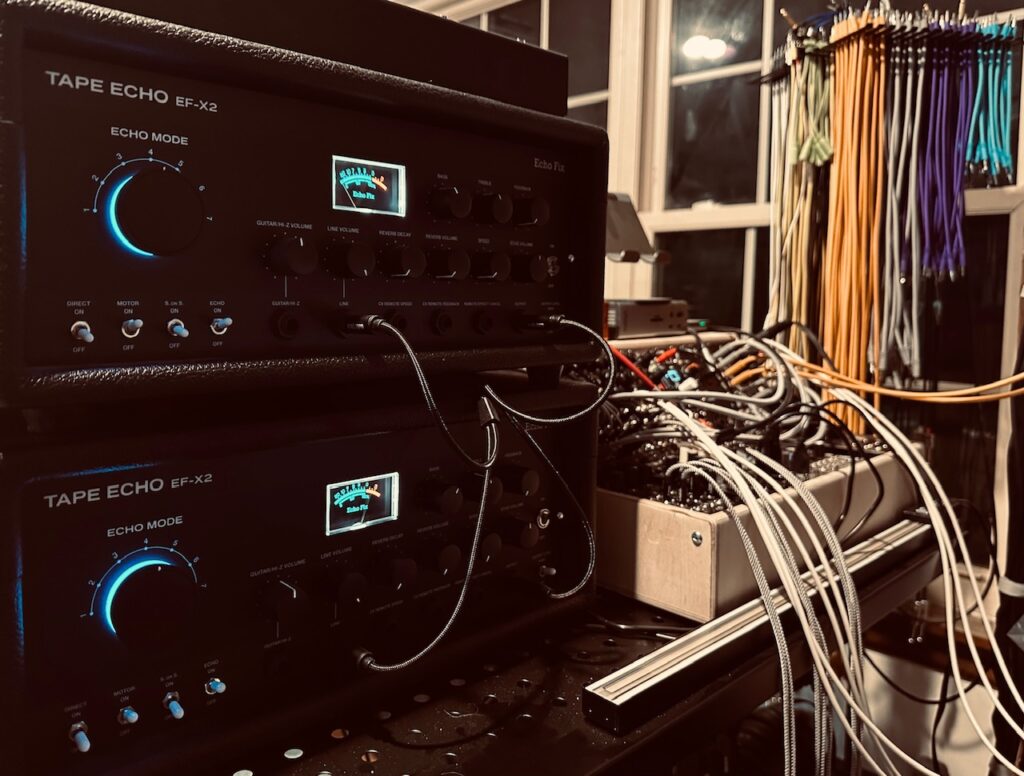
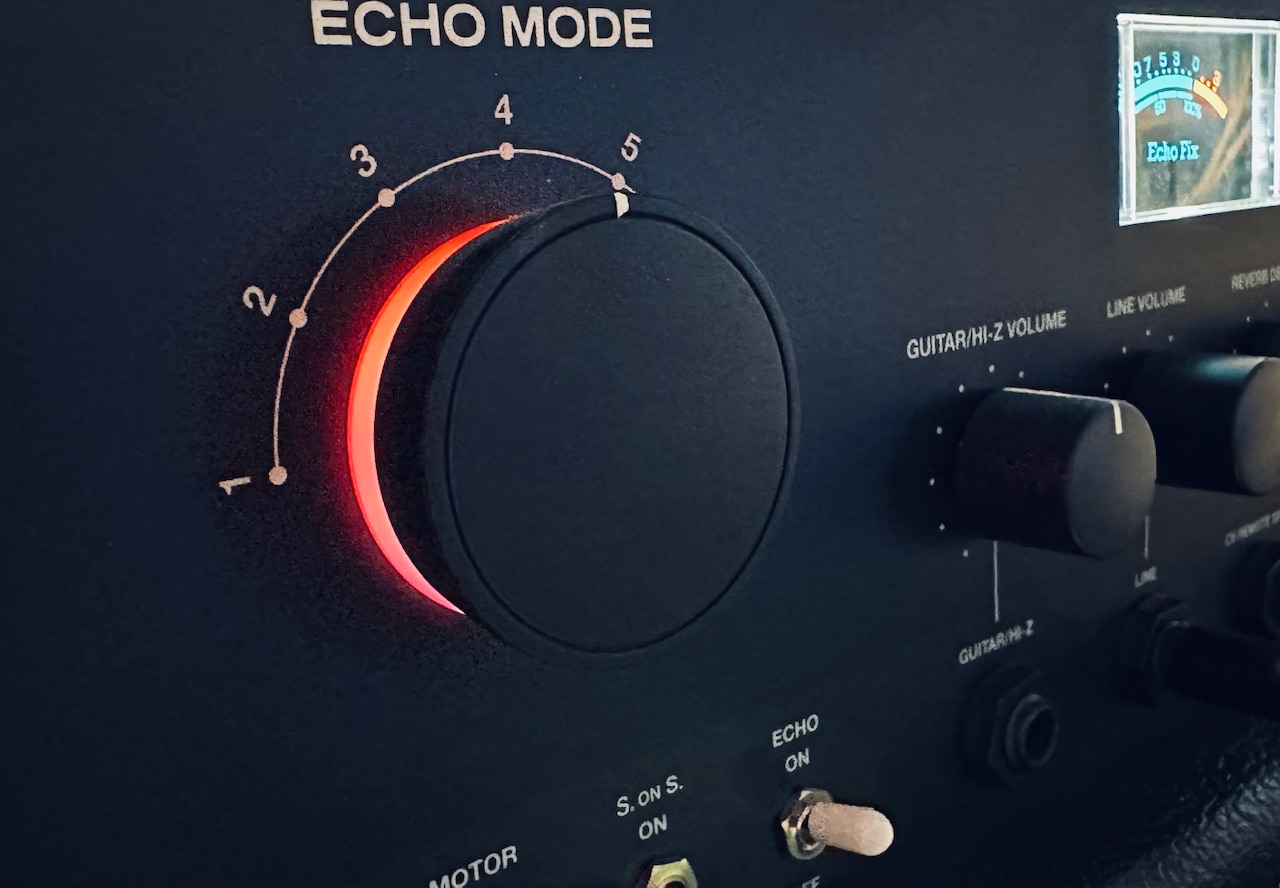
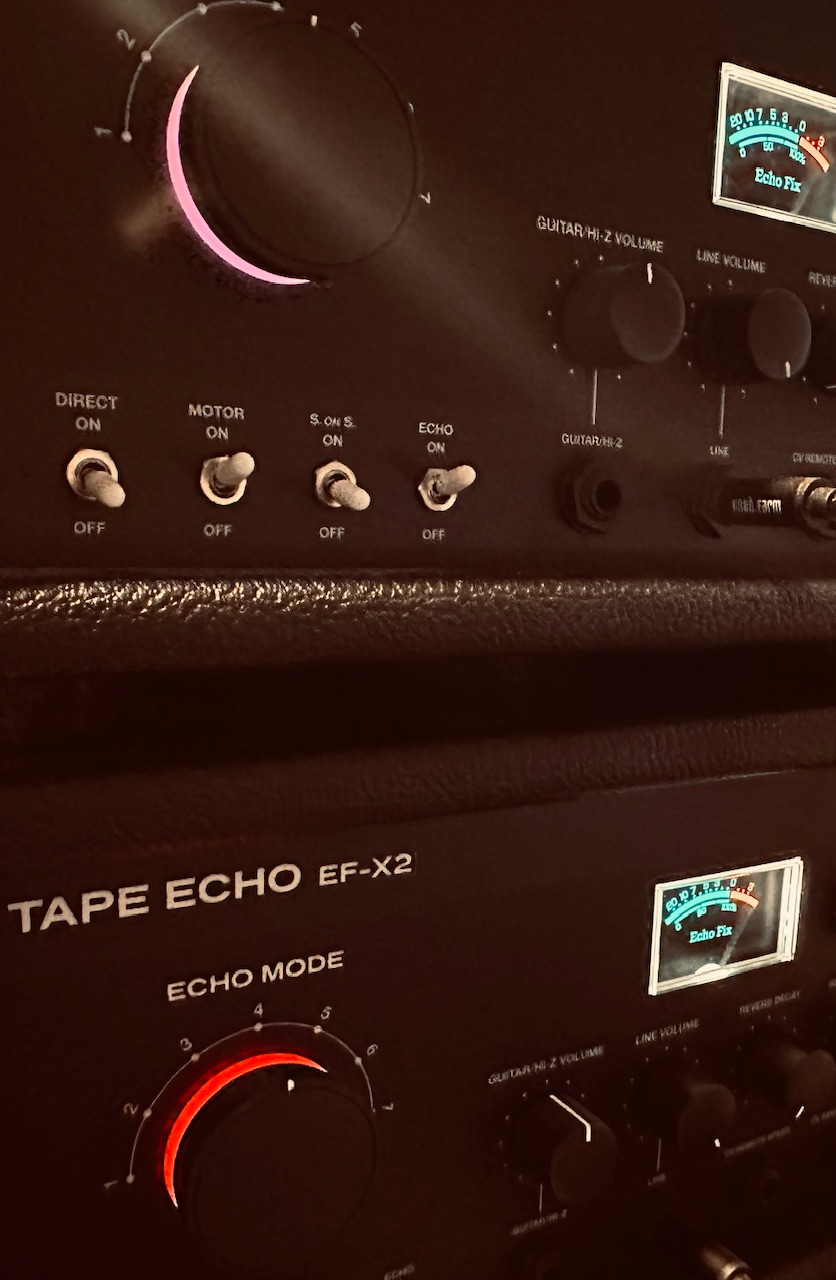
But I didn’t stop there. The Panharmonium voice was beautiful, but it needed delay for a bit of thickness of its own, so I sent its output to a pair of very slightly driven Echofix EF-X2s, with its speed lightly modulated by a triangle wave from a Frap Tools Falistri, giving it a hint of vibrato in the delay tails. The offset delays helped create a beautiful stereo image, and added a slight bit of focus.

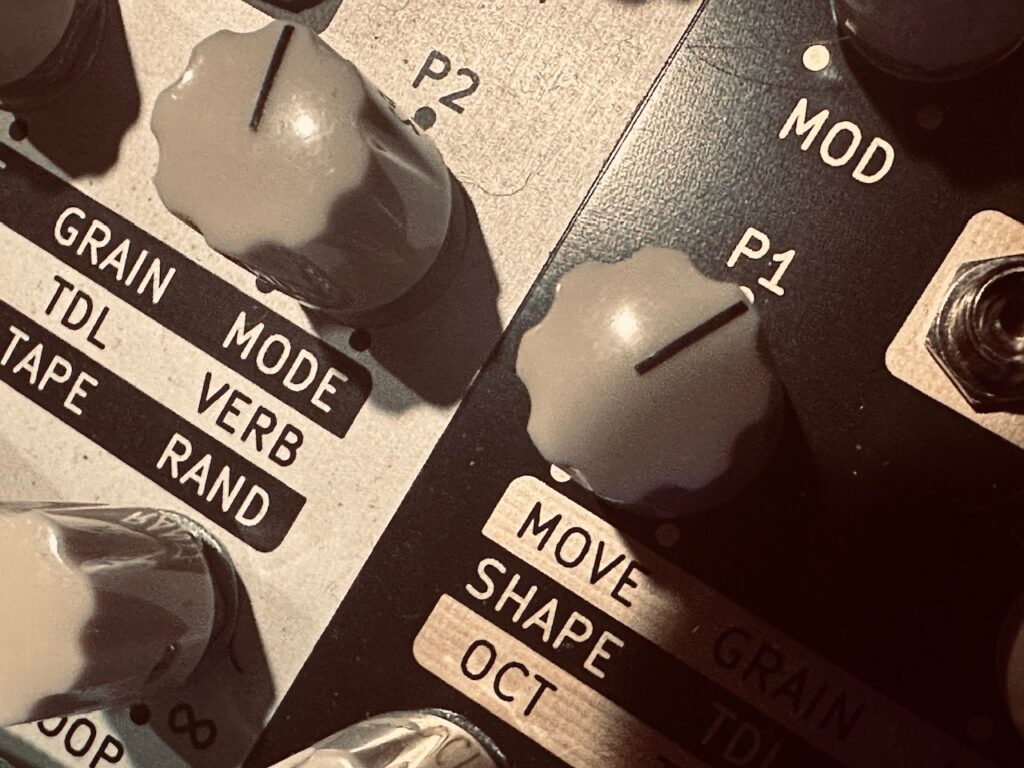
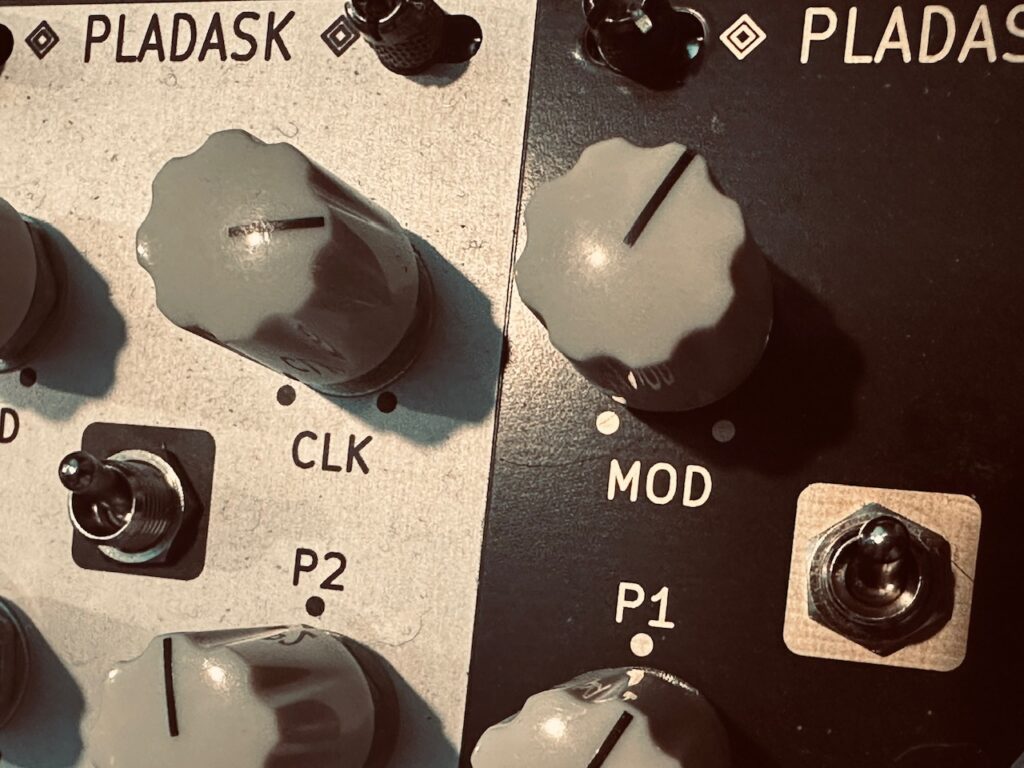
Now that we had a beautifully flowing soundscape of waves, it was time for some ornamentation. Recently I’ve been reaching primarily for my pair of ever wonderful Pladask Elektrisk Dradd(s) when I’m looking for granular synthesis, but I knew I wanted at least one thing that Dradd cannot do: a two octave shift to create sparkles. It can do a one octave shift in Tape Mode, but not two octaves. So I turned towards the Mutable Instruments Beads (introduced at 2:30). I’ve had Beads a long time. It was one of my first modules, bought on a whim when I saw they were in stock one day. Beads can be many things from delicate to bombastic, and with this patch I wanted subtle, and Beads excels at being subtle. Like all granular processors, finding a nice sweet spot (or range) can be a challenge, but the controls are intuitive and once you find that range, Beads can produce wonders to behold. With slight modulation from Tides to Size, along with use of the attenurandomizer circuit to Time, and I had a beautiful spray of shimmering grains to follow in the wake of the E370 and Panharmonium waves. But even with this beautiful flow of waves I wanted something more. Something to use as juxtaposition. Something with more edge.

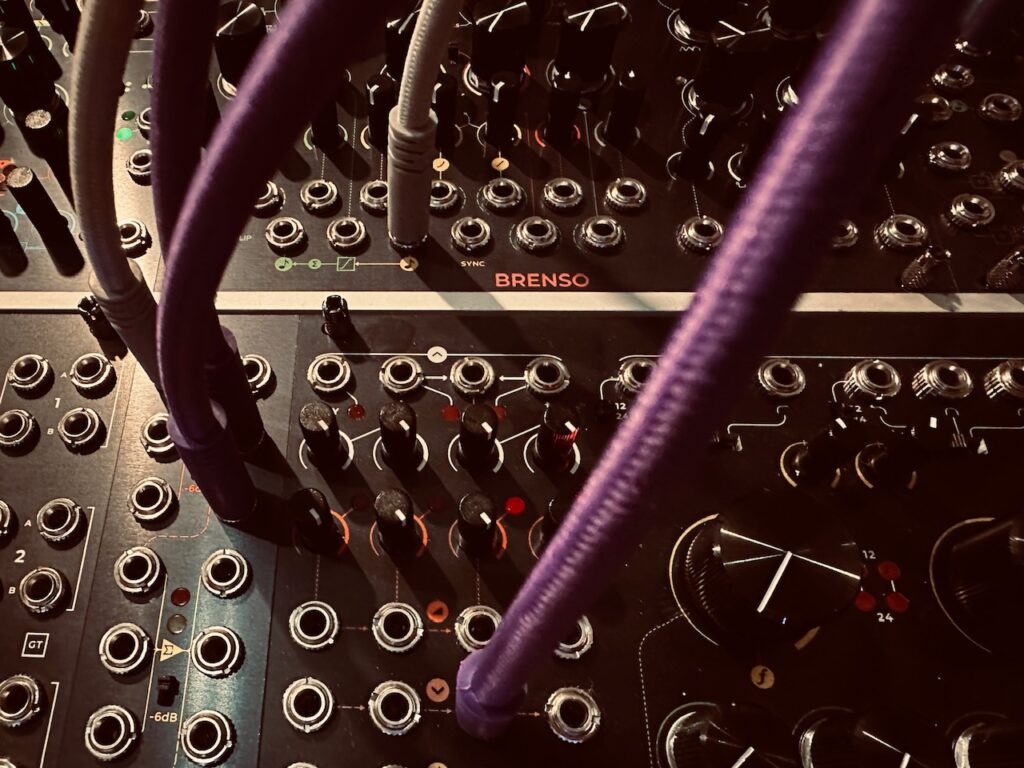
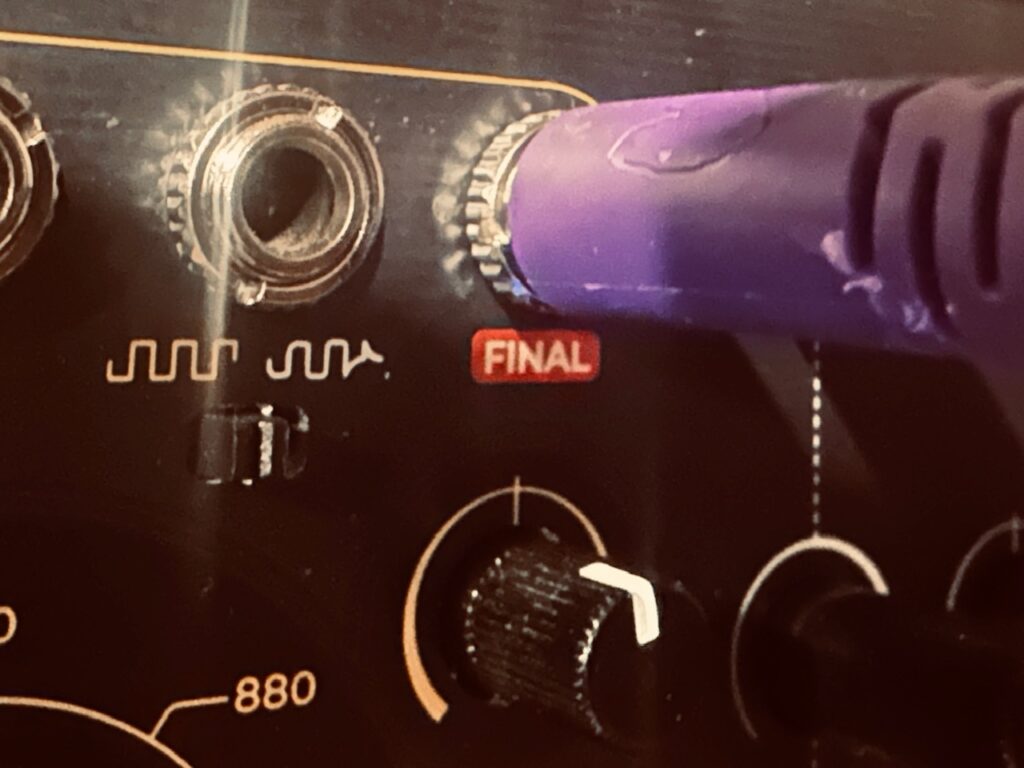
One module that I’ve criminally underused is the Frap Tools Brenso. I’ve certainly used it before, but it’s daunting, and I haven’t really put much brain power towards learning it, so I’ve tended to use its standard shaped outputs, while ignoring the gobs of waveshaping and wavefolding on the right side of the module. It’s a shame, really, but I thought that this day would be a good day to start exploring the extensive tonal options on the panel. I decided to start simple, using Sapel’s two smooth fluctuating random signals to slowly and lightly modulate both the waveshaper and wavefolder. This created an almost crackling electricity sound at times. It sputtered. It growled. It was an uneasy signal, fraught with fear while trying to exert its independence. I ran the Final output from Brenso through CUNSA, mixed with noise like the E370 waves, for some light filtering to attenuate some of the most egregious frequencies. The last time I made a patch like this I used a sequencer and pure sine waves for the epic sub bass line. It was way too loud, even if it was intentional, and repetitive. It was also pitched far too low. This time around I decided to use the same module to create the bass line, but rather than use a sequence, I used the Doboz T12 in Touch Keyboard mode and manually played the part. I wanted to time the note changes by feel rather than a clock. It’s still too loud, and still probably too low in pitch (some lessons are harder to learn than others), especially as I go up in register, but placing this very uneasy and slightly dirty wave in contrast to the smooth waves of the E370 and Co was a nice touch. Were I to record this patch again, I would definitely do a better job of controlling the level of this voice. I think the recording still sounds great, but I was certainly a bit overzealous with the volume of this voice.

For reverb I used my trusty Walrus Audio Slöer in Light mode for a choral sounding octave up shimmer. This reverb really has become my primary reverb. I only move away from it once it proves itself to not be the best tool for the job.

Improvised and recorded in one take on iPad in AUM via the Expert Sleepers ES-9.

Modules Used:
Addac System Addac508 Swell Physics
Addac System Addac814 6×6 Stereo Matrix Mixer
Synthesis Technology E370
Nonlinearcircuits Divide & Conquer
Nonlinearcircuits Frisson
Atomosynth Transmon
Intellijel Amps
Intellijel Quad VCA
Olivia Artz Modular Time Machine
Frap Tools Sapel
Frap Tools Brenso
Frap Tools CUNSA
Frap Tools 333
Frap Tools Falistri
Doboz T12
Rossum Electro-Music Panharmonium
Vostok Instruments Asset
Mutable Instruments Beads
Mutable Instruments Tides v2
ST Modular SVCA
Knob Farm Ferry

Outboard Gear Used:
Walrus Audio Slöer
Noisy Fruits Lab Lemon
Echofix EF-X2 (no idea why this is no longer on their website)

  1. Technically I had my iPad, which, from my Jamuary experience, is more than enough music making machine, but I simply wasn’t inspired by anything on it at the time. ↩︎

Bonus Track – Colored Strings Rev 1

I didn’t set out to re-record my latest patch the other day. I was set on using some other sample set in some other way. But there were a few things about my last recording that bothered me a little. I was getting too many pitches that were too high; well outside the zone of what “Low Strings” should be. There were points when way too many colors were being shouted at listeners. The delay was a bit too much. And I wanted to streamline the patch a bit.

I won’t go too in depth on the patch, you can read about the details here, but I did make a few changes that improved the recording substantially….

The most major change I made was to eliminate the Qu-Bit Electronix Nautilus, and use the pair of Echofix EF-X2 tape delays on the string samples. This helped to both fill out the space, while simultaneously cutting away excess in the overall soundstage. Rather than simply repeating notes and phrases, the tape delays lengthened and widened them.

The Panharmonium (introduced at ~2:40) was pitched down an octave, which helped lend some depth. More voices were added, and it was set to analyze a wider spectrum. The Panharmonium, along with the Walrus Audio Slöer (which was also set to pitch an octave down), really added weight to the entire recording. I removed a delay from the Panharmonium’s signal path (previously the tape delays), and allowed it to sing only through the reverb, which was a substantial improvement.

No changes were made to the Dradd(s).

No changes were made to Plaits-does-Robot-Speak except sending it far fewer gates.

Modules Used:
Nonlinearcircuits The Hypster
Nonlinearcircuits Lets Get Fenestrated
Nonlinearcircuits Stochaos
Nonlinearcircuits Triple Sloth
Vostok Instruments Asset
Expert Sleepers Disting NT
Addac System Addac814 6×6 Stereo Matrix Mixer
Rossum Electro-Music Panharmonium
Pladask Elektrisk Dradd(s)
Mutable Instruments Marbles
Mutabke Instruments Plaits
Mutable Instruments Beads
Knob Farm Ferry
ST Modular SVCA
Intellijel Quad VCA

Outboard Gear Used:
Echofix EF-X2
Walrus Audio Slöer
Noisy Fruits Lab Lemon

Improvised and recorded in one take on iPad in AUM via the Expert Sleepers ES-9.

Colored Strings

Ever since I started using the Polyphonic Multisample algorithm in the Disting Ex, and now the Disting NT, I wanted to do a string patch. For some unexplainable and inexplicable reason I never did. I got a taste of using string samples during a handful of Jamuary patches, particularly Jamuary 2507 and Jamuary 2510, when I experimented with using the very excellent Alexandernaut Fugue Machine and Decent Sampler, but I really wanted to do a string sample patch modular-style. At first I wanted to use the same string samples I used during Jamuary, the DK Solo Cello Spurs from Pianobook, but that did not work at all.1 After quickly pivoting to the LABS Low Strings Long samples included with the Disting NT, I was off.

Much of this patch is a simple altered duplicate of my last patch, so I won’t rehash the entire patch here. Many knob settings are different, and of course I triggered string and not piano samples, but the control and audio paths are largely identical. Because these string samples are inherently longer than piano notes, I had to drastically slow down The Hypster, the initial source for the master clock, in order to compensate and have Stochaos produce fewer gates. This slow down was coupled with using outputs on Stochaos that change much less often. I also tuned in the delay used on the string samples, the Qu-Bit Electronix Nautilus, to what I thought sounded best, thought I can’t recall the settings other than a long delay time with moderately high feedback. The Panharmonium settings were also changed drastically, cutting the number of voices, zeroing in on the desired frequency range, and really tuning the sampling time. Panharmonium is not always instant bliss, but given some gentle massaging it can become transformative. The Dradd(s), however, weren’t changed at all.

But even after being able to hone in on what I had hoped for the strings and the existing sound chain, there was something missing. It needed some kind of ornamentation. Something to juxtapose against the somber sounding string sequence plodding along in C minor. I initially thought of high pitched bells or sparkles of some kind, but then remembered a patch I did last summer as a test shortly before bringing a travel synth on a trip to Alaska. In that patch I used Plaits in the Vowel and Speech Synthesis algorithm (the last Green algorithm) to repeat four colors, Red, Orange, Yellow, Green. In this patch I took a slightly different approach, by using a random output from a Mutable Instruments Marbles to select the spoken color. I was quite happy with the result in the moment, but was carried away a bit during the performance with too many triggers. It should have been an occasional color spoken in a sad-ish voice to reflect the somberness of the strings, though it sometimes ended up being a robot talking over himself. I used a CV output from the Noisy Fruits Lab Lemon to control Marbles’ clock, which had a high amount of Jitter so as to not be regular. When I wanted more from Plaits, I pushed the fader to create more gates with Marbles. However I clearly pushed it too far during a couple of points. Initially I had Plaits running straight to the mixer, but later in the recording used Beads in full wet delay mode, which altered the tone slightly, and added a low number of soft repeats that really only served to add to the confusion. Plaits is simply triggered to often.

The proverbial icing on the cake was the Walrus Audio Slöer in “Light” mode, which is an octave pitch shift. But rather than a standard pitch shift, Slöer adds more of a choir or symphonic strings sound, which is absolutely beautiful. This patch used basic settings. Pitch shift volume at max, and clock speed at the slowest setting. There was a long decay, and a moderate amount of modulation.

Overall I’m quite happy with how this patch turned out. It’s beautiful and not deterministic. That said, the piece could use for some composed string sequences, even if only occasionally, in order to maximize tension and relief. I’m definitely going to try other adaptations, particularly in the timing of gates and pitch. I’m thinking the Addac508 Swell Physics might be a good place to start.

Modules Used:
Nonlinearcircuits The Hypster
Nonlinearcircuits Lets Get Fenestrated
Nonlinearcircuits Stochaos
Nonlinearcircuits Triple Sloth
Vostok Instruments Asset
Expert Sleepers Disting NT
Addac System Addac814 6×6 Stereo Matrix Mixer
Qu-Bit Electronix Nautilus
Rossum Electro-Music Panharmonium
Pladask Elektrisk Dradd(s)
Mutable Instruments Marbles
Mutabke Instruments Plaits
Mutable Instruments Beads
Knob Farm Ferry
ST Modular SVCA
Intellijel Quad VCA

Outboard Gear Used:
Echofix EF-X2
Walrus Audio Slöer
Noisy Fruits Lab Lemon

Improvised and recorded in one take on iPad in AUM via the Expert Sleepers ES-9.

  1. I was getting all sorts of sputtering and general ugliness using these samples. I’m not sure if I was overwhelming the algorithm with too many gates, or whether the sample rate or bit depth of the samples was too high, or perhaps something else, but I quickly abandoned these samples in favor of the stock LABS string samples. ↩︎

A Piano Dream

As I was un-patching my Fall patch, I got a hankering. I’ve used Multisample Piano in several patches over the last couple of years, but I wanted to make another one with the piano as the focus of the patch, rather than an accompanying ornament. These sorts of patches aren’t terribly hard, but they are fun, and I love relaxing to them as they just play.

My first thought was to get a random distribution of triggers and let it roll. I began by using the same sub-patch that created the Fall emulation; a series of random envelopes cycling within a defined range, with the End Of Cycle trigger striking one of four gate inputs programmed on the Disting NT. That worked okay, but there was something not quite right. I was never able to pin down exactly what that was, but I decided early on to abandon that patch and try a combination of patches that I’ve used before to some really nice effect. Once I decided to switch things up, I knew exactly what I wanted to do.

Let’s Get Fenestrated, by Nonlinearcircuits, is one of Andrew’s newest designs. It’s a triple comparator with the sole job of spitting out gates once the inputs reach certain voltage levels. According to an email exchange I had shortly before its release, Andrew’s idea when designing this module was to create wonky clocks with chaotic sources. When I inquired, I was looking for a couple of tools, some type of comparator being one of them.1 Upon his announcement of its release I had Scopic Modular, the guy I use for all of my NLC builds and all around nice guy, order and build it for me. But despite having had it for a while I hadn’t used it much. In the time between seeking some form of comparator and receiving Fenestrated, I had worked up several patches to get chaotic gates. Numberwang was my primary tool, but also others. But as I started to think about how I would come up with a different clock algorithm for this patch, I immediately thought about using Fenestrated.

The patch started with a chaos signal from The Hypster. I initially went with the U output, because it has the biggest range of the four outputs, but despite modulation happening via patch-programming, the output was just too regular. No matter what I did with the comparator setting on Fenestrated, I got more or less a steady-ish beat. Not on a grid, but just a little too close for the style of gate generation I was going for. Switching to The Hypster’s Y output, and adjusting the window on the first comparator of Fenestrated, fixed that in short order. The new clock output from Fenestrated was patched to Stochaos, which uses chaos (or random, or both) to generate gate patterns. One advantage to using Stochaos is that, unlike Numberwang or using the End Of Cycle outputs on various free running function generators, it generates multiple gates at the same time, meaning I’d have both dyads and chords, along with singularly generated notes, which is not possible using those other methods. Numberwang spits out exactly one gate at a time, and the chances of two random, free running cycles of a function generator finishing at the exact same time is exceedingly low. Having found a good cadence of notes, I moved on to giving them a pitch.

I’m a fan of using a very small number of modules as what I like to call an engine. The thing that makes the patch go. It’s quite often that I’ll use only one or two modules to control an entire patch. Having used The Hypster to control gate generation, I initially decided to use its other outputs as a pitch generator, patching the X, Z, U, and -Y outputs to the Disting NT CV inputs, via the Vostok Instruments Asset so that I might massage the notes for each input into a good range focused on the lower-middle to middle parts of the keyboard. Notes that don’t require one to be a dog to hear, nor ones that often only contribute to a muddy soundstage if used too often, especially in a reverb-rich environment. But I wasn’t completely satisfied with the result, so decided then to use the four CV outputs on Stochaos, which worked wonderfully, even if I can’t explain why it was better.

At first I wasn’t sure how I wanted to ornament the piano, not that a piano and some reverb aren’t enough to be beautiful. I wasn’t set on a sound, so I began to experiment with delays. Normally I would go to the Venus Instruments Veno-Echo, but decided instead to use the Qu-Bit Electronix Nautilus. I wanted intermittent reverse delay, which the Veno-Echo can do, but I wanted to CV control the reverse parameter, and not simply gate it on and off. Although I don’t always appreciate prescriptive controls, if those controls are lightly modulated the result need not feel prescripted. With most delays, reverse delay is reverse delay. It’s on or off. But due to it having up to eight delay lines, the Nautilus takes a different approach. Rather than an on of off dichotomy, it prescriptively assigns reverse repeats as you turn the knob. At full counter clockwise there are no reverse repeats. But as you turn the knob clockwise, you get reverse repeats in patterns. From the manual:

I set the knob at just above full CCW. I wanted reverse repeats, but I didn’t want them to overwhelm regular repeats. Using an attenuated version of one of the Triple Sloths outputs (a medium length cycle) I lightly modulated the reverse knob, which ended in a wonderful mix of mostly forward repeats, augmented by the always beautiful zips of reverse delay. But it wasn’t quite enough. I wanted to make it a bit dusty, so chose to put a very light amount of sample reduction as the Chroma.2 This matched perfectly with the slow clock speed I had running on my reverb, the Walrus Audio Slöer. I next decided on how long of a delay I wanted, and ultimately went with a fairly long delay time, and used an internal cross-feedback pattern for the repeats.

Wanting to fill in some of the space, I decided to go with a combination of Panharmonium and the Dradd(s). I initially had an idea that I would pitch the accompaniment in opposite directions, Panharmonium down an octave and the Dradd(s) up an octave, but that created all kinds of sonic havoc, especially with the already pitched up reverb. It just was too much going on in too many frequency ranges to be coherent. One issue with this patch is that it’s a bit difficult to pick out the Panharmonium. It’s pitched downwards an octave to give the piece some depth, but it seems to get lost a bit. It’s noticeable when Panharmonium is not present, especially as I added some saturation via the Echofix EF-X2 pair towards the end, but it’s hard to pick out as a separate voice in this recording. I’m not sure whether that’s good or bad, though I tend towards wanting every voice to stand on its own. I’m not exactly sure why this voice is so buried in the mix, and I’m not sure if it’s a bad thing in the end, but it is a little frustrating.

The Dradd(s), however, came out exactly like I’d hoped. They were set to Grain Mode, and time stretched at a slow crawl, one channel in reverse, the other forward. I love granular synthesis. The textures it can create are wonderful, and this patch is no exception. Each piano note, and its successive repeats from the Nautilus, stretched to the furthest extremes, filled out space in a particularly interesting way that I found compelling; the Piano notes seemingly stuttered as they were dragged out as long as the Dradd(s) could manage. Not only did the Dradd(s) serve to fill in space, but they added a wonderful lo-fi texture to otherwise smooth piano notes. Beautiful.

One thing I’ve long wanted to experiment with is using multiple reverbs. Not simply stacking reverbs or using two (or more) in parallel, but by trying to use them as instruments unto themselves. I’m not exactly sure when I first heard this technique, though it was surely in the context of ambient guitar, but it wasn’t until I heard Music Major by A Last Picture From Voyager that I saw its full potential. I recently made a recording during which I featured the freeze effect from the Dreadbox Darkness, and it was great, even if it all started with an accident. I was mesmerized by the beautiful reverb tail hanging as if it were a mist. But despite initially patching in the Darkness, I was simply unable to find the same kind of magic present in that first recording. While trying to fiddle around with Darkness, I discovered that, with shifting soundscapes, timing is everything. Hitting the freeze switch a smidge too early or too late and the capture isn’t what one hoped it might be. Whether too soft or too loud, slightly dissonant or too plain, hitting freeze at just the right moment proved to be more difficult than I originally imagined. So I decided to try a new reverb that I got around the start of the year but hadn’t yet used, the Old Blood Noise Endeavors Dark Star Stereo, to see if I might be able to get better results.

Buying the Dark Star Stereo was a long time coming. OBNE has been making highly compelling effects pedals for a long time. Alpha Haunt, a flexible, nasty fuzz,, was my first foray with them. And even if I sold that pedal for something much more basic, I knew it sounded awesome and that I was totally into the OBNE ethos. Dweller (Dweller!) was my next OBNE purchase, and that thing is ace. A delay circuit inside of a phaser circuit that sounds both unique and beautiful. Next was the Rêver and its sibling, Minim, which are both absolutely brilliant reverse delay/reverb. But as I grew, and especially with modular, I was pretty adamant that my reverbs all be stereo, and despite having wanted to use OBNE reverbs for their unique tones, none of them were stereo. A little while back they released the Dark Light (now discontinued), which is a “stereo” mashup of the Light and Dark Star pedals. But I always felt the implementation was odd, and some sounds were disjointed. It was seemingly more a dual mono reverb than a stereo one, and it just didn’t sound right so much of the time. So I waited. Then a few months backs, OBNE finally released a true stereo reverb, this time a fully featured version of the Dark Star, their most popular reverb pedal (and my favorite of those I’ve heard), and I jumped on one almost immediately. When I bought it I knew I didn’t have room in my pedal rack. But after selling my Oto trio and getting the proper cables to patch it into my synth, it quickly made its way to the synth FX rack, even if I all but ignored it during Jamuary when I didn’t touch it once.

The Dark Star Stereo is a lo-fi reverb, complete with pitch shifting (up or down), filtering, saturation, and sample reduction, along with mix, volume, and stereo spread. It’s designed primarily for soundscape and pad generation, but works great on any source. The default sound without any pitch shifting, filtering, sample deduction or overdrive is soft and gentle. But once you begin to shape the sound it begins to texturize in haunting ways. A bit of crunch to add some dustiness here, some high pass filtering there, and you have a beautiful ambient reverb that can last for days. In this patch I used a smidge of sample reduction and high pass filtering, along with pitch shifting up an octave. Compared to other implementations, the pitch shifting feature is…different. Rather than a cheesy sheen or beautiful choir-like effect, Dark Star Stereo produces more of a granular sounding pitch shift that can be a bit jagged sounding (in good ways), though I do wish that one could control the amount of pitch shifting in the output so that I can more easily get less of it. In this patch the Dark Star Stereo is introduced briefly at about 3:25, a second time around 4:35, then I used it very subtly as a parallel reverb from about 5:18 through the end. The result here was “okay.” It wasn’t exactly what I’d hoped for, but it was a good first foray into using reverbs in this manner., and a step in the right direction for future exploration.

The end-of-chain reverb in this patch is the ever-beautiful Walrus Audio Slöer, with a smidge of its choir-like pitch shifting that is exceptionally beautiful. The Slöer has been my go-to reverb since receiving it, and I simply can’t envision not having one.

Modules Used:
Nonlinearcircuits The Hypster
Nonlinearcircuits Lets Get Fenestrated
Nonlinearcircuits Stochaos
Nonlinearcircuits Triple Sloth
Vostok Instruments Asset
Expert Sleepers Disting NT
Addac System Addac814 6×6 Stereo Matrix Mixer
Qu-Bit Electronix Nautilus
Rossum Electro-Music Panharmonium
Pladask Elektrisk Dradd(s)
Knob Farm Ferry
ST Modular SVCA
Intellijel Quad VCA

Outboard Gear Used:
Echofix EF-X2
Old Blood Noise Endeavors Dark Star Stereo
Walrus Audio Slöer

  1. I also inquired about a gate combiner, to which he responded that would be a good idea, and wrote back a couple of days later with the design for Gator. ↩︎
  2. Chroma is an effect that’s applied to the delay feedback path. Other effects are a LPF, HPF, saturation, wavefolding, and heavy distortion. ↩︎

A Saunter Through Chaos

I recently sat down with a goal: identify modules in my synth that are underutilized, and make a plan to integrate them into my patches. Like all musicians, synthesists can fall into patterns. We use the same techniques and too often travel similar routes. Though my repetition of techniques of late is somewhat purposeful as I learn new gear, its’s still repetition, and it’s nice to walk on untrodden ground every once in a while.

While I was looking through my folder of manuals, I quickly identified a module that I’ve only used once, and over a year ago: the Blukač Instruments Endless Processor.1 On paper this sort of module seems a natural partner for the kinds of sounds I use most, but for some reason I’ve tended to reach by it and patch something else like the Rossum Electro-Music Panharmonium or Qu-Bit Electronix Aurora. In a bid for some nonlinearity in my practice, I decided that the Endless Processor would be the first of those unused modules to put through its paces.

This patch uses chaos to create a sequence. The starting point is The Hypster by Nonlinearcircuits. I use The Hypster in a lot of patches for a lot of different purposes. I use it for “normal” modulation, the beginning of a chain to make clocks, pitch CV, and maybe more. It’s definitely one of my favorite modules overall, and a top two or three modulator that I’ve used. The Hypster serves many purposes; sometimes more than one in a given patch. In this patch it would serve all three of those functions, plus a bit of self-modulation to keep it from settling into something resembling a pattern.

Four outputs from The Hypster (X, Z, -Y, -U) were patched to another Nonlinearcircuits module, Numberwang, for some good old fashioned gate extraction. The last time I used Numberwang, I wanted a steady-ish rhythm. Not perfectly-on-the-grid steady, but something close, even if it had the propensity to drift (which was a big part of the point), which is why I didn’t modulate The Hypster in that patch. But this time I didn’t want steady. I wanted gates that can’t easily be tied time, which required a meandering source. Chaos can meander a bit, but it can also become regular in that chaotic kind of way. I didn’t want the regular part this time, so modulation of at least one parameter was crucial. Once I started to ping my oscillators with gates from Numberwang and found a frequency on The Hypster that provided a satisfying cadence, I set out to modulate both the Damp and Gain settings. Adding gain adds both voltage and nonlinearity to the feedback loop. More gain is higher output levels and more meandering. Damping suppresses those things in interesting ways. Modulating both brought revealed the chaotic nature of the signal, specifically through the pitch CV, but also in the gate pattern from Numberwang.

This wasn’t the first time I’ve used a chaos signal an a source for pitch CV or gates. But it was the first time I’ve used chaos as a source for pitch and gates while I performatively modulated it so that I would have more control over its range, or the way it meanders. Too much gain and you have pitches more fit for dogs than humans) Too much damping, and you have pitches without enough variation to keep the note sequence interesting, and gates that quickly turn into patterns (even if they do drift a bit). To modulate gain, I used The Hypster’s next door neighbor in my case, Frisson. I also used the -Z output to self-modulate Damping. Although both the Gain and Damping CV inputs both have attenuators, I patched both signals to an attenuator to fine tune the level of modulation The Hypster was receiving. Even very small turns of either attenuator knob revealed very interesting results that would be difficult to achieve with one-pass attenuation at the CV input. Slightly different gate patterns; slightly different notes in the pitch sequence. All very interesting and necessary in order to keep any part of the sequence from becoming dry or repetitive for too long.

I’ve used chaos as a pitch CV source frequently, but this time was a little different. Normally I use one source signal for each oscillator in the patch. But this time I decided to use just one chaos signal as the source for all four oscillators, clocked by Numberwang separately in four separate channels of Quantermain. I controlled the range of pitch primarily through an attenuator, the Nonlinearcircuits De-Escalate.2 This allowed for small changes in pitch choices. One thing I would likely do differently would be to minimize very low pitches by using some offset to the signal before attenuation, especially as I opened up the attenuator. Higher pitches also means lower pitches at the bottom end without some offset, and some of the pitches on the low end are just a little too low for my liking. I imagine some are even inaudible.

The pitch sequence (in D Minor) was sent from Quantermain to the four wavetable oscillators of the Synthesis Technology E370, with all four oscillators tuned to the same pitch, even if I couldn’t tell you what that pitch is. Each wavetable was lightly modulated by the Frisson, with each oscillator detuned slightly by hand. This constant variation in timbre created a wide variety of sounds. Each note just a little different than the last time it was struck. The oscillator outputs were patched to a pair of Rabid Elephant Natural Gate LPGs for pinging, using the same four Numberwang outputs that selected pitch for each channel.

The result is a dance of orbs in some fantastical forest, or drops of water falling to make music, like something akin to a fast moving Fall on the Monome Norns. It’s a beautiful generative sequence, even if this version of the patch used some human assistance. Using a VCA to control levels of the pitch and modulation signals with a very slow modulator would be the key to make it fully generative. In fact, I’ll put that in my patch book to use in the future!

In this patch I used a very simple stereo algorithm: the first Natural Gate outputs are the left channel, and the second Natural Gate outputs are the left channel. Although this decision created a wide stereo space, four separate events happening independently, two in each ear, can become a little distracting and separated, even if it also heightened interest. I think I might have been better served to send these outputs to a panning mixer for mixdown to place them a little more carefully in the stereo field, though I won’t go so far as to say that change should be recorded in ink. There is no sense of a unified space until these completely independent left and right channels hit the stereo reverb.

This effect was exacerbated by the dual mono delays used in the patch, a pair of Echofix EF-X2 tape echoes. Each was set to augment the original’s clarity, holding on to timbre as long as it could until atrophy took hold. Each delay was also set to a different delay time and tape head playback/feedback configuration which created very different echo patterns, heightening the very different sequence patterns in each ear.

But I made a terrible mistake. Throughout much of the recording you can hear some clipping in the left channel. While I investigated I made sure levels were good going into the audio interface. Not only were they not too hot, I’d have liked for them to be even louder. At first I thought it might be some artifact in the wavetable being modulated. But why only that wavetable? I then thought I might have set an envelope a little hot before going to Natural Gate, but that wasn’t it either. Then I heard it. A clue. The clipping wasn’t on the note generation itself, but only occasionally on the very first repeat of only particular notes. It doesn’t happen all of the time. As I was recording i investigated my gainstaging. I discovered that my levels going into the left channel delay were quite hot, and that’s what was causing the clipping; the inbuilt analog limiter that was occasionally being hit very hard and distorting. At least I think that’s what it was. Toward the end of the recording I adjusted the input level to the left delay which seemed to mostly sort the issue.

I also used The Dradds in this patch, although in a way I had never used them before, with the Grain algorithm. I had sort-of tried this mode before, but never really investigated it with the manual until this patch. Like when I actually RTFM while using The Dradds in the Tape algorithm, I was immensely happy with the result. Understanding your instrument is key. As synthesists we can happy accident our way into nice sounds regularly. But you can’t really compose with the hope that your knob twists will land you where you want to go. Just as strumming away on a guitar, or pressing piano keys doesn’t create something musical, you can’t really get music from a modular until you know which knobs to turn and when/how much to turn them. For this patch I chose to scan each buffer using a chaos signal from Frisson. This was nice movement, but the scarcity of notes feeding The Dradds meant that sometimes there was nothing in the short buffer to scan, or so little that it wasn’t scanned while it was in the buffer. This served to keep the Dradds from becoming too busy and overtaking the patch, but I would have liked more from The Dradds at many points.

The last effect used (besides reverb on the entire output) is the aforementioned Endless Processor. I hadn’t used this module much before. Not because I don’t think it would add a beautiful dimension to my patching, but because of unknown reasons that had me patching other FFT-like modules instead. The Endless Processor is a very simple module that does just one thing: it analyzes the frequency and level information of incoming audio, and endlessly sustains an average of that audio until you clear the layer. You can clear layers, or replace them with new audio, but ultimately the Endless Processor is a very simple instrument. It’s perfect for drones or making chords. It’s perfect for creating air in your patch, or filling space and creating texture. You can even use this module for stabbing techno chords.

But simple doesn’t mean easy. Capturing the exact sound you want, particularly at lower Memory times, can be challenging. You don’t always get the capture you hoped for (something that happened during this recording), and sometimes you get a capture that sounds downright bad. Today was my first day with it, so I think I can forgive myself for getting “meh” results in my first recording with it. I can only discern one capture, though I was pretty sure I did at least four of them on layers one and two. My initial goal was to have both channels of the Endless Processor float back and forth in the stereo field at different rates, but with only one sound being audible it’s pretty awkward, especially with as loud as it is. Clearly, I need practice.

Overall I really enjoyed creating this patch. Chaos is always fun to use in whatever capacity I use it. The Natural Gates shines again. The Echofix tape delays, brilliant. The Dradds doing Dradd-y things. My hope is to really work with the Endless Processor, as I can absolutely see just what a boon it could be in my practice.

Modules Used:
Nonlinearcircuits The Hypster
Nonlinearcircuits Frisson
Nonlinearcircuits Numberwang
Nonlinearcircuits De-Escalate
Synthesis Technology E370
uO_C (Quantermain)
Pladask Elektrisk Dradd(s)
Blukač Instruments Endless Processor
Rabid Elephant Natural Gate(s)
Calsynth Changes (MI Stages)
AI Synthesis 018 Stereo Matrix Mixer
ST Modular Sum Mix & Pan
Intellijel Amps
Knob Farm Ferry

Outboard Gear Used:
Echofix EF-X2
Walrus Slöer

Performed and recorded in 1 take in AUM on iPad via the Expert Sleepers ES-9.

  1. I actually identified a whole lot of modules that have been underused, and am making a plan to use them, or sell them. ↩︎
  2. As much as I like the De-Escalate, it would be a much easier tool to use were the jacks to one side and the knob on the other. Input-Knob-Output is a horribly patching orientation for minimizing spaghetti. ↩︎

A Mighty Beast – The Synthesis Technology E370

Although I’m not fully clear on what might make a module beastly, what I am clear on is that the Synthesis Technology E370 Quad Morphing VCO is a beast. One might call a module beastly because of the sound it makes. Others might be termed a beast because of its sheer size. But then sometimes there are a few Eurorack modules that strive for something grandiose; so technically complex that to have it function at all is a major coup in engineering. It’s these sorts of tools that have the capacity to change the dynamic of one’s rack. To change how we go about playing our synthesizers. Not many modules fall into this category, and those that do tend to be bulky and expensive. I’ve only had this experience with a small handful of modules. The Synthesis Technology E370 is one of those modules.

I tend mostly to live in ambient-world when patching my synthesizer. In some ways it’s an extension of the mental state patching places me in. When I patch, I get lost; completely immersed in the algorithm. Not the shitty-type algorithm like those on social media, but that state of constantly thinking my way through the patch step-by-step. Sometimes that thought is speculative (I wonder what will happen if….), while other times I’m thinking through a problem (or set of problems) that are keeping me from achieving some goal within the patch (How the fuck do I do X?). Modular synthesis is a puzzle. It’s a technical exercise far exceeding putting the right notes in place, and one that rewards deep thought about how to approach the next step. The puzzle is what initially attracted me to modular. It’s like playing Myst, only with the real life reward of beautiful music for solving the puzzle correctly.

This quest for ambient has landed me with several oscillator banks in a search for the perfect cloud of notes. A few minutes that might have a chance to reflect the state I’m in while making the patch. I’ve used several of these in my practice. The Humble Audio Quad Operator, RYK Algo, Frap Tools CUNSA, dual Frap Tools Falistris, 4ms Spherical Wavetable Navigator, and 4ms Spectral Multimode Resonator can all be used as oscillator banks, and I’ve used them all in that capacity. But as nice as those tools are, none come to level the E370 strives to achieve. A full 4 oscillator wavetable oscillator with just about every bell and whistle one could desire to customize your sound. Oh, and each oscillator can be eight oscillators, either stacked and detuned, or with chords. That’s a total of 32 oscillators swarming around. That’s quite the tool.

Although this post is not an attempt to write a comprehensive review of the E370, it’s only my first patch with it, and after only a couple of not-terribly-thorough glances at the manual,1 I do want to note that it’s immediately apparent that the E370 is one of those transformative modules. The kind that will affect how I patch the modular in the future. Despite experiencing a couple of frustrations during this first patch,2 it’s clear that the E370 is ultra-powerful, able to deliver a wide assortment of sounds and timbres. The interface is beautiful, well laid out, and at 54hp definitely large enough to easily use it. Despite having a deep menu system, navigating is relatively simple and changing parameters is no problem. Where the issue lies is in understanding what each parameter within the menu system is and what it does, and that will come with practice. What’s the difference between MorphXY and MorphZ? What is Phase Interpolation? But those are different problems to be understood and solved with practice, not obstacles that need a workaround or compromise. This module is deep, yet despite not being quite as easy to navigate as something like the Doboz T12, it’s not difficult by any definition of the word. It’s quite easy to get going in a hurry.

This patch is a combination of several patches I’ve done recently. The Addac508 Swell Physics is the heart of the patch that controls almost everything, from the levels of each oscillator, to panning, to wavetable modulation, and more, even if not directly. Oscillator levels are controlled by Swell Physics indirectly via the Nonlinearcircuits Let’s Splosh, using the very excellent Jolin Labs Agogo LPG/mixer extraordinaire. Each oscillator output is patched to inputs 1, 3, 5, and 7 of the Agogo, with white noise patched to inputs 2, 4, 6, and 8. Four CV outputs from Let’s Splosh modulate the levels of each oscillator and its noise pairing in CV inputs 1, 3, 5, and 7, with the mixed signals being taken from outputs 2, 4, 6, and 8. This sort of usage really highlights the Agogo’s proverbial girth. With all inputs and outputs cascading, it’s a mixing powerhouse, with the ability to create all manner of different submixes to suit any patch. This patch made four separate outputs, each with one oscillator mixed with white noise that then went to the ST Modular Sum Mix & Pan for a mix down to stereo. Each of those signals was individually panned in the stereo field by outputs 1-4 of Swell Physics, with the L/R output of Mix & Pan patched to the matrix mixer. Swell physics also modulates each oscillator’s wavetable.

Another part of the patch I’ve used recently, and repeated here, is panning between delays in order to get contrasting patterns or textures and keep the sound progressing. I first learned this patch while watching a DivKid video about the stereo strip, even if I’ve adapted it to be able to pan a fully stereo signal between delays using chained Intellijel Amps, rather than sending them a mono signal to be stereo-ized by the delays. Although I don’t use the Stereo Strip for that specific purpose in this patch, I do use it to EQ the audio before going to the delays.

The first delay I used is the Venus Instruments Veno-Echo. It’s a staple in my synth, and might be the most versatile delay in Eurorack. I often use it in patches like this because it has reverse delay that can be triggered, and that leads to interesting textures that are able to contrast with whatever other delay I decide to use. It’s fully controllable per side, and highly modulate-able. I added some sample reduction (it does that too) for some slight crunch which really brings out the wavetable nature of the E370. Add in probability gated triggers to turn reverse on and off per side, and the first delay is set.

The second delay I used was a pair of Echofix EF-X2 tape delays. With this delay I added some drive using the preamp(s), and for the first time with the tape delays, used CV to control the Speed, creating a beautiful tremolo that sang almost like a voice in the feedback, particularly once run through the octave up reverb in the Walrus Audio Slöer. I hadn’t set out to CV control the tape delays, but I was reminded by the CV input sitting on the control panel and decided to give it a go.3 I’m glad I did. For me one of the highlights of the patch is this vibrato and how it interacts with the feedback of the delays. I spent a good chunk of time while playing the patch riding the feedback knobs, never allowing it to gather too much accumulated sound and run away, but at times enough so that it doesn’t really go away, even when the tape delays aren’t receiving any input. It’s a halo of entropy sitting atop everything, singing. It’s a time when a delay is more than just an echo, but an instrument unto itself, becoming its own voice.

These delays generally take the lead in the full mix. There is certainly dry signal present in the mix, but it ended up taking a supporting role in the patch, being about a 80/20 mix in favor of the wet delays, and that dry signal was to keep some kind of coherent shape to the patch. Without that wee bit of dry, it felt like it was falling apart. A loose blob.

Another highlight in this patch is The Dradds. I’ve had a Dradd since not too long after its release. I’ve long been a fan of Pladask Elektrisk. I’ve had all, or almost all, of his pedals at one point or another. Although all of them were unique, none were stereo, and I’m a guy who (irrationally) believes all of his time effects, like delay and reverb, should be in stereo. Despite also being mono, as soon as I learned of Dradd I knew I would give it a chance. After several plays, I was frustratingly underwhelmed. Not that it didn’t sound great (it sounded awesome), but that it too wasn’t stereo. I know There Are Ways, but I’d rather just have stereo effects and not worry about it. They can always be patched in mono if need be. As I was on the verge of selling it I saw a video by Matt Lowery featuring dual Dradds. Gratuitous as it may be, I was quickly convinced on the merits of two Dradds and rushed to the Pladask Elektrisk website, elated to see that they had them in stock, and purchased a second one, the first’s evil twin.

The Dradd, despite its innate ability to stumble into happy accidents with virtually every knob twist, is a module that confused me. I’d kept it for so long because of how easy it is to find sweet spots. Flick a switch, turn a couple of knobs, maybe add in some modulation (or not), throw in some delay and/or reverb, and something beautiful happens. But I never used it with an intention that requires understanding. It’s one thing to turn a couple knobs until something pretty comes out. It’s another thing entirely to understand the controls, and intentionally use them to create the sound you want, or meaningfully transition into something different. Having used Dradd several times I was becoming frustrated that I couldn’t play it. It was an exercise in happy accidents. I hadn’t run into any sort of problems that kept me from decent enough results so there’d been no rush to the manual, but I was at a point where I wanted more than luck determining the output. Having run into this realization, I finally decided to really dig into the manual to finally understand what the module is doing with all these these knob twists. And the outcome is the first time I’ve been truly happy with the results. Dradd had certainly put a smile on my face before, but the sense of creating a sound with intention rather than happing upon it is far more satisfying. I’m a long way from Dradd mastery, but the first step is often the most intimidating, and that’s now done. From here it’s about ingraining my understanding of the instrument by practice, which will surely lead to an even greater understanding.

This patch also put the Jolin Agogo to use in a capacity far more involved than as a simple LPG, instead using it as a complex mixer for eight signals (four oscillators and four sources of white noise). The Agogo is my favorite kind of mixing VCA/LPG. It does a special trick that most don’t: every input, both audio and CV, as well as every output cascades to the next channel if unplugged, making the creation of complex submixes, both mono and stereo, a simple task. If you’re not using all eight channels, you can add saturation simply by moving down a couple of outputs. The Agogo is also chainable, making a 16, 24, etc. channel LPG/mixer with almost endless possibilities. The mixing flexibility it offers is truly incredible. It’s possible to mix entire patches with the Agogo, and the slight filtering it does in the odd channels brings just the right amount of vactrol-controlled goodness to any mix. It does have a drawback, however. Being that it’s vactrol-based, any slow moving CV like LFOs (or simulated ocean waves) must reach a minimum voltage level before the vactrol can start to open. Like all vactrols, and sometimes me, it’s a little slow. You are, however, treated with beautiful decays when there are sudden voltage drops (or indeed pings), provided by eight vactrols on the PBC.

The Oto Boum also made a first appearance in this recording. I’ve never really been a huge fan of using compression. Not because I didn’t think it was good for producing music, but mostly because I don’t really understand it all that well, and most compressors are decidedly not happy accident machines like Dradd. I never had the patience to mess with it, especially when the differences and improvements you’re listening to are often very subtle. But, as with Dradd, I became frustrated at not using the heralded Boum much at all, much less in the capacity for which it was designed: an end of chain compressor.

In this exercise, the manual was no help, even if it is quite good. I needed real guidance. Basically, something that could be a crutch and tell me exactly what to do. Compression is a debated topic in ambient music. You want everything to be heard, but since dynamics play such a pivotal role in ambient music it’s paramount that you maintain a high dynamic range. Having turned to YouTube for some direction, I found a video with the perfect title: “INCREDIBLE OTO Boum – Dawless Mastering Chain part #3.” Although the video is dedicated to mastering live club music, virtually the entire video is on compression and how to apply it using the Boum as an end of chain effect. Using the approximate knob positions and general guidelines in the video as a starting point I finally decided it was time. After some careful (read: very conservative) knob turns and A/B listening, the Boum worked a treat. Although the differences are admittedly small, there is more obvious clarity and sharpness across the soundstage with compression than without.

Although the Oto Boum is also a distortion, I decided to use the ever-beautiful Bizarre Jezabel Mimosa so that I could isolate it to the main voice and not the entire mix. Plus, although I’m sure the Boum is a wonderful distortion, the Mimosa is the most beautiful I’ve heard outside of high dollar tube amps.

This patch was a lot of fun to make, but it’s not perfect. The Dradds are a bit forward in the mix, and get a little busy in spots. Some more care with the settings and in the mixer ought to clean that up. I’m also not convinced that using Let’s Splosh as an intermediary for Swell Physics was executed as well as it could have been. I tried using different outputs, but to call those efforts half-assed would be a disservice to genuine half-assed efforts. I’m also not sure about the result of panning the individual signals in the Sum Mix & Pan with Swell Physics. Although the waves are spread, they’re still close enough to each other to keep too much of the audio to one side of the stereo field or the other at a given time. Inverting one of more of those signals would probably help balance out the soundstage.

Modules Used:
Addac Systems Addac508 Swell Physics
Nonlinearcircuits Let’s Splosh
Synthesis Tecnology E370
Jolin Labs Agogo
Intellijel Amps
Vostok Instruments Ceres
Xaoc Devices Zadar
Xaoc Devices Warna II
AI Synthesis 018 Stereo Matrix Mixer
Befaco/DivKid Stereo Strip
Venus Instruments Veno-Echo
Bizarre Jezabel Mimosa
ST Modular Sum Mix & Pan
Pladask Elektrisk Dradd
Knob Farm Ferry
Frap Tools Sapel
Frap Tools 333

Outboard Gear Used:
Echofix EF-X2
Walrus Audio Slöer
Oto Boum

Performed and recorded in 1 take in AUM on iPad via the Expert Sleepers ES-9.

  1. I do tend to read manuals thoroughly, but genenerally not until after I encounter an issue and look to the manual for advice. ↩︎
  2. After some troubleshooting, I discovered that my primary problems were less about the E370, and more about the CV I was using to modulate it. ↩︎
  3. Ironically, my entry into Eurorack was initially as a way to CV control my tape delays, and yet I hadn’t yet tried it until this patch. ↩︎

A Chordal Soundscape With The Pianist, Odessa, Panharmonium, And A Couple Of Tape Delays

I’m not going to go in depth on this patch as there’s a lot of modulation happening and I can’t possibly document it without rambling in circles. I’m also using several techniques I’ve already written about, like using chaos at a clock, running a delay into the Panharmonium, using tape delays, and panning using VCAs.

A couple things of note:

The Echofix EF-X2 tape delays have incredibly good overdrive. The clipping is all analog and is both warm and musical. I would absolutely use the preamp alone to add anything from subtle saturation to thick overdrive. All of the distortion in this track is from the pair of EF-X2 tape echoes.

The Pianist by NOH-Modular is a highly capable chord sequencer. Building progressions is easy and the interface is intuitive. It certainly has faults (that I’ll discuss later in a more comprehensive review), but overall it does an absolutely fantastic job.

Odessa is Odessa and I will make no apologies for it.

This is the first patch during which I’ve used both the go-to AI Synthesis 018 Stereo Matrix Mixer alongside my new mono (voltage controlled) matrix mixer, the Transmon by Atomosynth. I used the latter to mix the Sofia Mix output with the Odessa partials outputs, while panning the Odessa fundamental slowly from left to right (although I can’t really hear the panning in the mix if I’m honest). Having a voltage controlled matrix mixer with individual outs for 12 of the 16 channels, along with 8 channels that can attenuvert makes for a compelling piece of kit. The possibilities are endless.

Modules Used:
NOH-Modular Pianist
Xaoc Devices Odessa (+ Hel)
Xaoc Devices Zadar
Xaoc Devices Lipsk
Xaoc Devices Erfurt
Xaoc Devices Samara II
Xaoc Devices Batumi II (+ Poti II)
Rossum Electro-Music Panharmonium
Holocene Electronics Non-Linear Memory Machine
Atomosynth Transmon
AI Synthesis 018 Stereo Matrix Mixer
Nonlinearcircuits The Hypster
Nonlinearcircuits Divide & Conquer
Nonlinearcircuits Triple Sloth
Auza Wave Packets

Improvised and recorded in 1 take on iPad in AUM via the Expert Sleepers ES-9.


Stereo Ping Pong Delay In Eurorack (and outside too!)

Ping Pong delay is easy, right? Just tick a box in a plugin, or flick a switch on your handy stereo delay unit and you’re done, right? Well, sure, but that’s all digital. What I’m talking about is ping pong delay, old school. Patching 2 mono, analog delay units in order to create ping pong delay in the stereo field.

When I first started thinking about how to do this, very few ideas came to mind. Of course there is the pseudo ping pong trick of setting one delay time at X with the other delay at 2X, which would give you a repeat on one side then the other. But that only works for exactly 1 repeat per channel. If there is any feedback, the first delay will sound again each time the second plays, which means it’s not really ping pong at all. It’s only kinda sorta ping pong. I wanted something better. The real McCoy.

As I started to research analog ping pong patching via Google, I was quickly dismayed. There aren’t really any good sources I could find to explain the method for patching ping pong delay. Nothing. Nada. After I couldn’t find the info I was after via research, I decided to ask. I asked on an audio engineer forum. Crickets. I asked a home studio group on Facebook and was met with “Just use a plugin. It sounds the same”, as if that’s a good answer to the question of how to patch analog hardware. I looked in my own studio recording books, which were all silent on the matter. It’s as if this information just doesn’t exist, or, more accurately, was outdated by the time the internet arrived, and the knowledge on how to perform this studio trick was simply never recorded digitally. It’s a lost art from the days of yore when everything had to be patched manually, and no one outside of studios used it. A voodoo spell that not even those inside of professional working studios seem to use any longer. Analog ping pong delay is dead.

After searching for what seemed like forever, I finally happed upon a video which explains using 2 analog delays in ping pong fashion, with the aid of a desktop mixer. The patch is fairly simple, even if it’s not intuitive.

Sound Source > Ch 1 input (panned center)
Ch 1 Aux Send > Delay 1 input
Delay 1 > split directly to Ch 2 input (panned hard left) and Delay 2 Input
Delay 2 > Ch 3 input (panned hard right)
Ch 3 Aux Send > Delay 1 input
Mixer Stereo Output

Be sure that both delays are set to the same time. Be extra sure that the feedback (repeats) for both delays are set to the minimum (1 repeat). The Aux Send of input 3 (Delay 2) controls the number of repeats. BEWARE: This is a feedback patch. It can get out of control very quickly. Use the Aux Send wisely.

But I don’t have a desktop mixer, and although they can be had inexpensively, I didn’t really have much use for one outside of wanting to do tape echo ping pong delay. I used to have a Xaoc Devices Praga in my eurorack synth, which would have been ideal, but I sold it in favor of decentralized mixing alongside using a matrix mixer. Hmmmm….

A matrix mixer is nothing if not a set of inputs, sends and returns. “I think I can make this work, even in the context of my matrix mixer being full stereo”, I thought. And sure enough, after several drafts in my Notability folder for synth patching, and experimenting with dummy cable theory, I had a solid plan. I just didn’t know if it would work.

The theory with a matrix mixer is the same, but because mine is stereo, I had to use make clever use of some dummy cables in order to defeat L> R normalization at the inputs to ensure everything was in the correct channel at the outputs, while still having access to the dry and wet signals independently to mix their respective levels later in an output mixer. To mix the dry and wet in the matrix as it’s patched would leave the dry signal in the left channel only. No good.

Sound source > Input 1L, with dummy cable in 1R
Output AL/R > mono mixer > Delay 1
Delay 1 > Input 2L, with dummy cable in 2R
Output BL > Delay 2
Delay 2 > Input 3R, with a dummy cable in 3L (it is not necessary to use a dummy cable here, but I’m using one for consistency)
Output CL > Output Mixer (Pan Center)
Output DL/R > Output Mixer (Pan L/R respective, or use a stereo input)

Knobs with an X are fully CCW (off). Knobs with a green check are mixed to taste. Knob with the red check is controlling feedback for the repeats. BEWARE: Ch 3A is feedback from Delay 2 to Delay 1. It can easily run away out of control and blow your speakers, headphones, and/or ear drums. Use it sparingly.

This method also makes use of a separate mono mixer to act as a send for both the source and Delay 2 to Delay 1. It what helps make the magic happen. Without the mixer, I couldn’t get the source and Delay 2 to Delay 1 without getting channels mixed up. Everything must remain on discrete channels in the matrix. As a result of the several dummy cables, Ch A’s outputs are discrete channels being used in a dual mono setup rather than in stereo, with those signals being mixed separately before going to delay 1. It was the only way to accomplish the task of sending both the source and Delay 2 inputs to Delay 1 while keeping those signals unmixed and discrete inside of the matrix mixer for final output.

Heed the inputs and outputs used very closely. It seems a bit odd, but it ensures that the stereo field is intact and signals remain properly separated until the final output mix. Deviate at your own peril.

The dry output is from Ch C, with the wet stereo output from Ch D. Pan the Ch C output to the center, with Ch D being panned L/R respectively.

This patch can likely be simplified (and perhaps sound better as a result) by splitting the audio at the Delay 1 output rather than relying on the matrix mixer to send the output of Delay 1 to Delay 2. This experiment, however, is for another day.

Although I haven’t pondered the nitty gritty of this patch in a mono matrix mixer, I think it would likely be a better tool for the job, but my first inclination is that you would need 5 outputs, and not the standard 4.

Enjoy!

Jamuary 2429: A Tape Delay Experiment

One thing I’m not afraid to admit is that I’m a delay junkie. I love delays. Analog delays, digital delays, reverse delays, pitched delays, but most especially tape delays. I love tape delays so much I have a real one. Uh, make that 2 of them. But I’ll also admit, a bit more tentatively in a misguided effort at fooling myself, that I haven’t really gotten much use from a stereo pair. I’ve gotten decent use from one, but not very much at all from the other.

One thing that I’d always wanted to do was to do old school ping pong delay with my 2 tape echoes. In a world of simple-to-use plugins, ping pong delay is normally just a check box or button click away, but in the analog hardware world, it takes careful and deliberate patching, along with lots of level adjustments along the way. In fact, it seems that ping pong delay with analog gear is a lost art. A dark magic lost in the olden times when you had to patch everything manually. The patch itself is not terribly hard, but it’s also not necessarily intuitive, which makes figuring it out a challenge. It also takes a piece of gear that I don’t have: a standard desktop mixer. And not even a super fancy one. As long as it has 3 inputs and an AUX send, we’re good. I don’t have a performance mixer in Eurorack either. At least not after I sold the Xaoc Devices Praga (which would have been perfect for this).

But I do have a stereo matrix mixer, and the will to use it.

I’ll breakdown the patch in a post later this week, but suffice to say that it worked a treat. I got my ping pong delay. It took a fair amount of finagling, particularly with feedback, but I got what I wanted. As soon as I introduced any feedback into the system, it would tend toward self-oscillation, as one might expect. But one fancy trick about tape delays is that they do The Thing. You know, when feedback starts to build, and you can hear it, but it’s just on the edge, not blowing your speakers, riding a wave of sonic beauty, underneath your melody. It really is voodoo. Of course you can go overboard, but tape delays make it a bit easier to ride the wave rather than have it blow up on you. I’m sure the matrix mixer design helps too.

One thing I discovered about the AI Synthesis 018 Stereo Matrix Mixer is that, probably because it does not introduce any gain, is that it can control feedback fairly easily. Despite feedback running rampantly toward the end of the patch, it never once got out of control, and allowed me to play the tape delay via the echo levels, as well as the EQ knobs of each echo, creating some nice stereo swirl and howling tone changes, without being overly worried about a runaway train of feedback blowing my cans and my ears to smitherines.

My apologies for the repetitive sequence. This really was an experimental session for me, from figuring out the minutiae of ping pong delay, to playing with feedback through my tape echoes. I’ve never done either, and it was surely a treat.

Enjoy!

Modules Used:
Oxi One
Frap Tools Brenso
Frap Tools Falistri
Frap Tools 333
Frap Tools CUNSA
AI Synthesis 018 Stereo Matrix Mixer
Knob Farm Ferry
Echofix EF-X2
Vongon Ultrasheer

Performed and recorded in 1 take in AUM via the Expert Sleepers ES-9.

0:00
0:00