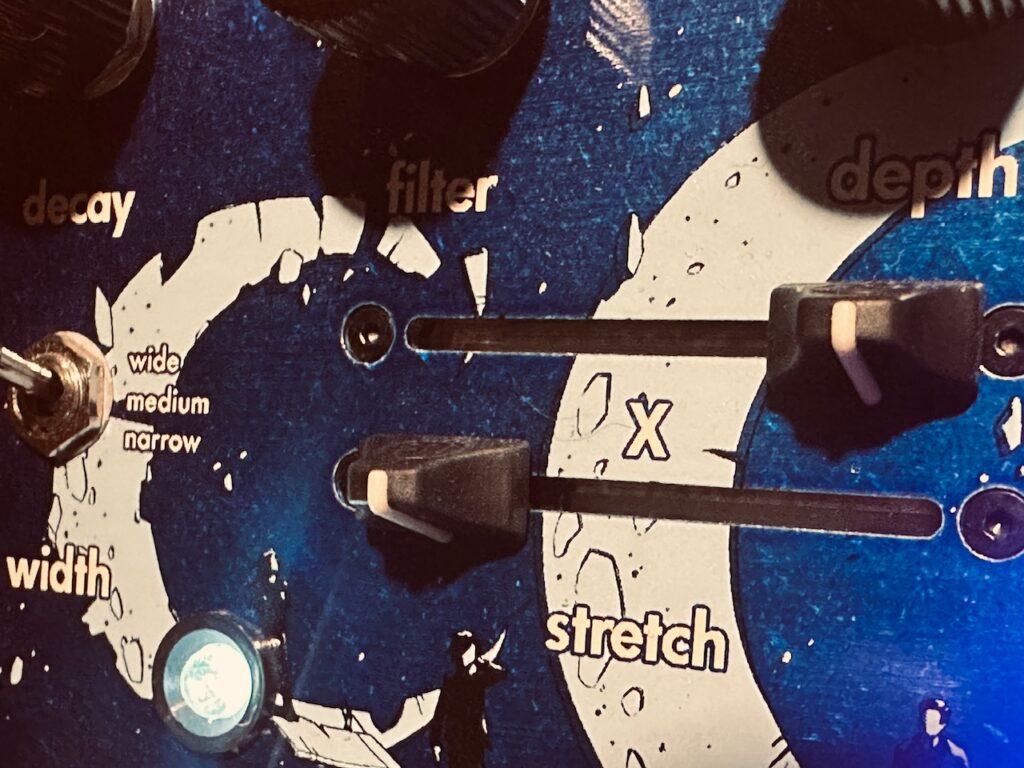
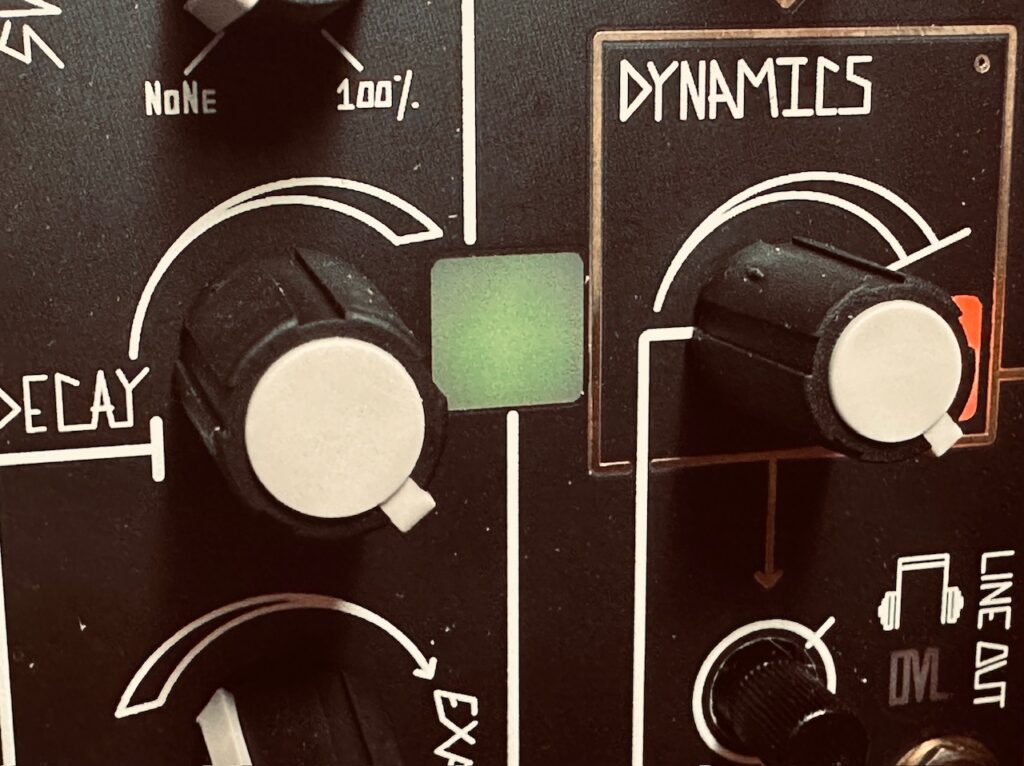
Still inspired by my latest patch, I decided to once again use four slow waves to control the levels of the Synthesis Technology E370, gently bringing them in and out of audibility. But rather than using Swell Physics to set the flow, I decided to use the flow of pure chaos. These sorts of soundscapes are amongst my favorite patches to create. They’re almost always exceedingly beautiful, and I’ve found that even similar patches can yield radically different results. I have a small library of slow motion patching techniques I use regularly, and I’m continuously looking for new ways of expanding upon them. Whether that be newly created control schemes, or simply making small adaptations to ones already in my toolbox, I’m constantly seeking new routes and trying to learn new methods.
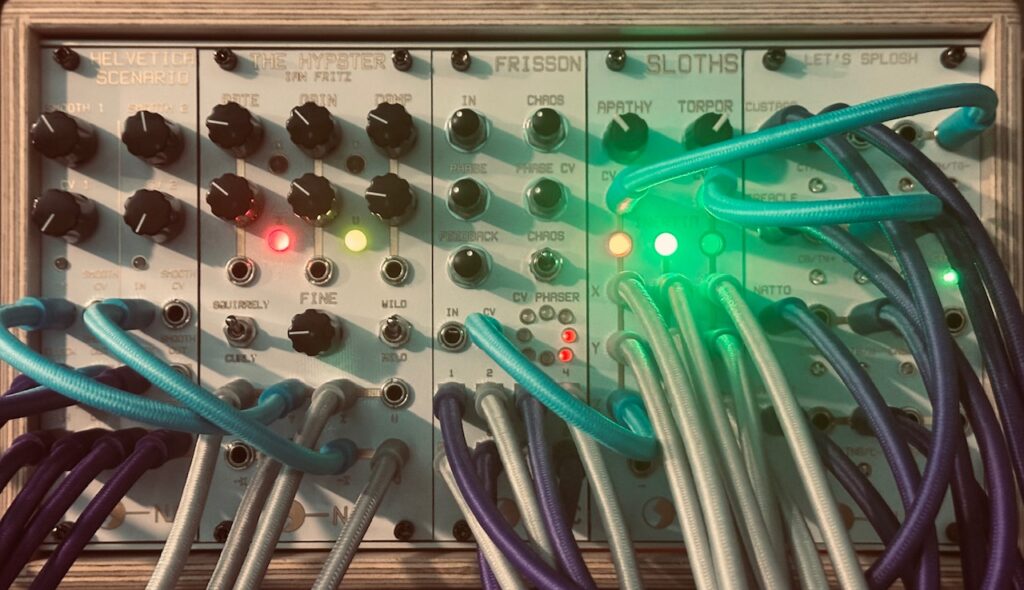
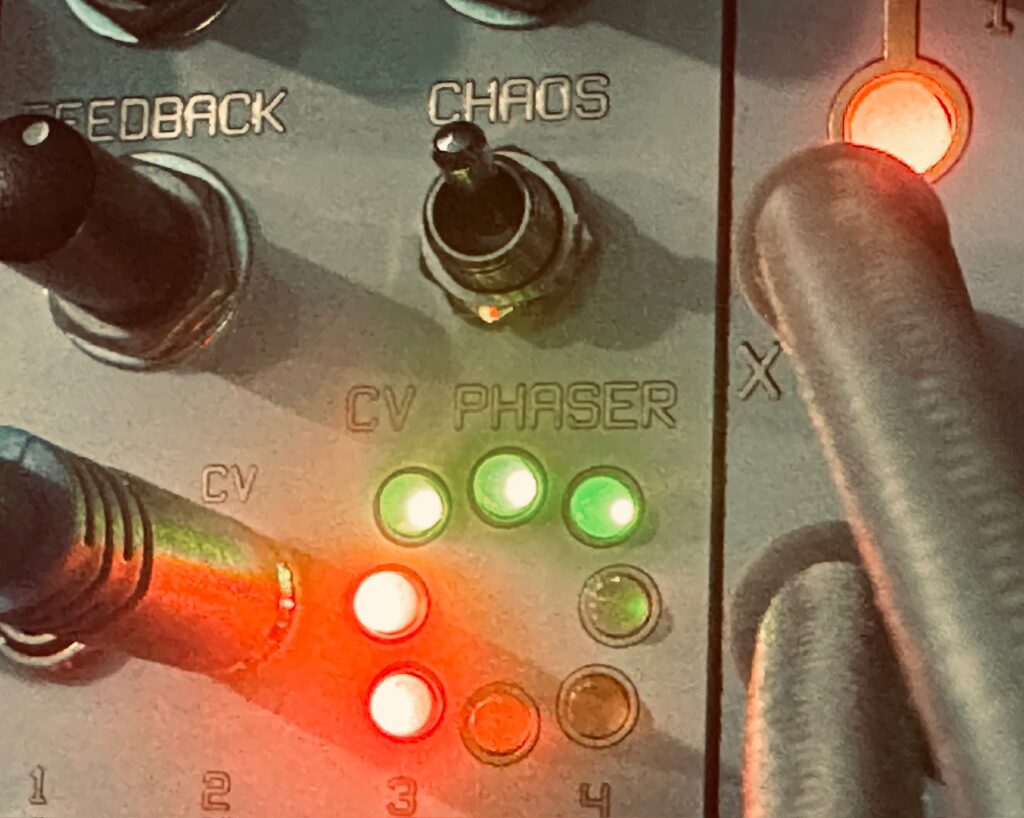
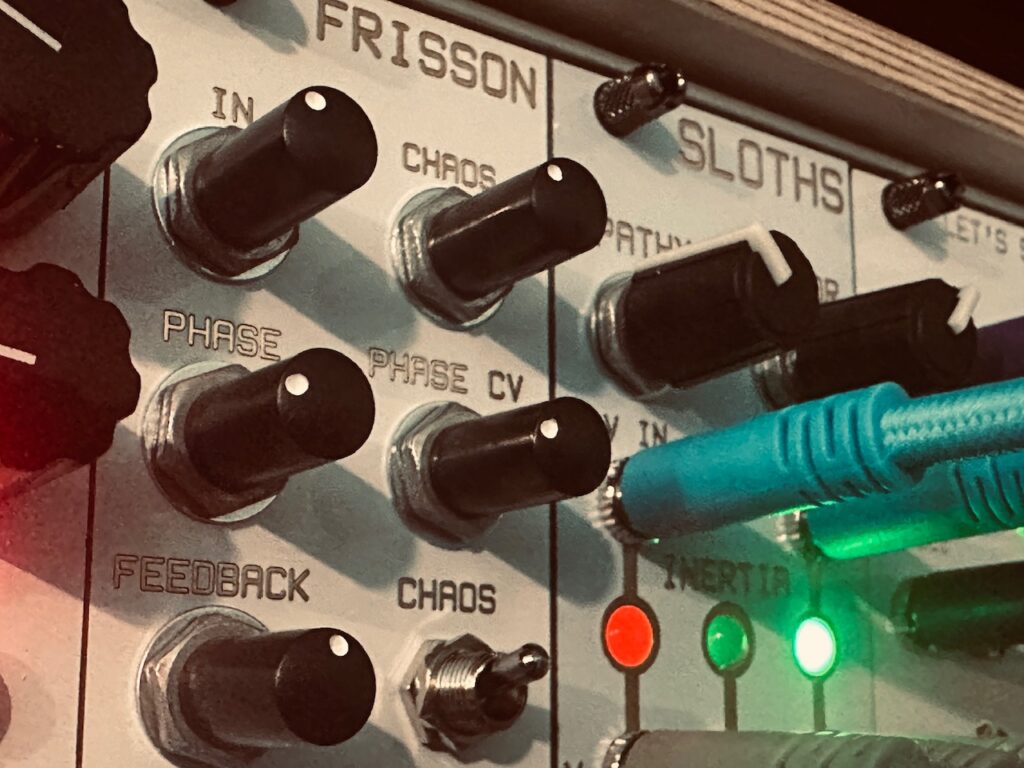
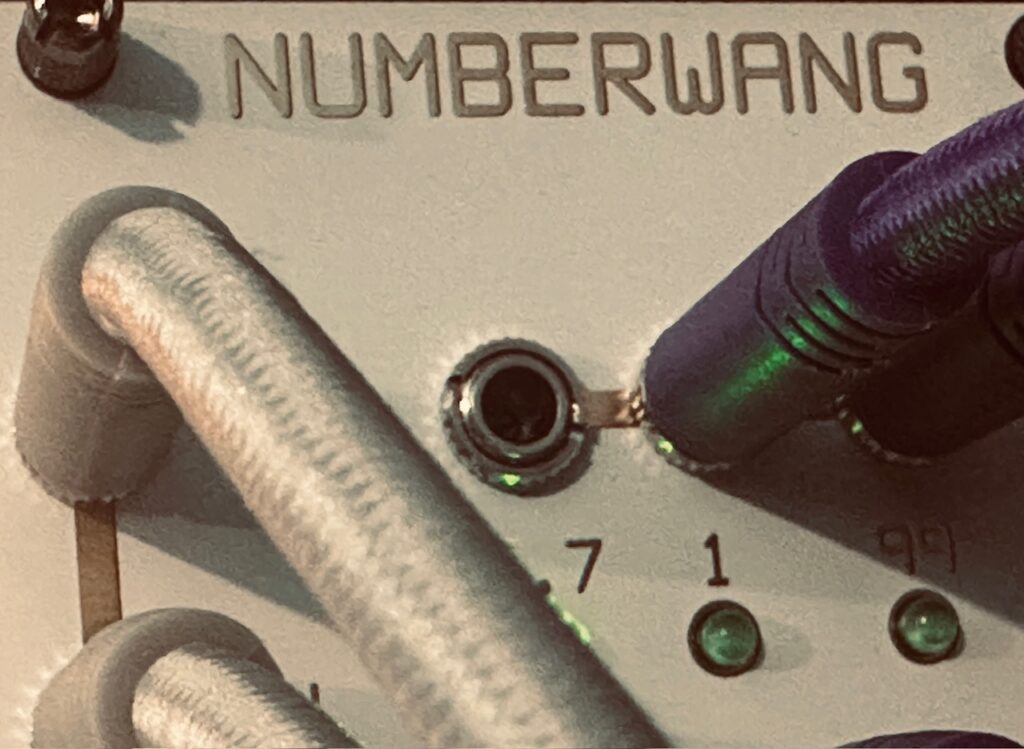
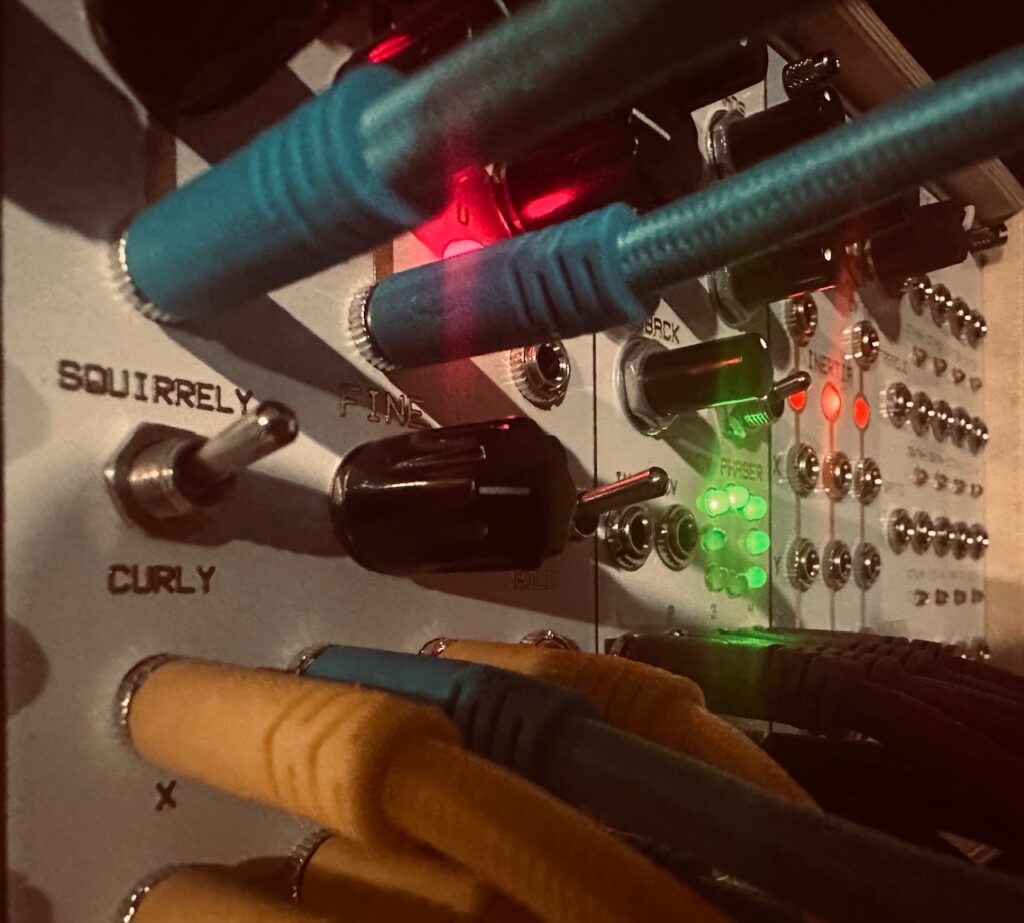
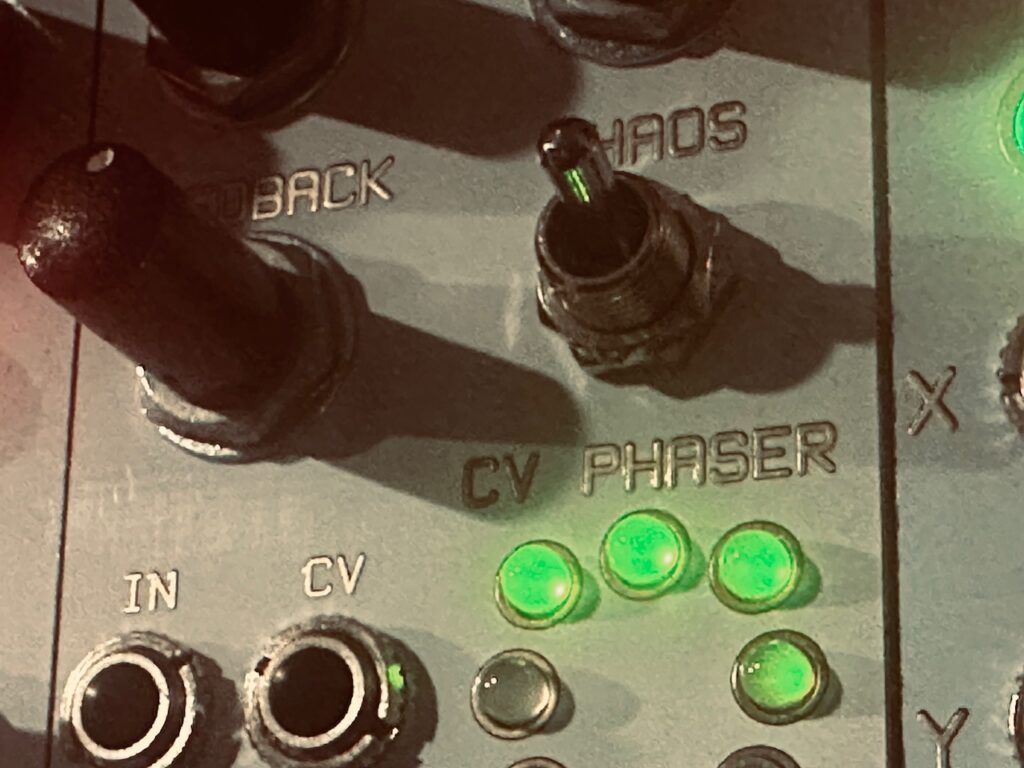
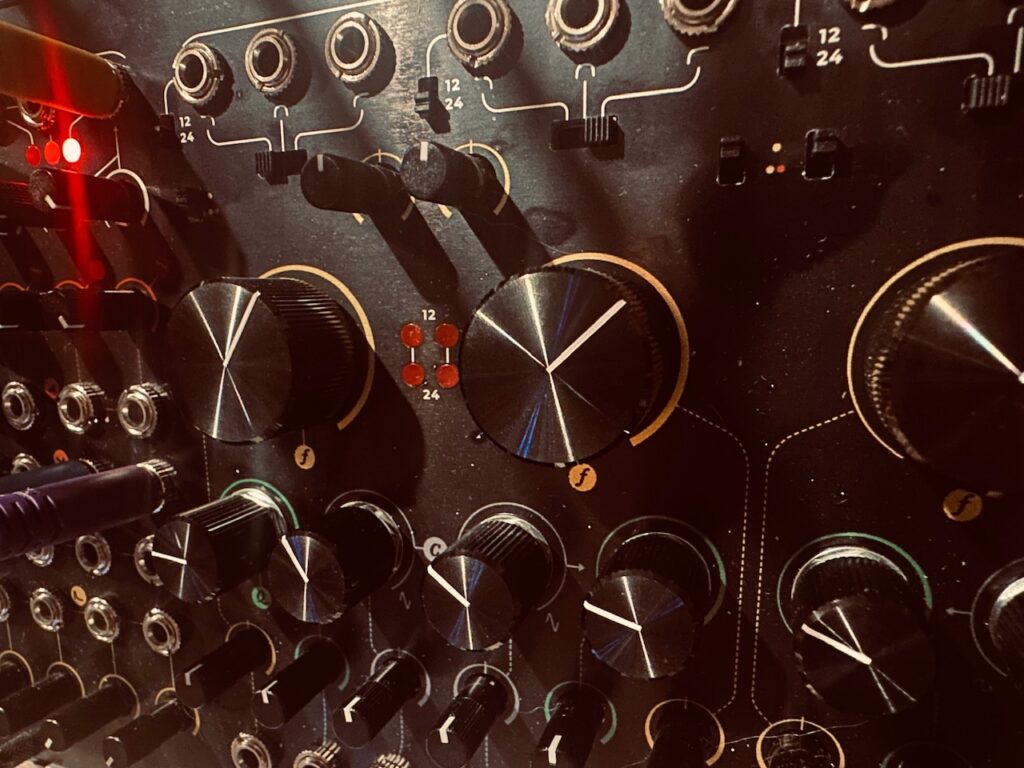
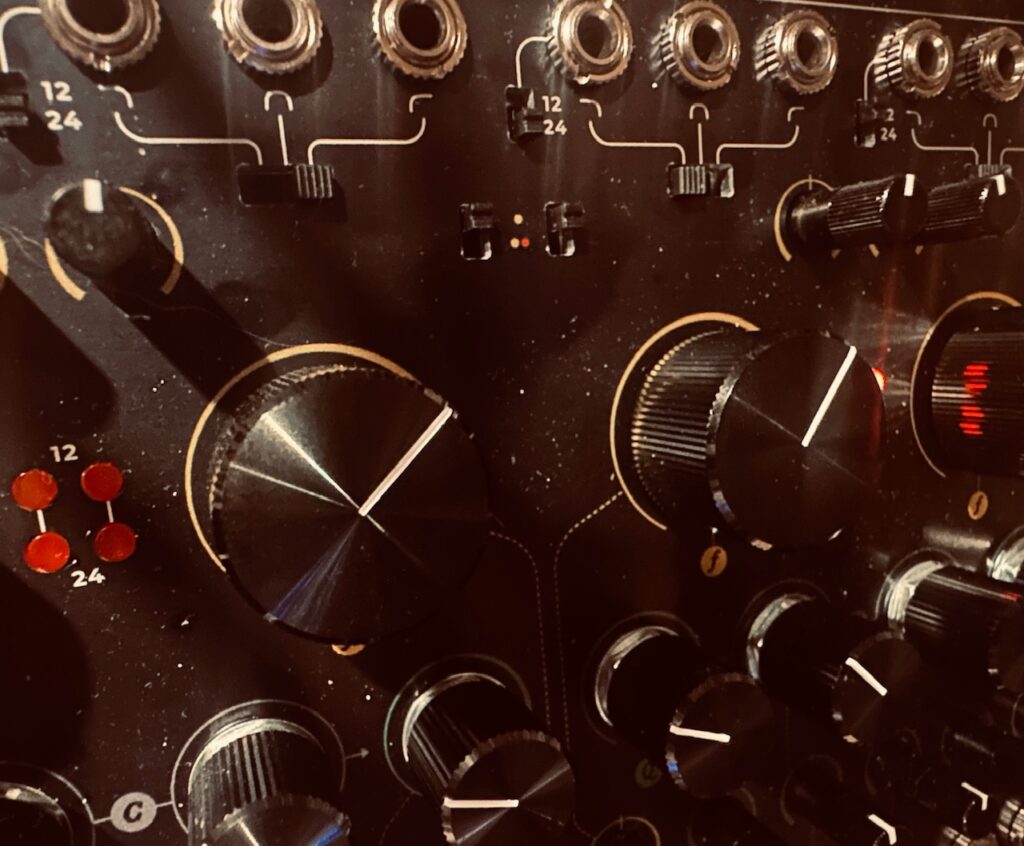
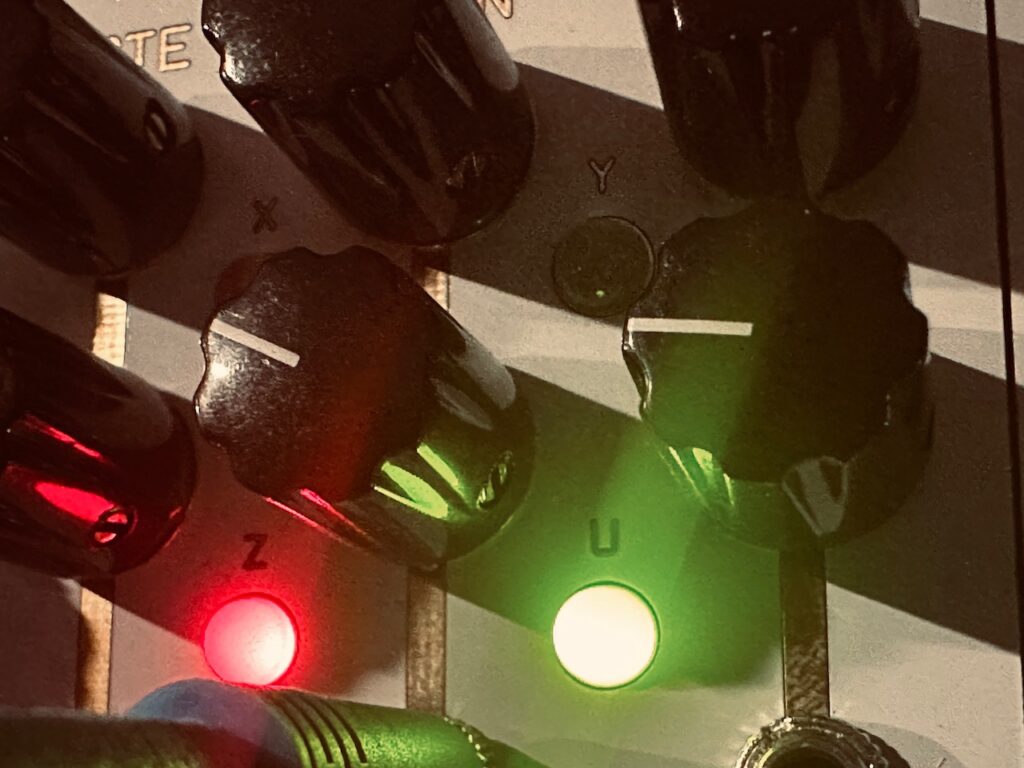
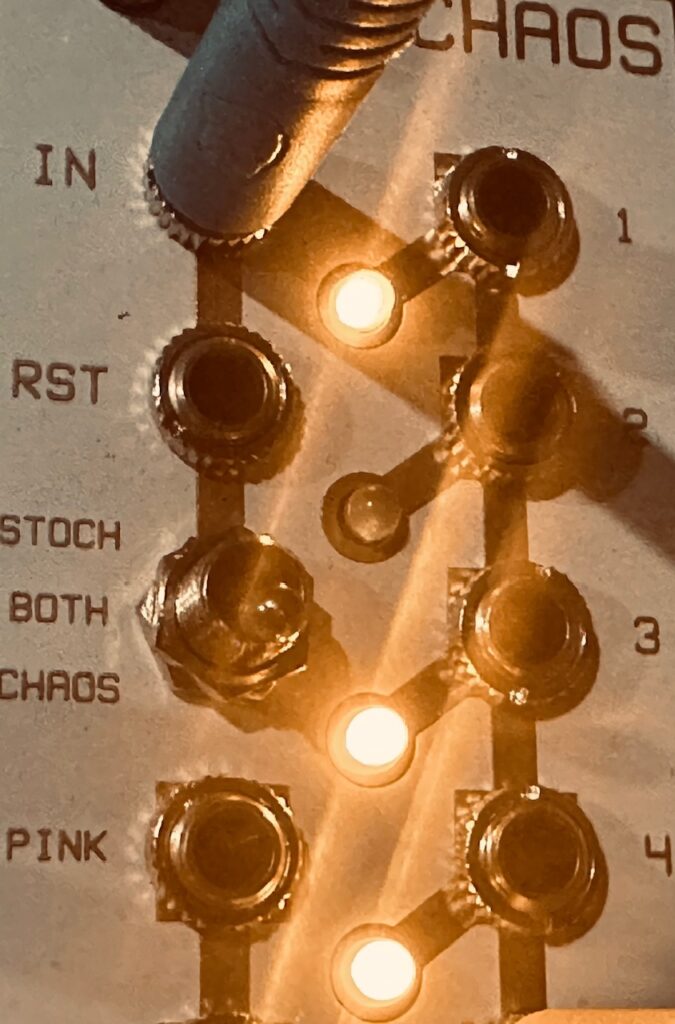
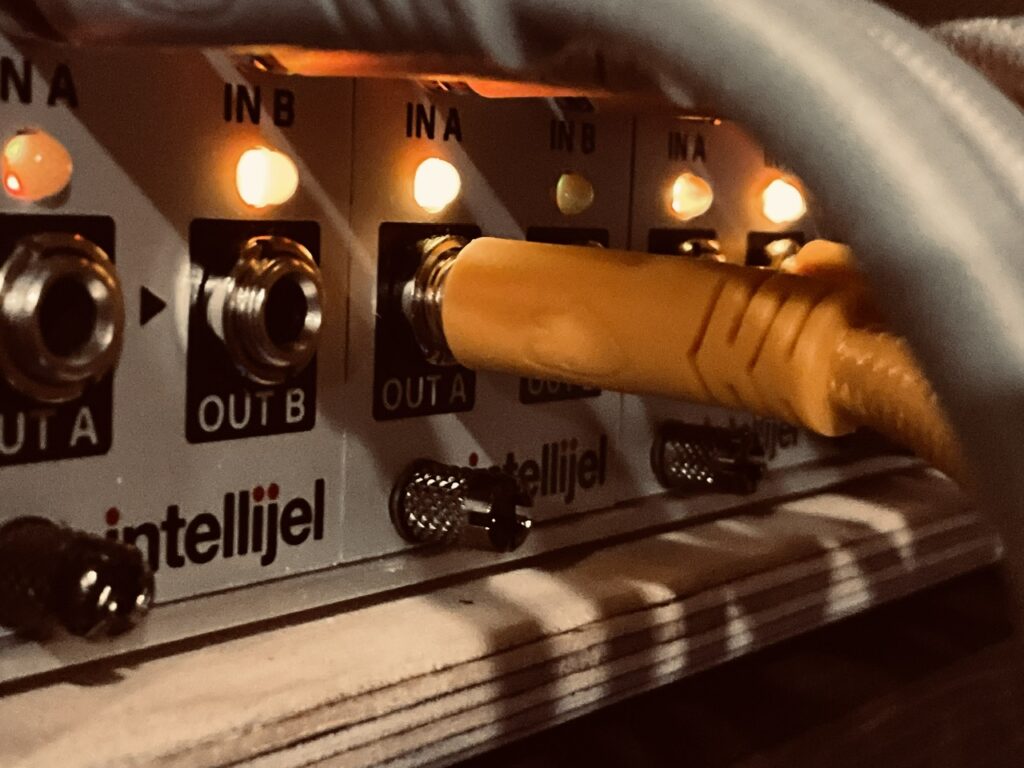
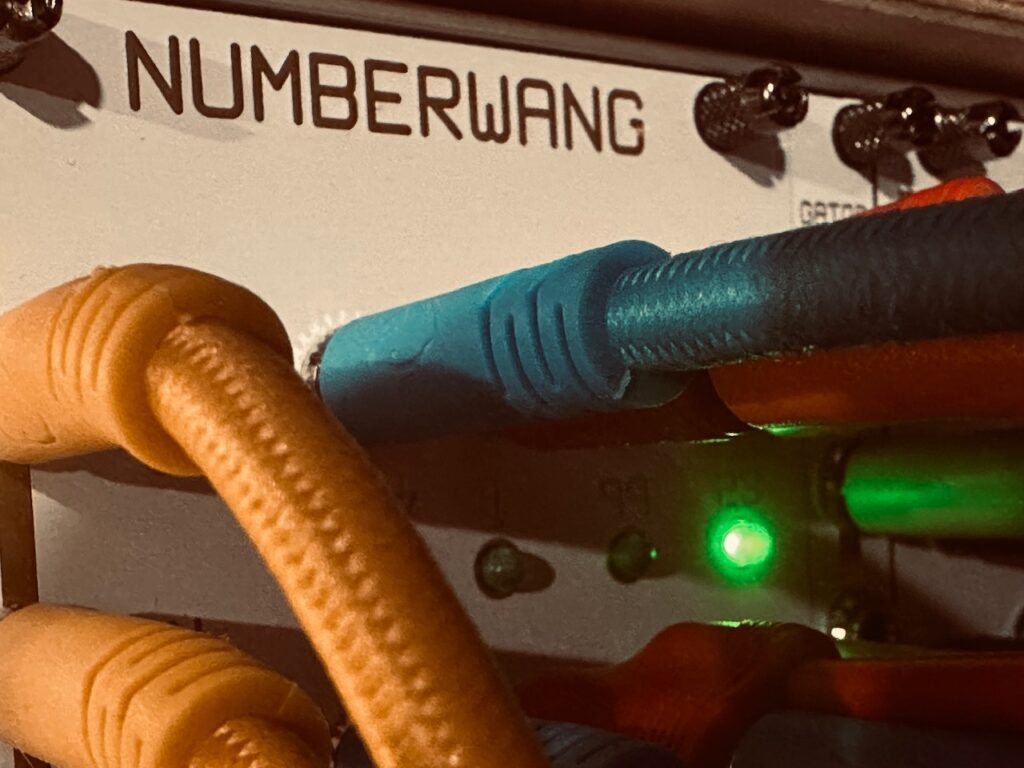
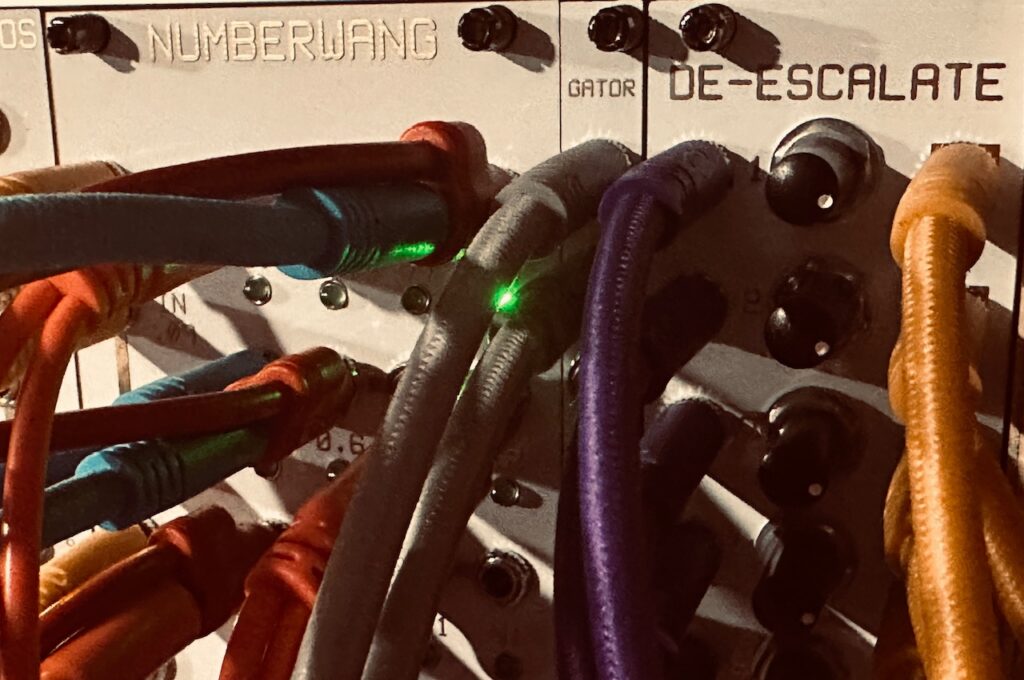
The beating heart of this patch began with the Nonlinearcircuits Frisson, an eight output chaos module based on Mackey-Glass equations, with some help from its chaotic friends, Helvetica Scenario, Triple Sloth, and The Hypster, as well as assists from fellow NLC friends, Numberwang and Let’s Splosh. Frisson is a chaos module that gives some control, but not an overwhelming amount. You can control phasing of the outputs, which also increasingly have more slew, and the speed can be somewhat controlled, though not really. You can also CV control the phasing, or inject an external signal into the internal chaos. It also can be alternatively used as a CV phaser, taking an input, while phasing the outputs and increasingly adding slew. It’s a fantastic way of getting eight closely related modulation signals. I’ve used Frisson in the past, it was a goodly part of my last patch too, but this time I used it differently. Rather than being solely used for modulation of some secondary parameter like a filter cutoff, this time Frisson’s chaos was the star of the show, with four randomly chosen outputs directly controlling the Synthesis Technology E370 output levels in the Intellijel Amps, while the other four outputs were patched to Let’s Splosh to be spread through the system. Having chaos directly control levels is interesting, because it means you’re hearing chaos and it’s meandering directly, as opposed to indirectly via the modulation of a secondary parameter. When the chaos signals rise, so too does the sound of each oscillator. As the chaos moves through its circuitous oscillations, you can hear its mood. Sometimes bold, other times shy and apt to change its mind, chaos is the highlight of this patch, not part of a side show. I’ve done similar patches before using chaos, most notably Jamuary 2509, but I tend more towards Swell Physics, or some form of LFO over straight chaos for this kind of job. Here, Frisson and its chaos form the basis of everything.
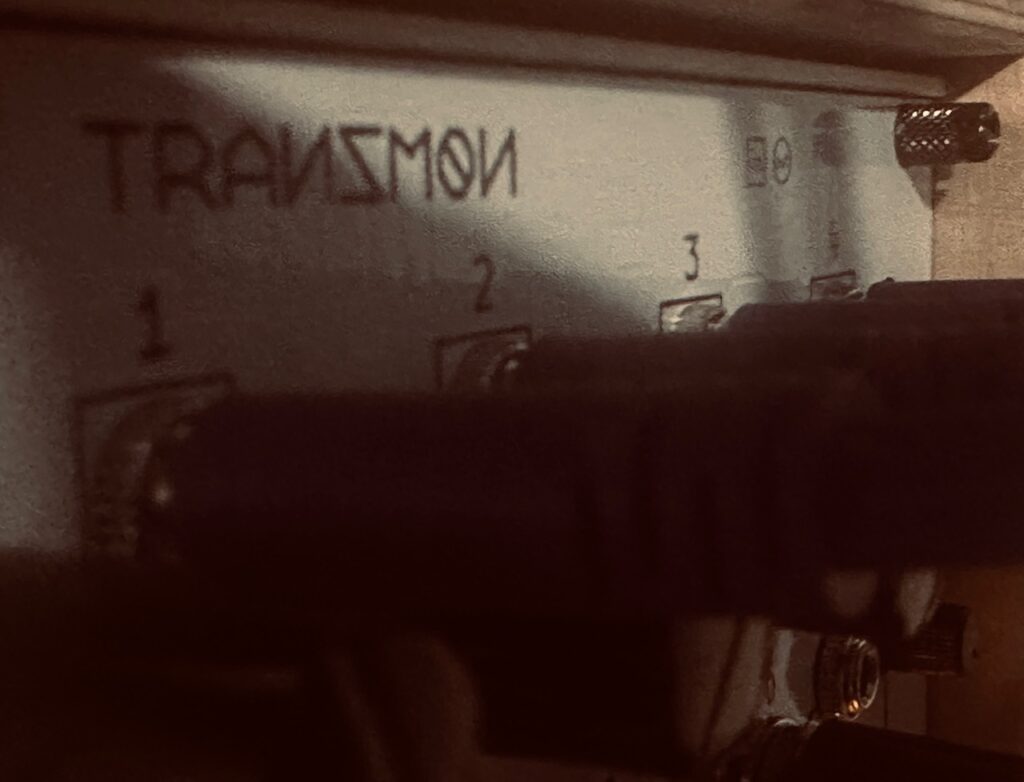
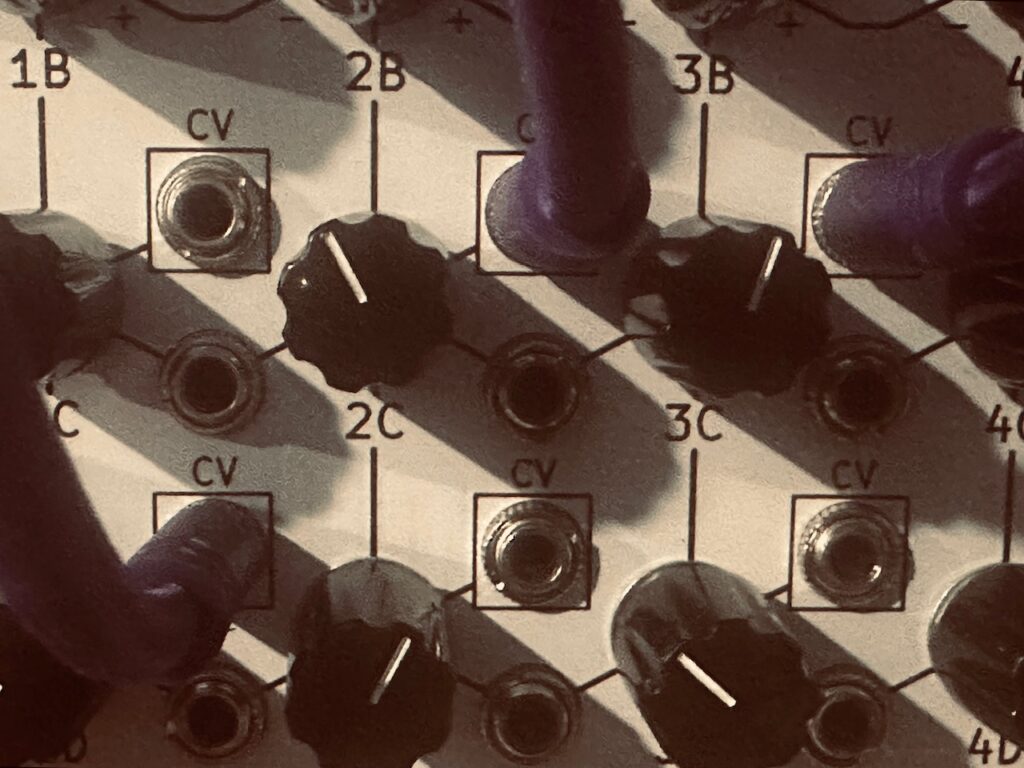
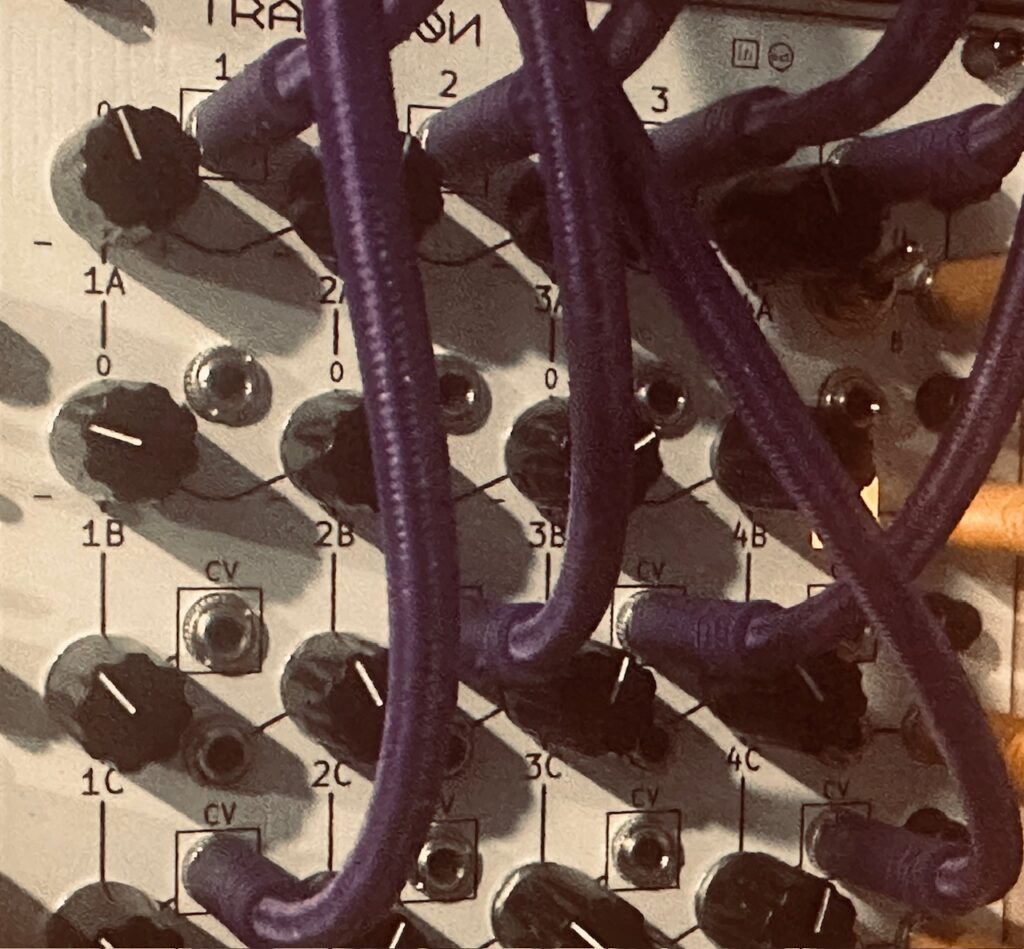
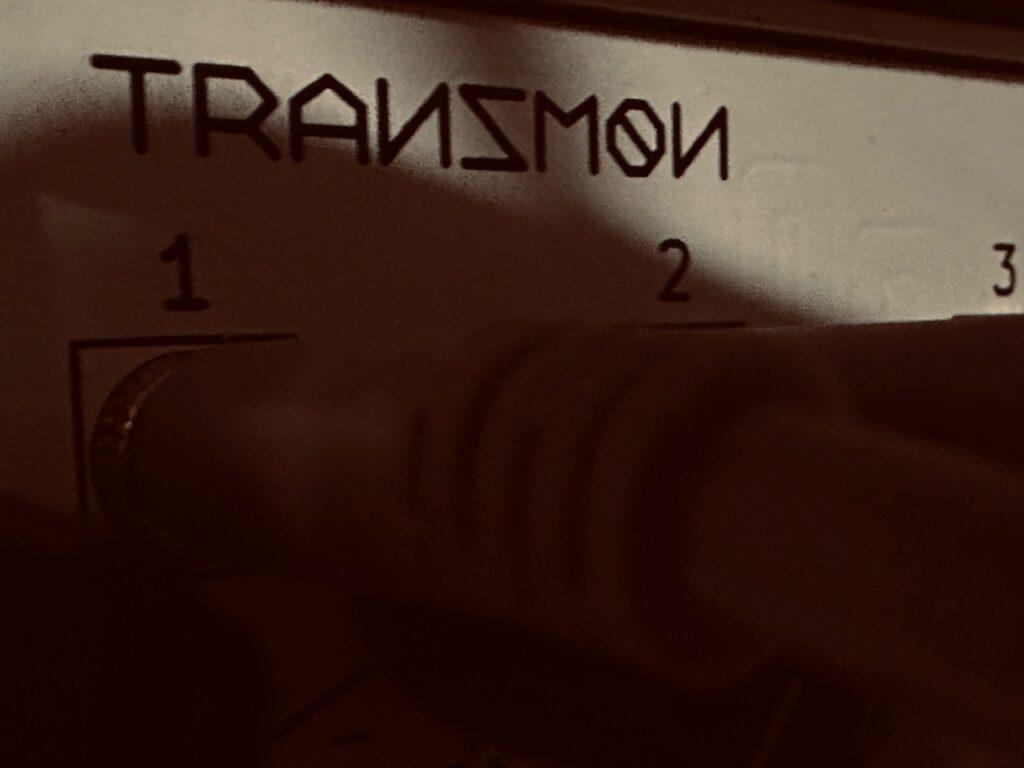
And it’s not just the volume levels that Frisson controlled. The remaining four outputs were patched to Let’s Splosh, a very excellent “put something in, get many things out” kind of module that takes four inputs and has a lovely 16 outputs of completely interrelated control voltage to spread around a patch. Four more-or-less randomly chosen Splosh outputs were patched to the Atomosynth Transmon’s inputs.1 Eight of the 11 outputs from the one and only Triple Sloth were used to modulate the eight CV inputs on Rows C and D of the Transmon to help create a wild mix of chaotically moving control voltage. This rich and complex mix of chaos created all of the tonal movement in this patch, as the oscillators were sent a steady Dmaj7 chord. As voltage increased along the X axis of each wavetable, notes move along a scale, most noticeably in the higher register, where it sounds reminiscent of a classic Gen X toy, the Whirly Tube. I was absolutely infatuated by this chaotically created melody, making sure to treat that one channel different from the rest. I offset the audio in Amps so that it might be audible for a bit longer than the other oscillators. I also made sure that its channel was centered and turned up loudest in the ST Modular Sum Mix & Pan, even if the third channel is still mixed too loud. I wanted it to be a highlight of the patch, with pitch and volume of the melody controlled by Frisson’s lovely chaos. Let’s Splosh didn’t stop at modulating wavetables, however. Two more of its outputs were patched to the two CV inputs on Triple Sloth, creating a CV loop where Splosh modulated Sloth which in turn modulated other Splosh outputs in the Transmon. Chaos acting upon chaos, acting upon chaos. Beautiful.
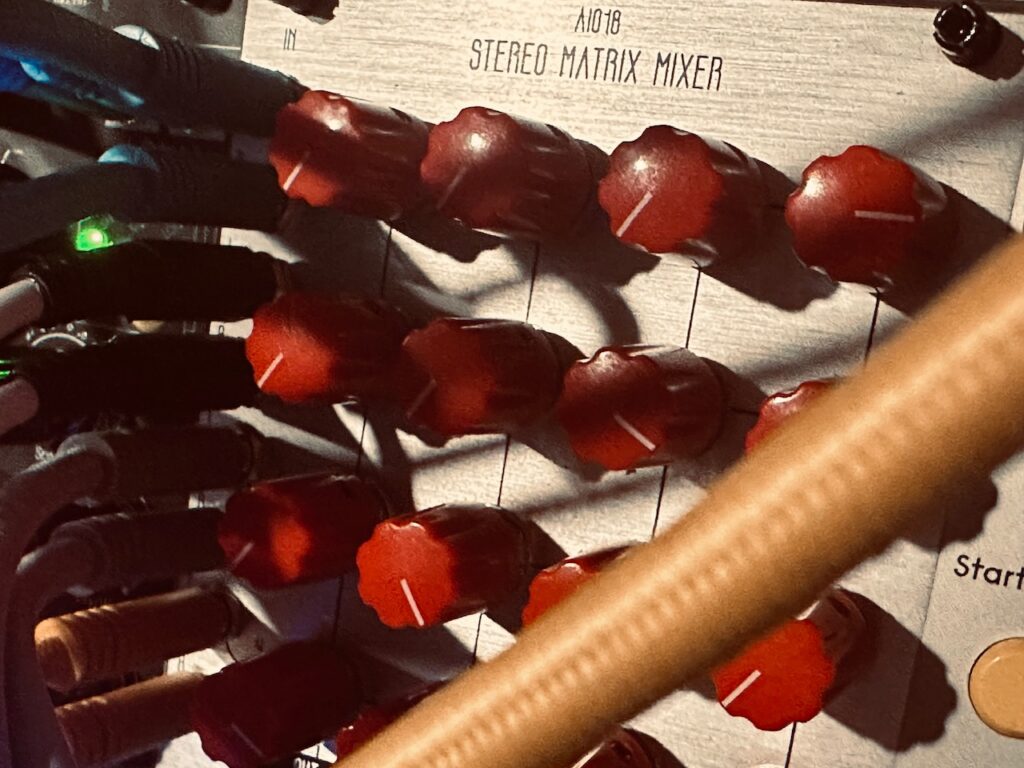
The audio was patched from the Intellijel Amps to the Addac System Addac814 6×6 Stereo Matrix Mixer via the ST Modular Sum Mix & Pan, before being spread around to various effects. Its primary destination was the Echofix EF-X2 pair for some stereo tape delay treatment. This recording may well be the my most beautiful result from the tape delays to date. Having used offset delay times with varying tape head combinations, a fair amount of feedback, and a smidge of reverb, the sound floats back and forth cloud-like in the stereo field. Once that cloud hit the reverb, it lingers in the best ways possible, with a slight octave up choir to provide for some air.
But the tape delays weren’t the only FX destination for the main audio. As I’ve become prone to do, I wanted something to fill out the frequency range. Most of the audio was in the mid-to-upper ranges, and I’m a sucker for depth. I used Panharmonium with a fairly slow analysis gap, set at an octave down. Two octaves down really sounded great, but, like the last patch, there was too much flutter from very low frequencies. I didn’t want to bother re-patching it through a filter, and I didn’t think to use an EQ in my mixer. I thought about sending the Panharmonium through a delay, but ultimately chose to let it stand on its own (through reverb, of course).
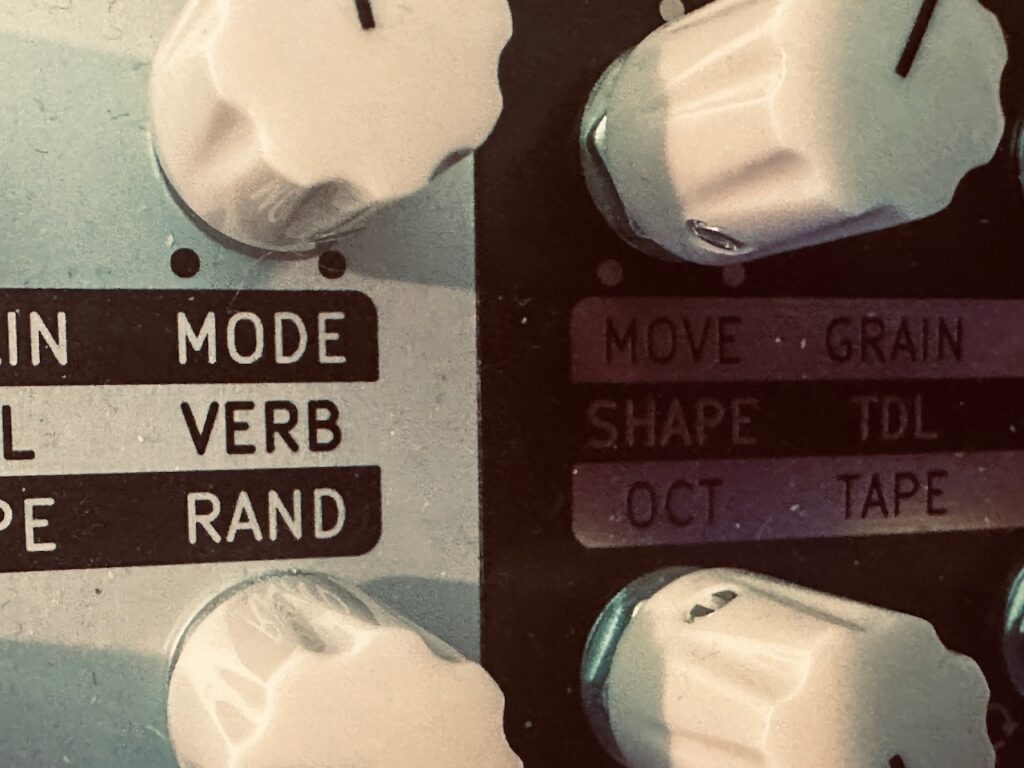
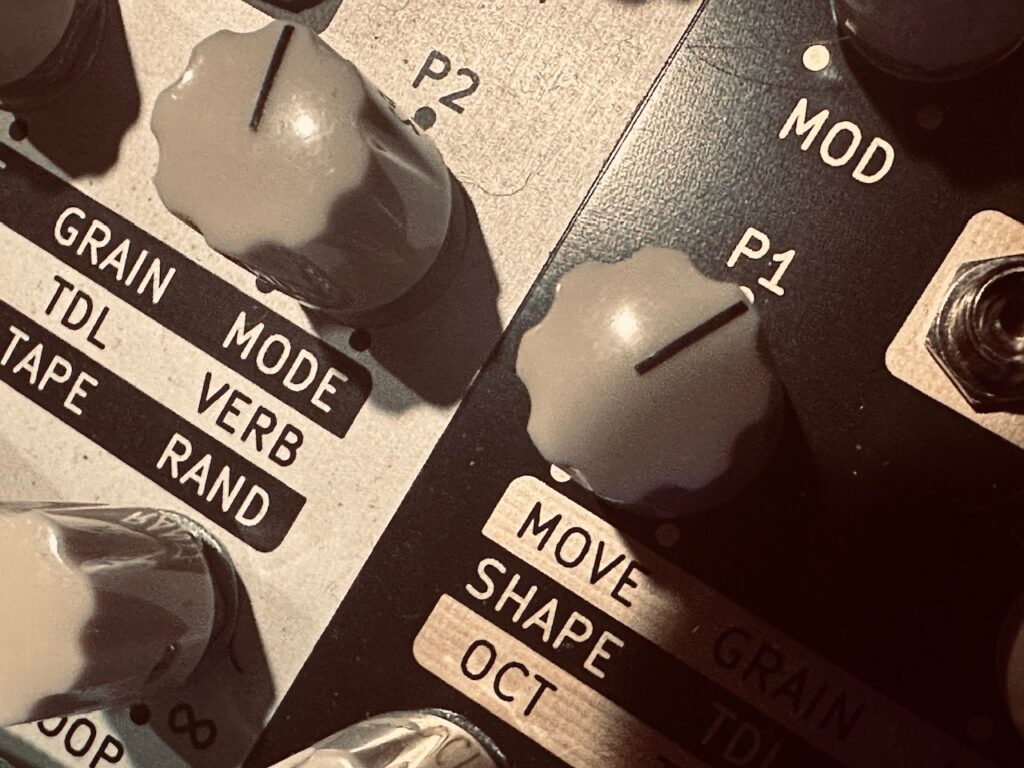
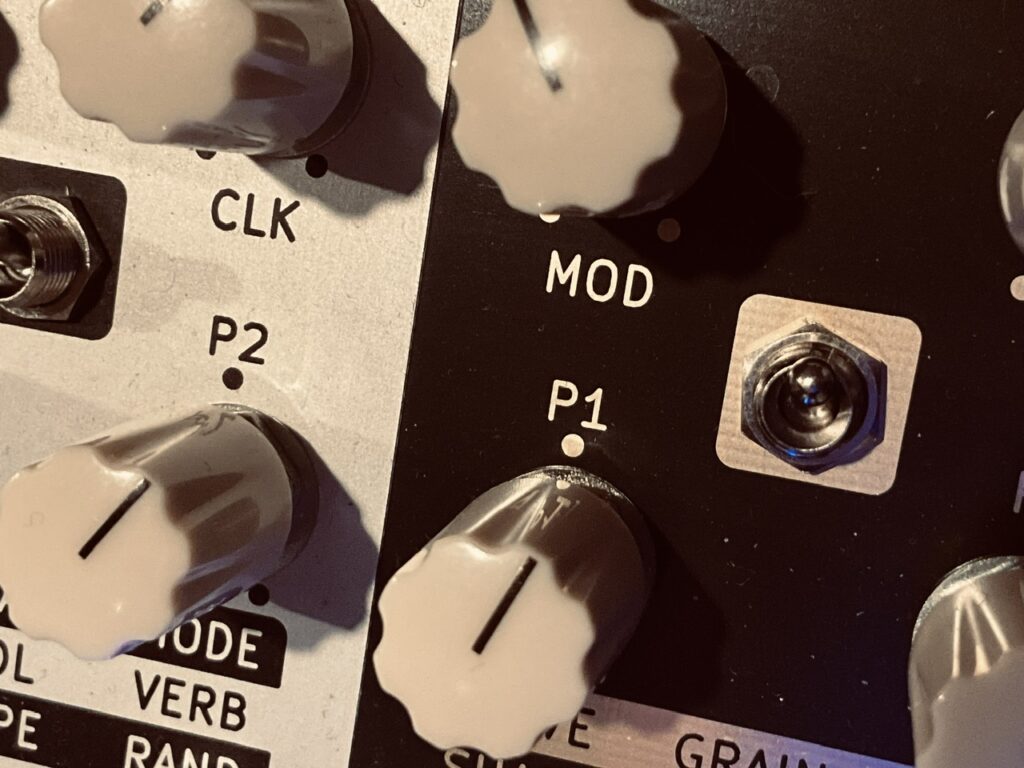
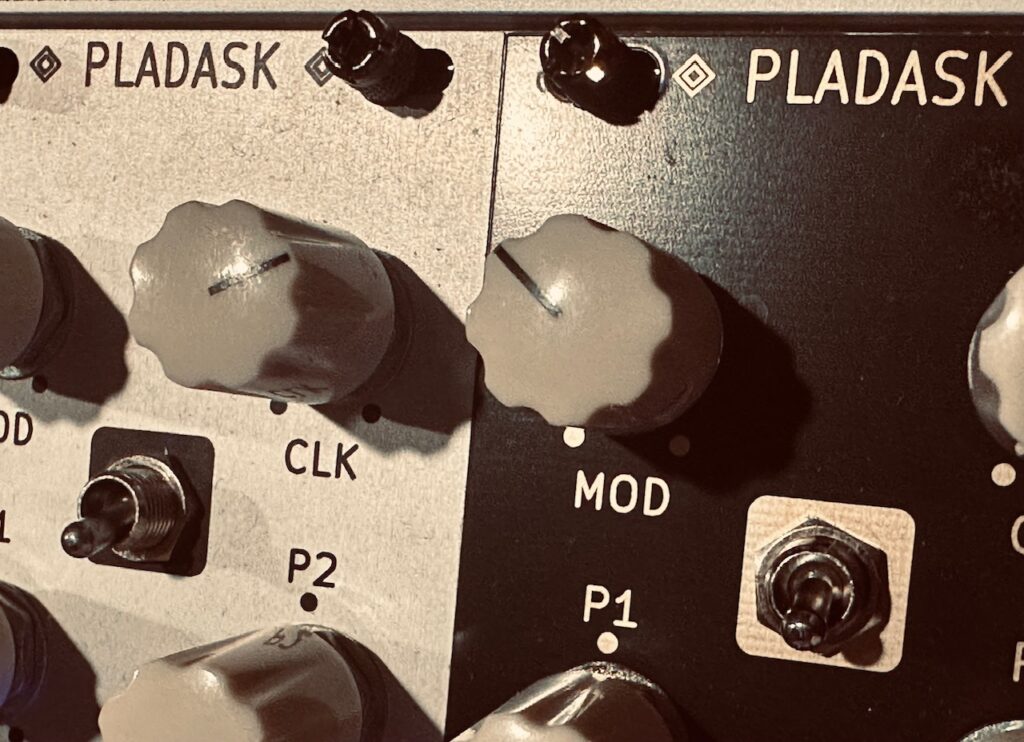
And the effects didn’t stop there either. Another favorite method of mine to thicken sound is to use it with the venerable Pladask Elektrisk Dradd(s). It’s not easy to describe what the Dradd(s) do in Grain Mode. The manual describes it as time stretching. And though it certainly sounds like time stretching, with some sources it sounds like something else too. Almost as if a small string section were playing a tremolo shadow of the input. A wonderful unsteadiness to the notes that follows it around like a little brother whimpering for attention.
With the core of the patch complete, I sought some appropriate ornamentation. This is normally a spot I might use a Multisample piano or high(er) pitched oscillator pings through a LPG, but none of that felt right. It was awkward, often falling too in line with the already existing frequency and timbre range of my chaotic cloud, and just sounded bad. I tried pianos of various types, resonators like Rings, music box samples, and others before deciding to do something I’ve never done before; just cycle through sample folders and see what sounded good in context. I landed on one instrument that sounded promising, but I decided to keep going and come back to it if I couldn’t find anything else. Within a few clicks I landed on a sample folder called “MoogMG1vsAD_SynthFX.” I still have no real idea what these samples are, but when I heard the first careless swirl I immediately associated it with the sound of my Whirly Tube oscillator and knew it was right.
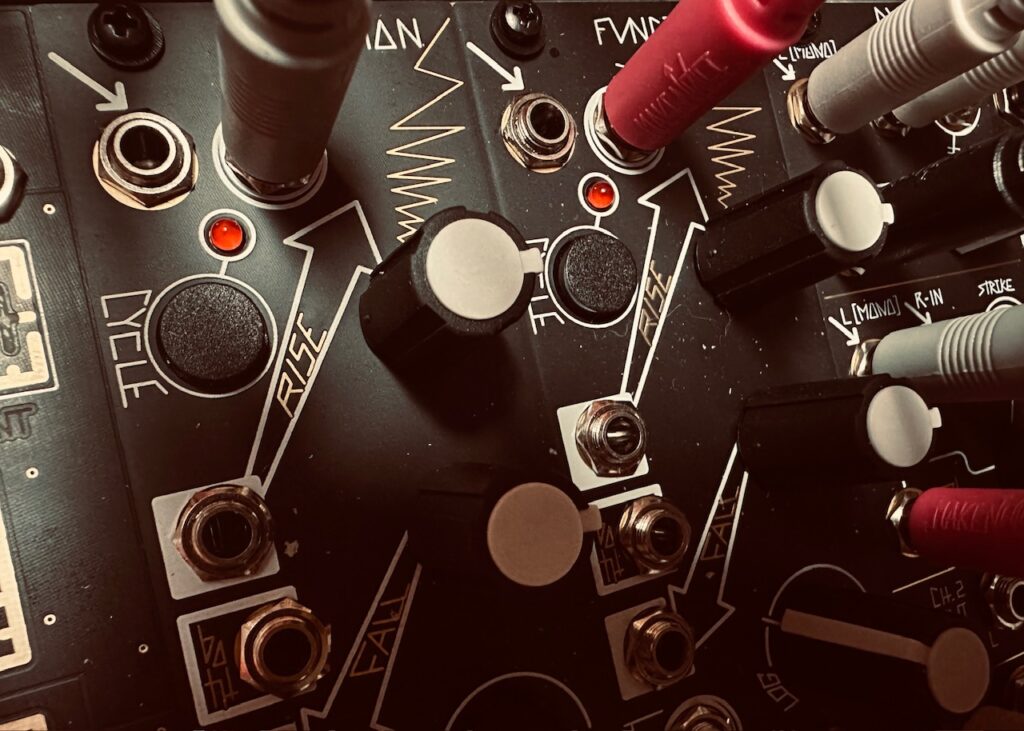
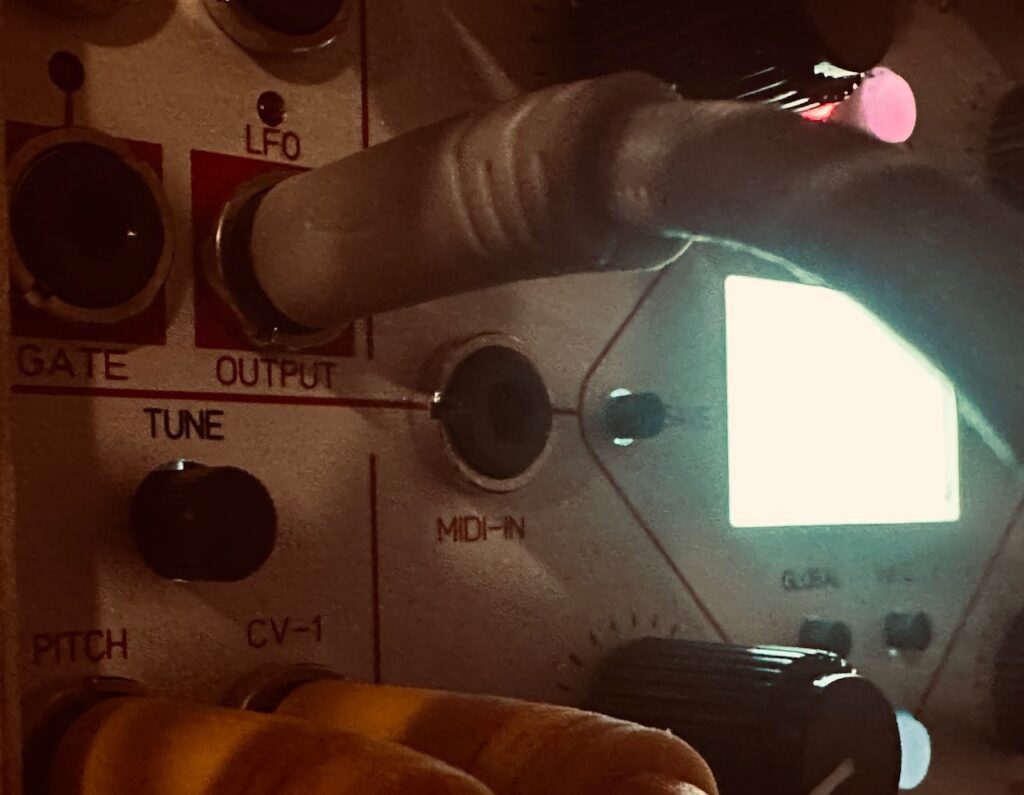
Gate and pitch generation for these swirlies was, just as the main audio, generated via chaotic processes. Four outputs from The Hypster were patched to Numberwang, while two others were patched to the Helvetica Scenario inputs. Numberwang used these chaos signals to create gates, while Helvetica Scenario was used as a sample and hold to get four separate CV outputs to be used for pitch, two of which would be derived from the inputs from The Hypster. Numberwang is a fantastic way of getting off-grid gate generation. It’s a favorite method of mine, depending on the needs of the patch. Four of its outputs were sent to the Disting NT which triggered the quantizer and samples, while two other outputs were used to trigger Helvetica Scenario. Helvetica Scenario is a fun module. It’s a slight twist on a traditional sample and hold module. Rather than using noise from which to sample voltage, it uses a jerk chaos signal running at approximately 300Hz. When hit with a trigger, it will output the voltage of the chaos signal, just as a normal S&H would do with noise. And just as with most S&H modules, one can always use an input, but Helvetica Scenario provides two outputs which act like a S&H. The first, the S&H output will sample the input and send that voltage to its output. The second, the Stepped output, however, will always sample the voltage of the internal chaos circuit so that each will provide two separate stepped outputs with just one trigger, for a total of four stepped voltage outputs. In fact, even if no input is patched, the Helvetica Scenario Stepped and S&H outputs will output voltages from different parts of the signal, so there are always at least two discrete voltages on every trigger. The four outputs here were used as the pitch CV for the swirlies, via the Disting NT’s quantizer, triggered by other gates coming from Numberwang.
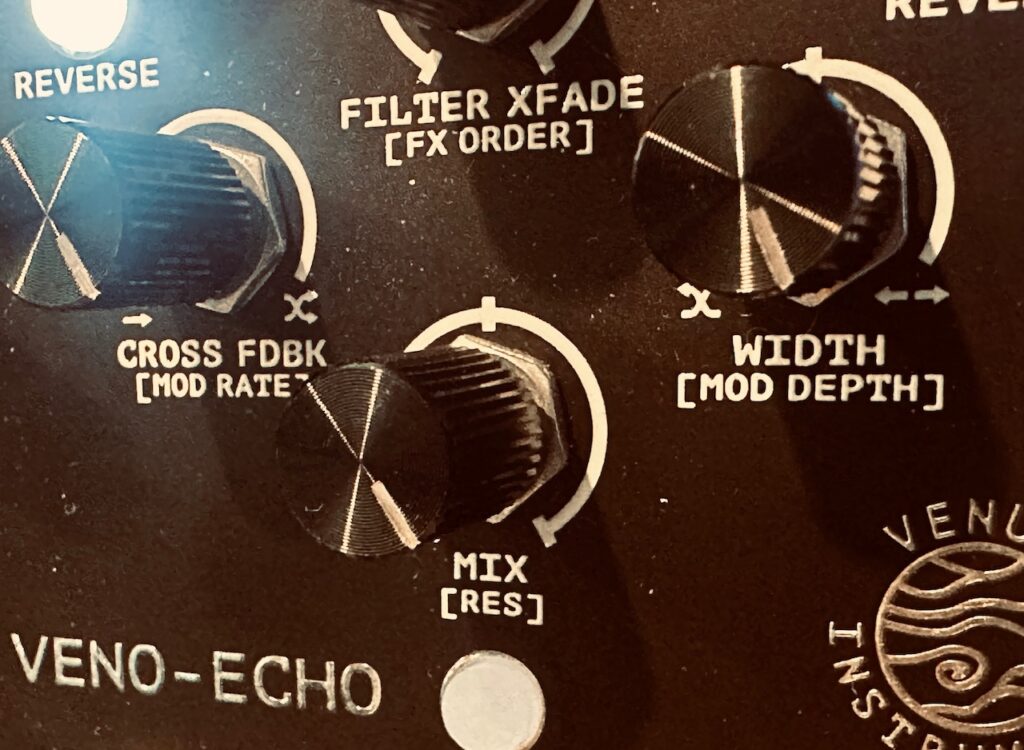
The swirlies from the Disting NT were patched to the Venus Instruments Veno-Echo. Cross feedback was set to full, with wide stereo width. There was also a twinge of sample reduction in the feedback path. Two final gates from Numberwang triggered the left and right Reverse, which created a very psychedelic feel to the swirlies as they darted through the clouds of the E370 and its floating repeats, Panharmonium, and the Dradd(s).
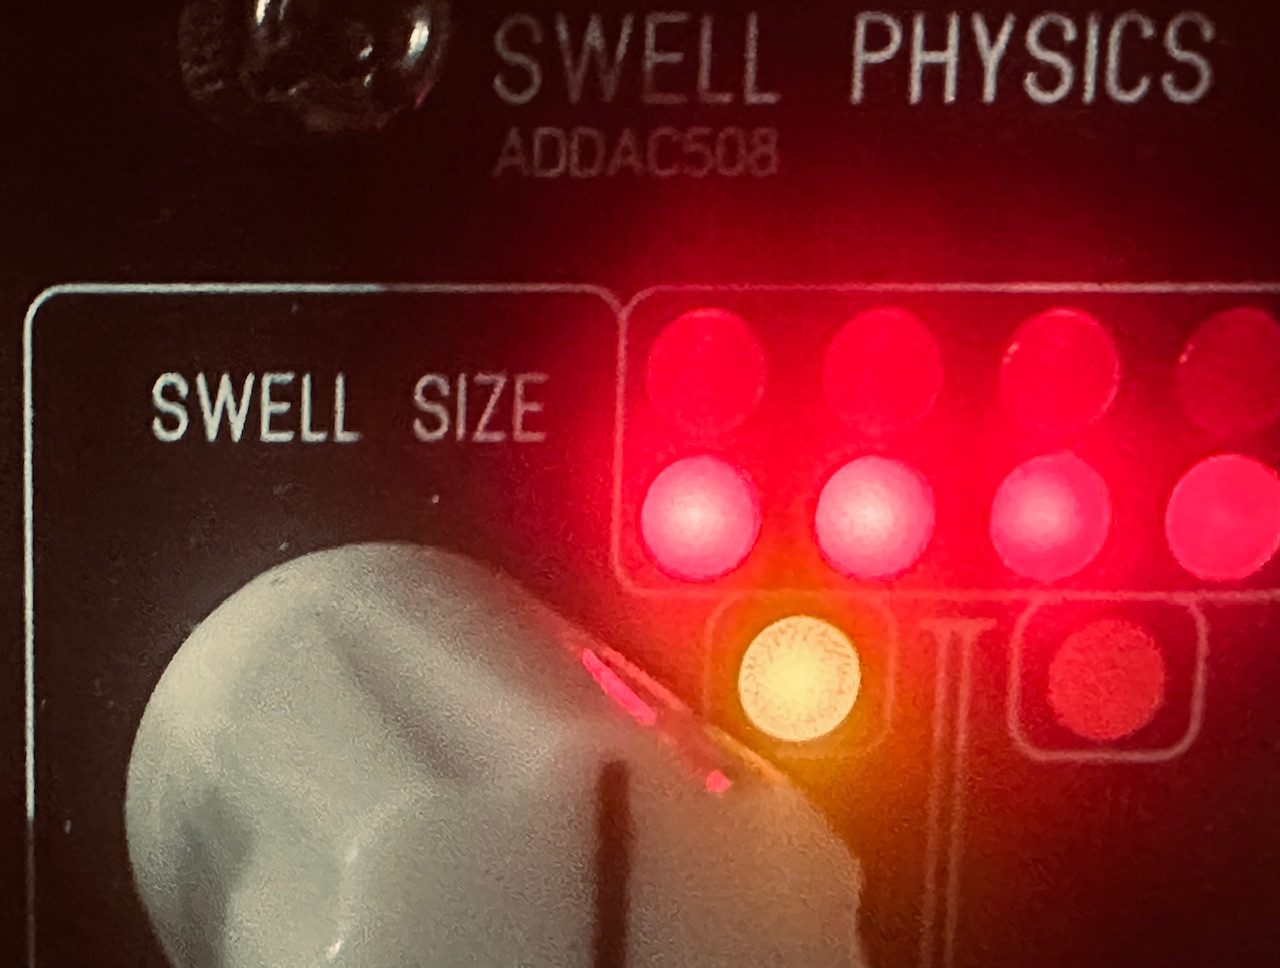
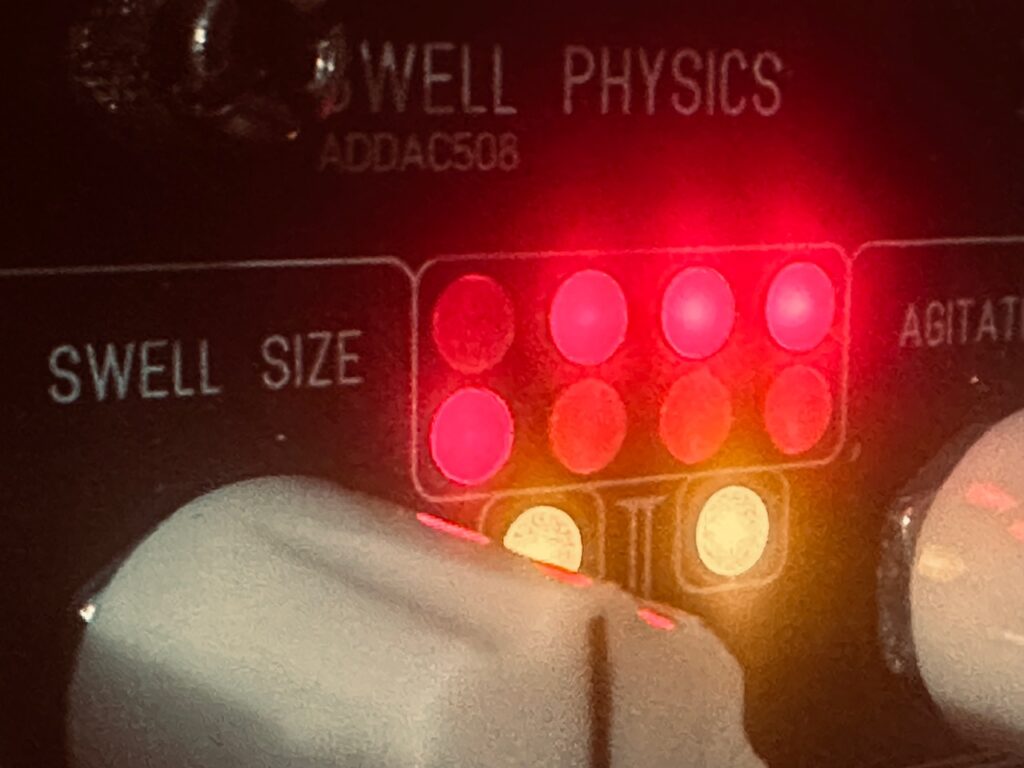
It had been a couple of weeks since I’ve been able to patch, and I was itching. Having just been on a spring break high school baseball trip to the beautiful Emerald Coast, I was inspired by the sea. It was the first trip in over a year I hadn’t taken some music making device, and even if I didn’t really have the time to patch during this trip, I missed not having something.1 I thought all week about what I would be making if I had my synth, and Swell Physics was first and foremost in those musings.
When I first set up this patch it was a mess. A cacophony of sound where each part seemed to work well on its own, but as soon as it mixed with other parts the whole thing turned to shit. As a non-professional musician, I try not to fall into that trap of being too hard on myself when my results are less than what I’d hoped for. Failure, after all, is the key to progress and improvement, and if a recording sucks it’ll just go into the folder of dozens of other recordings that suck. My livelihood is not at stake, and I don’t yet have a reputation to ruin. When I turned on my synth today, I listened to that latest patch still plugged in, and I was unhappy. It was a mess, and only reminded me that the recording I had heard of that patch a dozen or more times that week just wasn’t it. I was resigned to tearing the patch down and starting from scratch, but since I wanted to use the same control scheme I instead chose first to tweak a few settings and see if I couldn’t salvage the patch.
I don’t really like tweaking already-built patches. I mean, I like tweaking controls, but not patch points. It’s generally not been an exercise that has produced meaningful fruit, and I usually find it easier to simply start over rather than navigate a nest of patch cables. Today’s first change, however, wasn’t a physical patch change, but a setting change to the E370. Rather than using one of the User wavetables I’ve taken fancy to, a very cool wavetable leftover from the previous owner, I switched all four channels over to ROM A, and the difference was immediate. In fact, it was pretty much the sound I envisioned before i even started patching. So much for tearing down the patch.
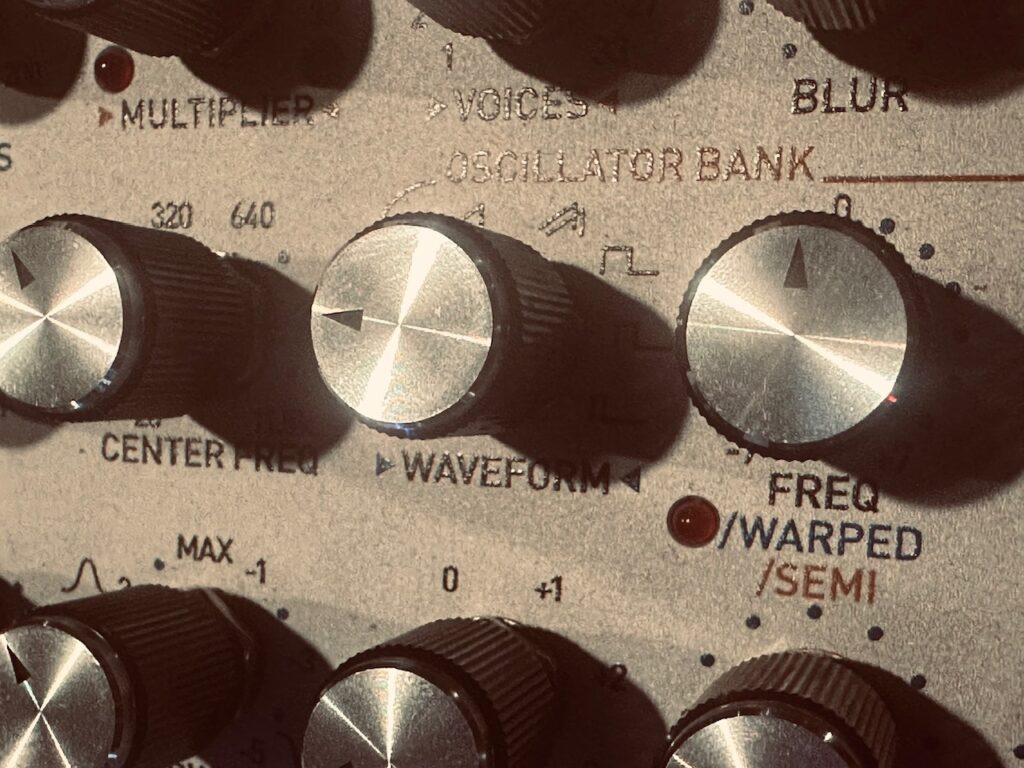
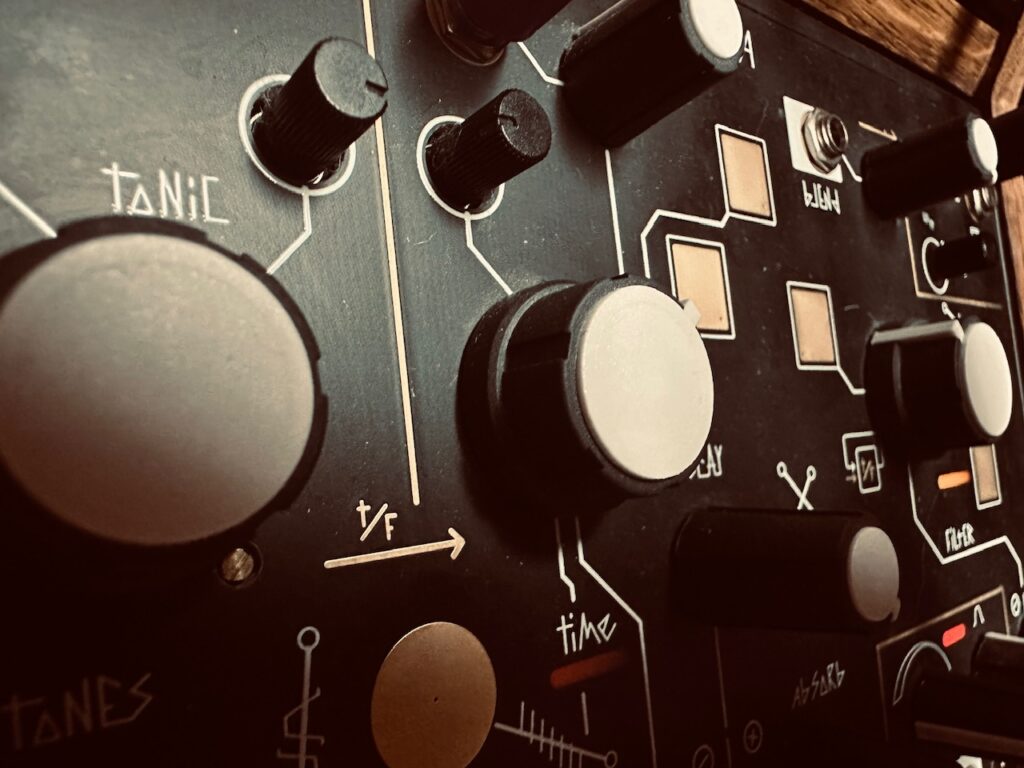
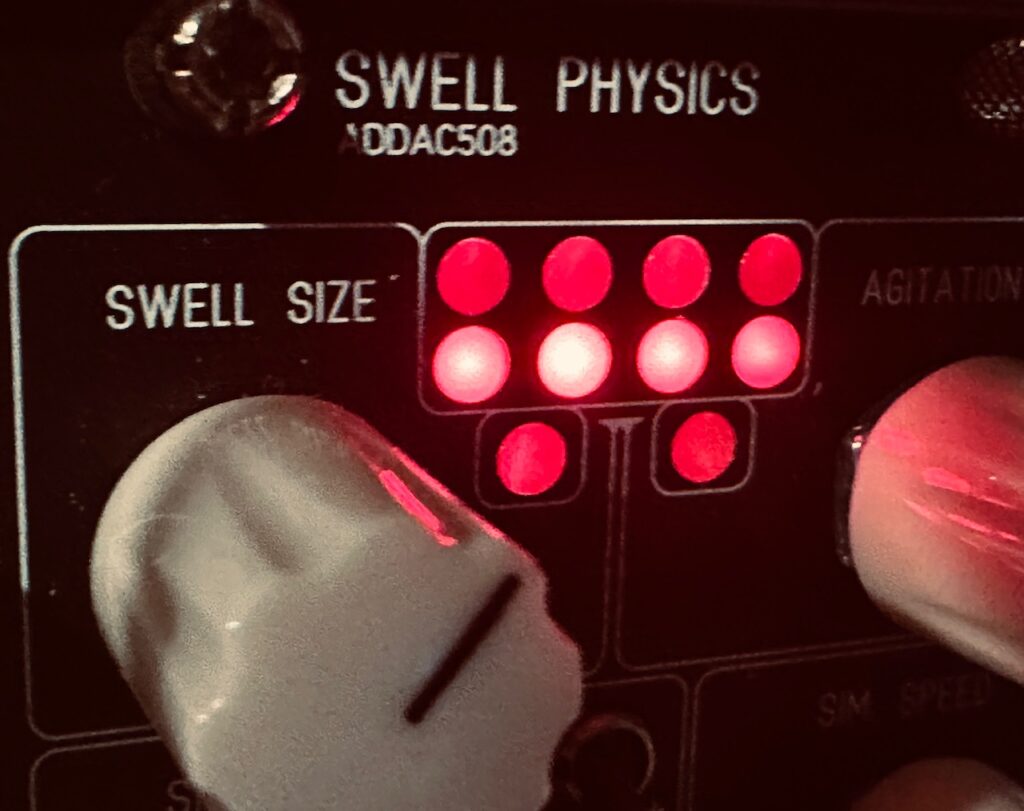
The patch starts, as many of my patches often do these days, with the Addac System Addac508 Swell Physics. Since first receiving Swell Physics many of my favorite recordings are based around it. Whether I’m using the wave outputs directly to control levels, or in conjunction with modules like the Nonlinearcircuits Numberwang and Let’s Splosh to control various facets of a patch, I’m constantly finding new ways to integrate it into my work. The four outputs were sent to an array of Intellijel Amps’ CV inputs to control the levels of four modulated outputs from the always lovely Synthesis Technology E370 quad wavetable oscillators and blue noise to simulate the spray of the ocean. Each oscillator was fed pitch information from the NOH-Modular Pianist, one note each of a D minor seventh chord (though I’ve no idea what the oscillator was tuned to). From the Amps, the mixed noise and audio outputs went to the ST Modular Sum Mix & Pan to place in the stereo field of the mix.
Modulation of the E370 wasn’t particularly heavy in this patch, but each oscillator’s X axis was moved around by a complex mix of CV from the Nonlinearcircuits Frisson mixed together in the Atomosynth Transmon CV controlled matrix mixer. Four randomly chosen outputs from Frisson were sent to the four inputs of the Transmon, with the other four Frisson outputs modulating four separate nodes in the mixer itself. This modulation to the E370’s X axis was at a medium slow speed and moved waves around beautifully, slowly shifting the sine wavetables.
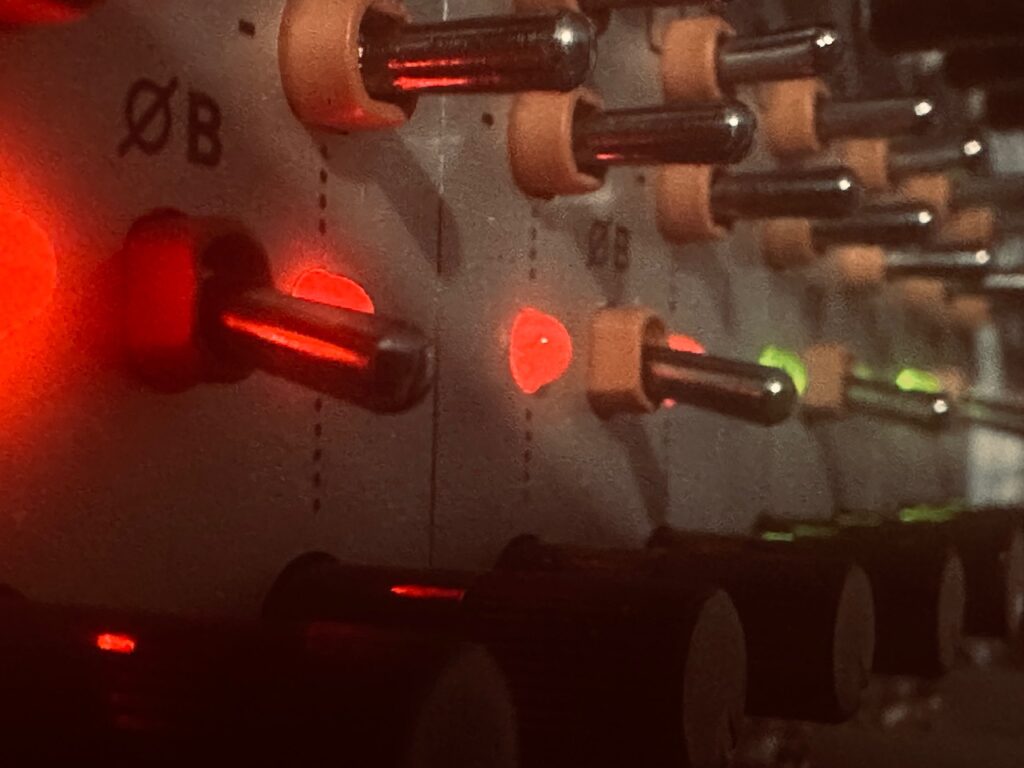
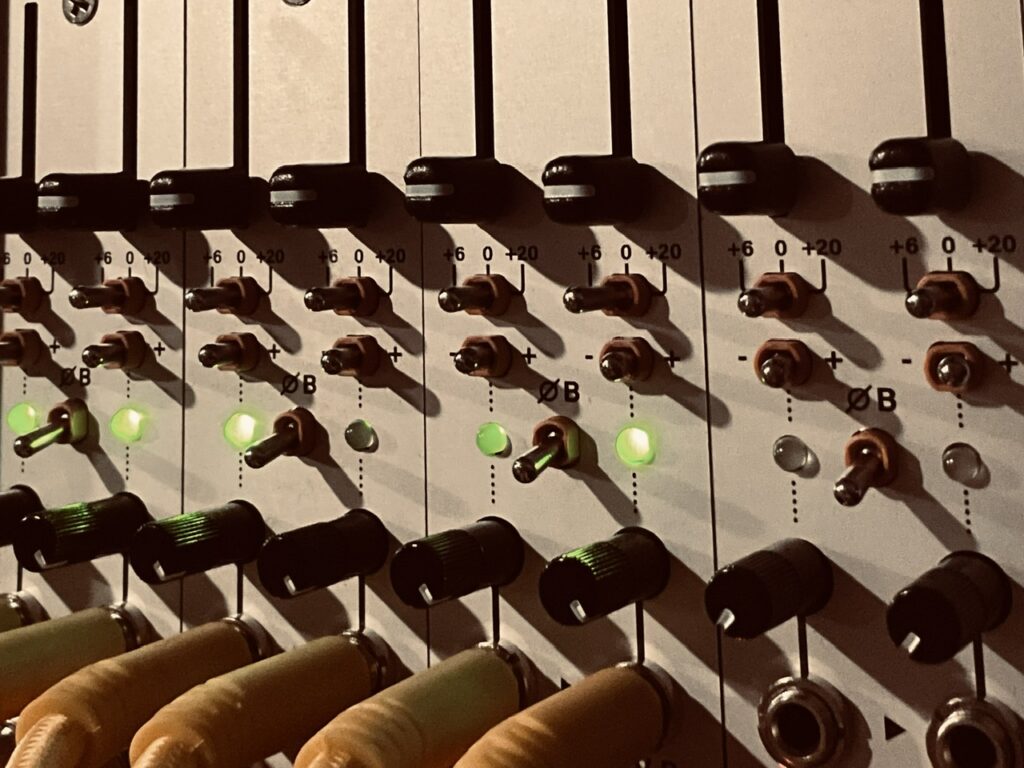
The Atomosynth Transmon is a curious module. Nominally it’s a matrix mixer, made by a very niche maker based in Lima, Peru. But this matrix mixer has several tricks up its sleeve. The first row can be used for the attenuation or attenuversion of signals, a switch controlling which mode is active. The second row can do both, and each node has an individual output. The last two rows each have a discreet VCA input per node, also with individual outputs. If one of those individual outputs is used, it’s removed from the final mix of the row. Each node can also be used as a 12V offset voltage using jumpers on the back. The Transmon is a very powerful and flexible mixer that can be used in a myriad of ways. Most often I use it for simpler mixes, or even as individual VCAs, but this patch called for going whole-hog, mixing four chaos signals, while using four of Transmon’s individual VCAs to modulate my modulation. These new modulated modulation CV mixes create all of the tonal shifts in the E370 voice as they move the sine waves through a series of notes along the X axis of the wavetable. The pitch CV being sent was constant through the recording. I could have manually tuned each oscillator to those notes and the result would have been no different.
Although I was much more pleased with the result after changing wavetables, it wasn’t enough change. The original delay I had chosen for the E370, the Holocene Electronics Non-Linear Memory Machine, was no longer the best tool for the job. Although its inherent aliasing worked great with the original wavetable, I didn’t like it at all with the much cleaner waves I was using at the time. It created too choppy a repeat, even with some diffusion and without pitch shifting. So I switched over to the very clean Olivia Artz Modular Time Machine, which worked a treat. With a medium length delay time, notes were lengthened and it gave the overall sound a bit of thickness, even if I didn’t pay much attenuation to how I set up each tap.
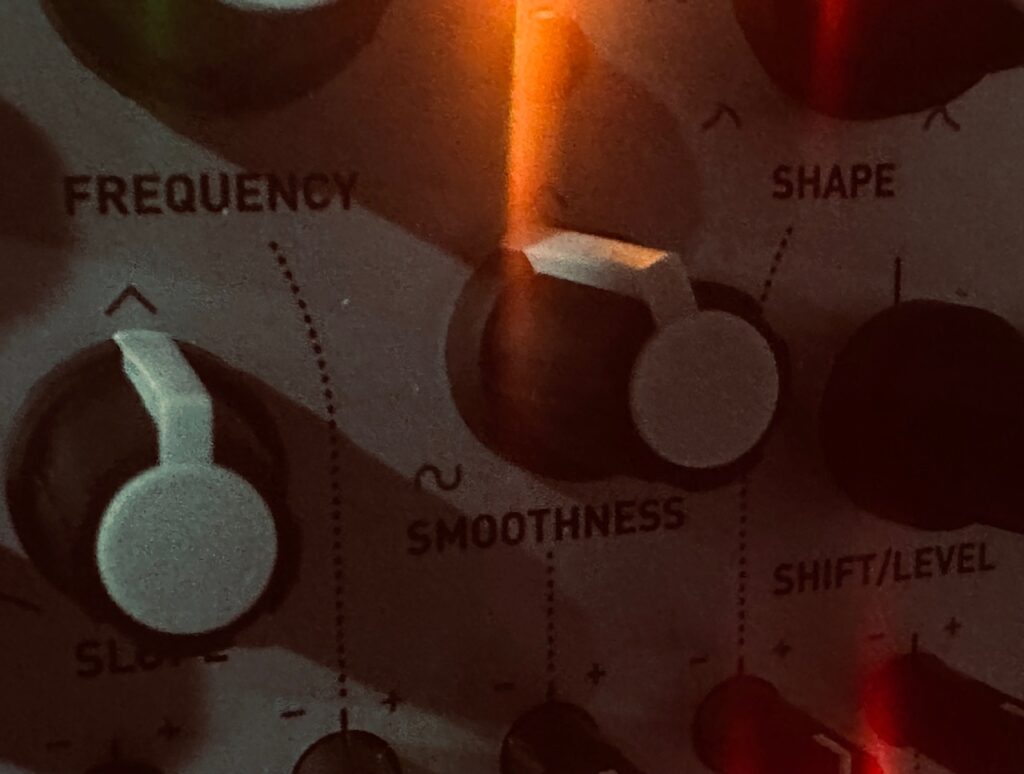
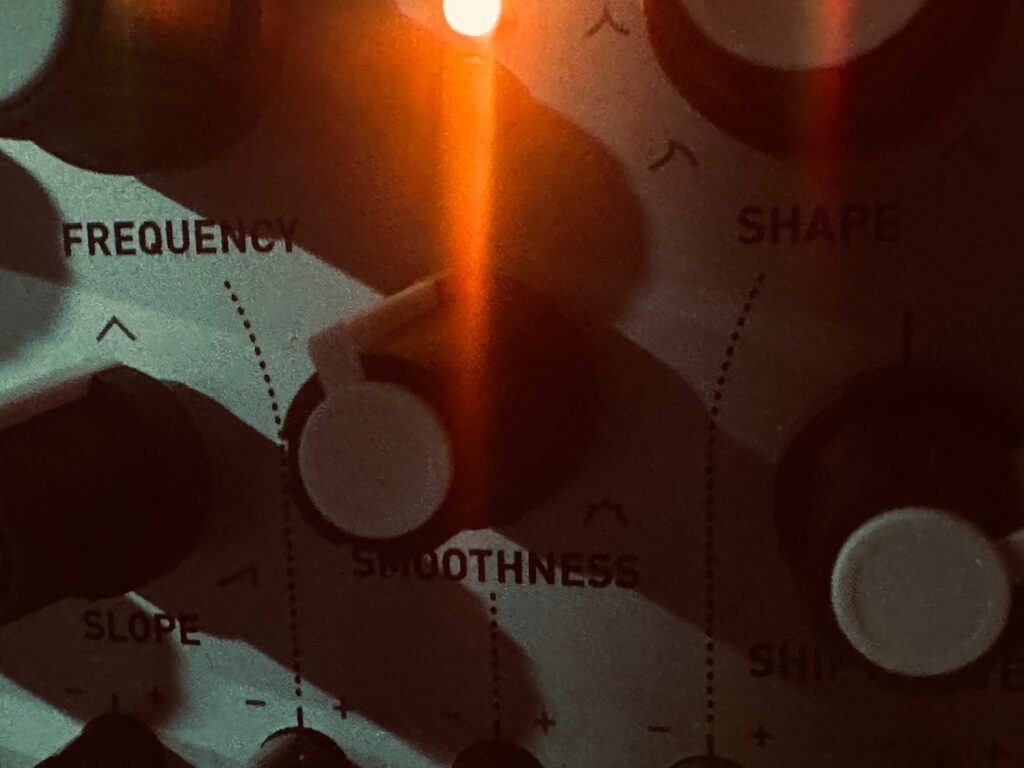
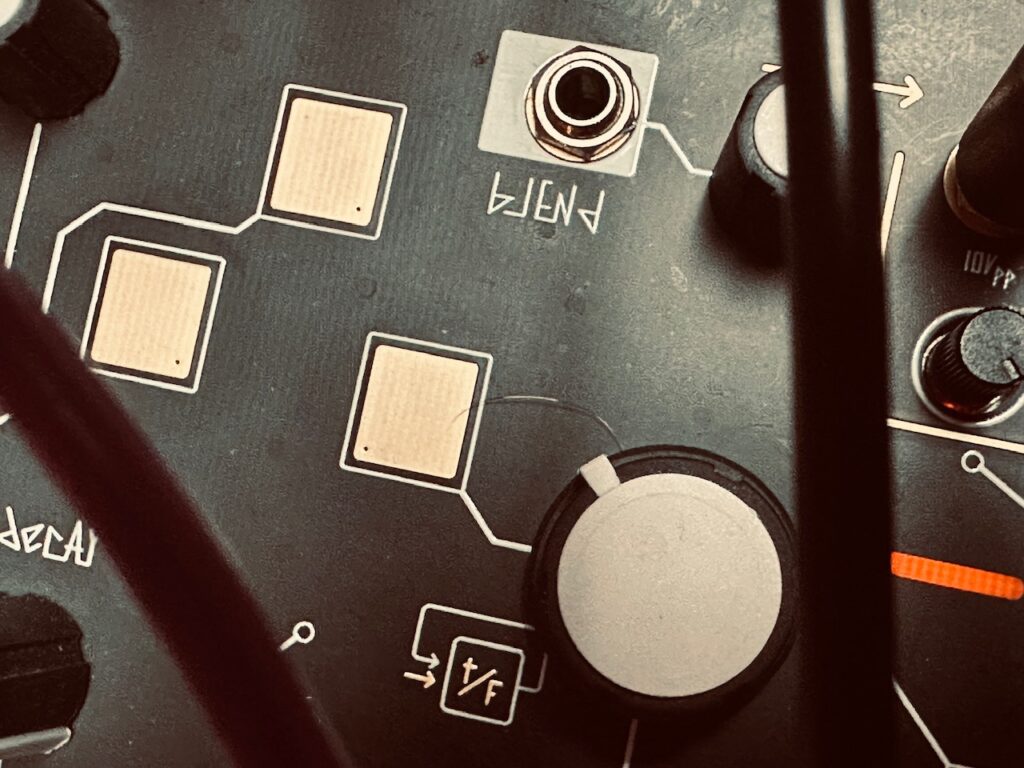
With the primary voice more-or-less set, it was time to fill in the cracks. The flowing waves of the E370-plus-noise mix with its delay and some reverb were beautiful, but lonely. It was heavy on high(er) pitches, and I wanted to add a bit of body to it. In comes Panharmonium. Though it’s highly capable, I very rarely use Panharmonium as a main voice. But I use it all the time as a supplement to the primary voice as a means of reinforcement, most often shifting the pitch in one direction or another so that various frequency ranges are represented. In this patch I initially went with a two octave downward shift. It was deep, but not overpowering, in a beautiful way, though there was simply too much that wasn’t being heard at all because the frequencies were just too low, which too often caused a flutter that sounded like clipping. No good. So I compromised by going down only one octave, (introduced at 1:15), which transmogrified the audio into a warm bath. I don’t normally modulate Panharmonium, I haven’t found it needed, but for this patch I decided to use offset and attenuated versions of the Swell Physics Average output to modulate both the Center Frequency and Bandwidth, which created a slight swirl in the output which added texture.
But I didn’t stop there. The Panharmonium voice was beautiful, but it needed delay for a bit of thickness of its own, so I sent its output to a pair of very slightly driven Echofix EF-X2s, with its speed lightly modulated by a triangle wave from a Frap Tools Falistri, giving it a hint of vibrato in the delay tails. The offset delays helped create a beautiful stereo image, and added a slight bit of focus.
Now that we had a beautifully flowing soundscape of waves, it was time for some ornamentation. Recently I’ve been reaching primarily for my pair of ever wonderful Pladask Elektrisk Dradd(s) when I’m looking for granular synthesis, but I knew I wanted at least one thing that Dradd cannot do: a two octave shift to create sparkles. It can do a one octave shift in Tape Mode, but not two octaves. So I turned towards the Mutable Instruments Beads (introduced at 2:30). I’ve had Beads a long time. It was one of my first modules, bought on a whim when I saw they were in stock one day. Beads can be many things from delicate to bombastic, and with this patch I wanted subtle, and Beads excels at being subtle. Like all granular processors, finding a nice sweet spot (or range) can be a challenge, but the controls are intuitive and once you find that range, Beads can produce wonders to behold. With slight modulation from Tides to Size, along with use of the attenurandomizer circuit to Time, and I had a beautiful spray of shimmering grains to follow in the wake of the E370 and Panharmonium waves. But even with this beautiful flow of waves I wanted something more. Something to use as juxtaposition. Something with more edge.
One module that I’ve criminally underused is the Frap Tools Brenso. I’ve certainly used it before, but it’s daunting, and I haven’t really put much brain power towards learning it, so I’ve tended to use its standard shaped outputs, while ignoring the gobs of waveshaping and wavefolding on the right side of the module. It’s a shame, really, but I thought that this day would be a good day to start exploring the extensive tonal options on the panel. I decided to start simple, using Sapel’s two smooth fluctuating random signals to slowly and lightly modulate both the waveshaper and wavefolder. This created an almost crackling electricity sound at times. It sputtered. It growled. It was an uneasy signal, fraught with fear while trying to exert its independence. I ran the Final output from Brenso through CUNSA, mixed with noise like the E370 waves, for some light filtering to attenuate some of the most egregious frequencies. The last time I made a patch like this I used a sequencer and pure sine waves for the epic sub bass line. It was way too loud, even if it was intentional, and repetitive. It was also pitched far too low. This time around I decided to use the same module to create the bass line, but rather than use a sequence, I used the Doboz T12 in Touch Keyboard mode and manually played the part. I wanted to time the note changes by feel rather than a clock. It’s still too loud, and still probably too low in pitch (some lessons are harder to learn than others), especially as I go up in register, but placing this very uneasy and slightly dirty wave in contrast to the smooth waves of the E370 and Co was a nice touch. Were I to record this patch again, I would definitely do a better job of controlling the level of this voice. I think the recording still sounds great, but I was certainly a bit overzealous with the volume of this voice.
For reverb I used my trusty Walrus Audio Slöer in Light mode for a choral sounding octave up shimmer. This reverb really has become my primary reverb. I only move away from it once it proves itself to not be the best tool for the job.
Technically I had my iPad, which, from my Jamuary experience, is more than enough music making machine, but I simply wasn’t inspired by anything on it at the time. ↩︎
I didn’t set out to re-record my latest patch the other day. I was set on using some other sample set in some other way. But there were a few things about my last recording that bothered me a little. I was getting too many pitches that were too high; well outside the zone of what “Low Strings” should be. There were points when way too many colors were being shouted at listeners. The delay was a bit too much. And I wanted to streamline the patch a bit.
I won’t go too in depth on the patch, you can read about the details here, but I did make a few changes that improved the recording substantially….
The most major change I made was to eliminate the Qu-Bit Electronix Nautilus, and use the pair of Echofix EF-X2 tape delays on the string samples. This helped to both fill out the space, while simultaneously cutting away excess in the overall soundstage. Rather than simply repeating notes and phrases, the tape delays lengthened and widened them.
The Panharmonium (introduced at ~2:40) was pitched down an octave, which helped lend some depth. More voices were added, and it was set to analyze a wider spectrum. The Panharmonium, along with the Walrus Audio Slöer (which was also set to pitch an octave down), really added weight to the entire recording. I removed a delay from the Panharmonium’s signal path (previously the tape delays), and allowed it to sing only through the reverb, which was a substantial improvement.
No changes were made to the Dradd(s).
No changes were made to Plaits-does-Robot-Speak except sending it far fewer gates.
Ever since I started using the Polyphonic Multisample algorithm in the Disting Ex, and now the Disting NT, I wanted to do a string patch. For some unexplainable and inexplicable reason I never did. I got a taste of using string samples during a handful of Jamuary patches, particularly Jamuary 2507 and Jamuary 2510, when I experimented with using the very excellent Alexandernaut Fugue Machine and Decent Sampler, but I really wanted to do a string sample patch modular-style. At first I wanted to use the same string samples I used during Jamuary, the DK Solo Cello Spurs from Pianobook, but that did not work at all.1 After quickly pivoting to the LABS Low Strings Long samples included with the Disting NT, I was off.
Much of this patch is a simple altered duplicate of my last patch, so I won’t rehash the entire patch here. Many knob settings are different, and of course I triggered string and not piano samples, but the control and audio paths are largely identical. Because these string samples are inherently longer than piano notes, I had to drastically slow down The Hypster, the initial source for the master clock, in order to compensate and have Stochaos produce fewer gates. This slow down was coupled with using outputs on Stochaos that change much less often. I also tuned in the delay used on the string samples, the Qu-Bit Electronix Nautilus, to what I thought sounded best, thought I can’t recall the settings other than a long delay time with moderately high feedback. The Panharmonium settings were also changed drastically, cutting the number of voices, zeroing in on the desired frequency range, and really tuning the sampling time. Panharmonium is not always instant bliss, but given some gentle massaging it can become transformative. The Dradd(s), however, weren’t changed at all.
But even after being able to hone in on what I had hoped for the strings and the existing sound chain, there was something missing. It needed some kind of ornamentation. Something to juxtapose against the somber sounding string sequence plodding along in C minor. I initially thought of high pitched bells or sparkles of some kind, but then remembered a patch I did last summer as a test shortly before bringing a travel synth on a trip to Alaska. In that patch I used Plaits in the Vowel and Speech Synthesis algorithm (the last Green algorithm) to repeat four colors, Red, Orange, Yellow, Green. In this patch I took a slightly different approach, by using a random output from a Mutable Instruments Marbles to select the spoken color. I was quite happy with the result in the moment, but was carried away a bit during the performance with too many triggers. It should have been an occasional color spoken in a sad-ish voice to reflect the somberness of the strings, though it sometimes ended up being a robot talking over himself. I used a CV output from the Noisy Fruits Lab Lemon to control Marbles’ clock, which had a high amount of Jitter so as to not be regular. When I wanted more from Plaits, I pushed the fader to create more gates with Marbles. However I clearly pushed it too far during a couple of points. Initially I had Plaits running straight to the mixer, but later in the recording used Beads in full wet delay mode, which altered the tone slightly, and added a low number of soft repeats that really only served to add to the confusion. Plaits is simply triggered to often.
The proverbial icing on the cake was the Walrus Audio Slöer in “Light” mode, which is an octave pitch shift. But rather than a standard pitch shift, Slöer adds more of a choir or symphonic strings sound, which is absolutely beautiful. This patch used basic settings. Pitch shift volume at max, and clock speed at the slowest setting. There was a long decay, and a moderate amount of modulation.
Overall I’m quite happy with how this patch turned out. It’s beautiful and not deterministic. That said, the piece could use for some composed string sequences, even if only occasionally, in order to maximize tension and relief. I’m definitely going to try other adaptations, particularly in the timing of gates and pitch. I’m thinking the Addac508 Swell Physics might be a good place to start.
I was getting all sorts of sputtering and general ugliness using these samples. I’m not sure if I was overwhelming the algorithm with too many gates, or whether the sample rate or bit depth of the samples was too high, or perhaps something else, but I quickly abandoned these samples in favor of the stock LABS string samples. ↩︎
Despite having to hazard snowy conditions doing afternoon obligations, I finally had a bit of time today to patch as the sun was beginning to set on what is about to be a very cold night. Like, for real. It’s gonna be cold as balls.1
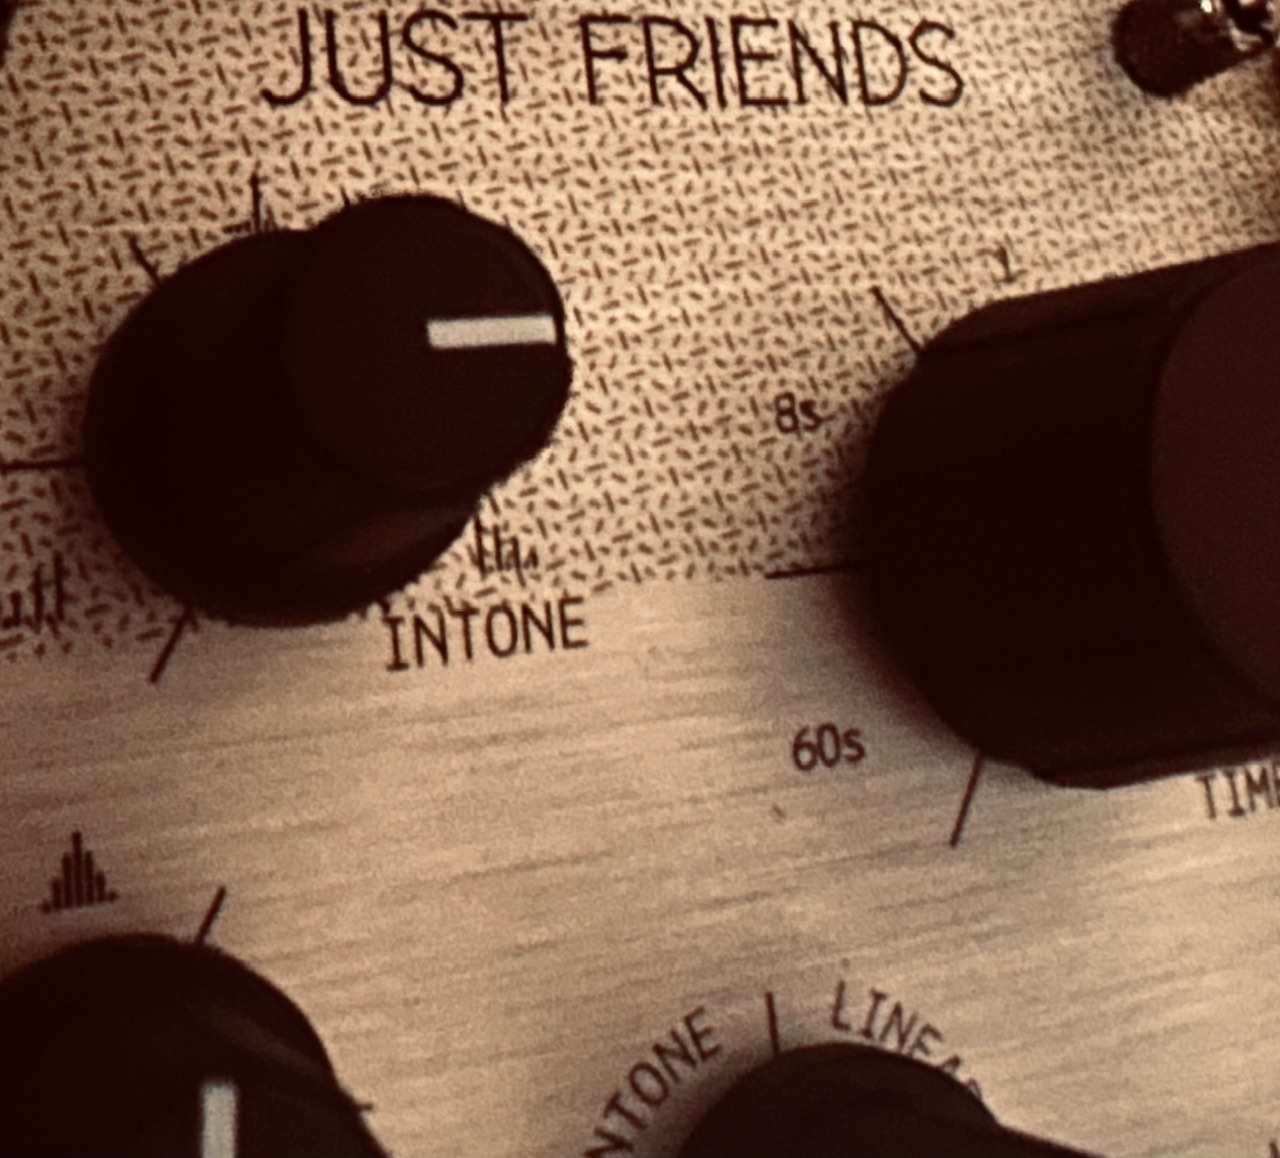
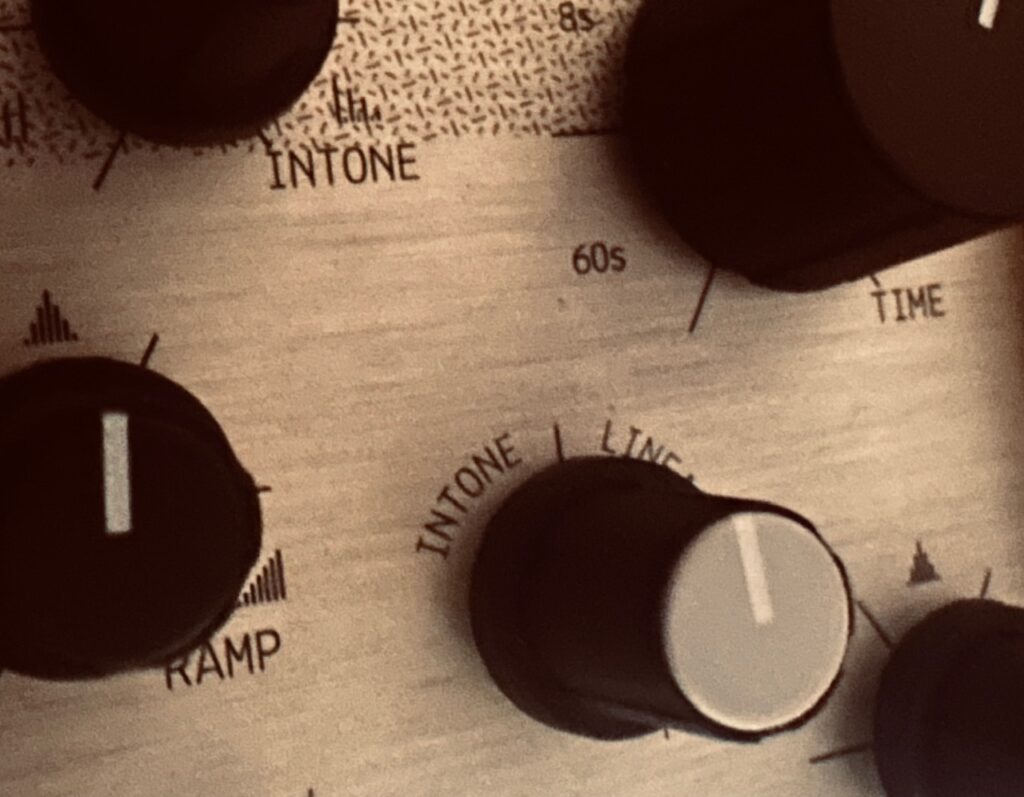
I didn’t have an idea ready to go for today, so resorted to a couple of patches that I’ve done variations of in the past and wanted to further explore. I finally used Just Friends as a six part oscillator, with a lightly modulated Nonlinearcircuits The Hypster chaotically controlling their levels in six VCAs, while also modulating Just Friends’ Shape to get subtle timbre shifts. I didn’t seek a particular harmonic relationship between the different oscillators, but I turned Intone clockwise from noon until I got something that sounded a little dark but still pleasant.
Once these waves were level modulated and mixed to stereo in an Intellijel Amps, with odd Identity outputs on the left channel and even ones on the right, the mix was sent to the Olivia Artz Modular Time Machine for some delay before being sent to the output mixer and some reverb. I also sent a passthrough of this output to the Dradd(s) for some granular synthesis in Tape mode. I initially wanted it in an octave up mode, but between the high pitched bleeps, that were further pitched up in their own delay and granular-esque process, there was too much going on in that higher frequency range and it became too much to deal with. In lieu, I went with what amounts to using a tape machine that stutters at half speed. The effect here isn’t dramatic, but it does add a lot of movement in the stereo field which is really interesting.
The second voice was a simple triangle wave from a Falistri, using the other generator as its envelope and trigger source in the Rabid Elephant Natural Gate. The EOC output also triggered Sapel, which supplied both a new fall time for the envelope, as well as pitch for the oscillator, varying both note pitch and length. Although this sub-patch worked as it should, it was weirdly patched. It could have been great simplified without any penalty whatsoever. The inefficiency is due to it being what was left from other ideas. Rather than re-patching, I recycled what was already going on. I initially combined both generators’ bipolar outputs in Falistri’s four quadrant multiplier for some ring modulated tones, but ultimately opted for a sparkly sound over the marimba sound. The output from Natural Gate was sent to the Holocene Electronics Non-Linear Memory Machine for some delay and buffer freezing, which created some really cool effects, especially the aliasing on the pitched up notes. I wanted to devise a way to scan the buffer only while it was frozen, but couldn’t quite figure out how to do that with the current patch and gating technique. It definitely stumped me. I’ve done a recent patch where I was able to scan the buffer only when it was frozen, but it used an entirely different triggering mechanism and today I didn’t have there wherewithal to work together an algorithm to get it done. That said, the effect it does create is very cool. Almost Data Bender-like, which appeals to me.
I ran into a dreaded problem while recording today’s patch. It doesn’t occur often, only a handful of times that I can remember, but it is a problems channel bleed/crosstalk in my mixer. It can be clearly heard for at least the first two minutes and 20 seconds, and intermittently throughout the recording. It only happens under circumstances like today, with much lower pitched audio in one input, and much higher pitched audio in some other channel. Think sparkles. You know, kind of like in today’s patch. It’s really annoying, even if I don’t notice it in most circumstances. Fortunately the builder is super-responsive, and we’ll see if he has a fix or mitigation for it.
In America, at least for my generation where I grew up (South Florida), “as balls” is a popular unit of measurement. You can use it similarly to “as fuck”, although “as balls” isn’t quite as flexible. It works, however, under many circumstances. Hot as balls. Cold as balls. Busy as balls. Heavy as balls. Far as balls. It can also sometimes be used in a slightly different form as an adjective. (E.g., balls cold, balls hot). ↩︎
Today’s patch was a long time coming. Several years ago I saw a patch from scratch video by Omri Cohen which used a Befaco Rampage as the base of everything else. It dictated volume, speed, when pitch changes would happen, timbres, and lots of others things besides. I was inspired, and immediately purchased a Rampage. Only I never tried that patch, and moved on to other great things.
Even though I no longer even have that Rampage, I do have several other Function Generators with many of the same features, and after watching the video again recently, I decided today was the day. Only I cheated a little bit. Rather than patch up various Sample and Hold modules to vary envelope length for the higher Brenso voice, I used the Addac506 Stochastic Function Generator which accomplished the same effect. I initially tried using a Falistri but the pitch was always changing a fraction too late for the cycling envelope, and I’d hear that pitch change. I worked on it for a bit, but decided to move on once I realized I wasn’t getting anywhere. To be fair, it was similar with the Addac506, but since I can negatively offset its functions directly, I was able to make it so that always happened in silence, and didn’t give a noticeable blip. I could have accomplished the same thing using a separate offset with the Falistri envelopes, but in a bit of laziness decided I didn’t want to patch it. I did use a certain kind of Sample and Hold for pitch voltage, via Quantermain for quantization into D# Phyrigian (which gives it a dark, mystical feel – like were walking through a dark elvish den), from the Nonlinearcircuits Helvetica Scenario. It differs from a standard Sample and Hold module in one unique way. Rather than using a noise source for sampling voltages, Helvetica Scenario uses a Jerk Chaos circuit running at 300Hz, which, from a practical standpoint, is similar enough.
That varying envelope and pitch control a Frap Tools Brenso, with its wave shape being modulated, along with a slight bit of modulation to the wavefolder. I’ll be the first to admit that I haven’t used Brenso very much. Not nearly as often as I should. I’m generally a bit intimidated by complex oscillators, and have mostly used them as two separate oscillators without the FM or waveshaping features, but in the spirit of loving my Frap Tools case and generally trying new things during Jamuary, I decided to give it a bit of a shot by using the waveshaper and wavefolder features. At least a little bit. I would have used some FM too, but decided to leave that for another day. I did note, however, that while patching Brenso, how beautiful the sound was. Reedy in some ways, at least before running it through the noisy PT2399 delay chip of the Bizarre Jezabel Quarté Mk2. I then ran it through to ST Modular Sum Mix & Pan to slowly pan the signal across the stereo field.
This voice was doubled by the Dradd(s) in Grain mode, time stretching the Brenso part, but at a fairly high clock rate to both shorten the buffer, and produce shorter grains.. I’ve really enjoyed using the Dradd(s) this way of late.
The ever oozing chord base underneath is the Humble Audio Quad Operator with a set chord of the one, three, five, and seven of D# Phrygian (D#, F#, A#, and B). I initially used three cycling envelopes from a pair of Falistris to control the level of those notes, but opted in the end to use a cycle similar to the one I used in Jamuary 2505 and 2511, where the End of Rise gate would trigger the next envelope, allowing the next note to fade in while the current note fades out. I should have used Sample and Hold on these envelopes to vary their length, but opted not to in the end to allow the main Brenso voice to monopolize attention. All four oscillators were mixed to mono in Intellijel Amps, and sent to the Bizarre Jezabel Pkhi Mk3 for low pass filtering before the output. The low passed audio signal was also sent to a the Venus Instruments Veno-Echo, which had its high pass filtering enabled in the feedback loop so as not to muddy the sound. I was never fully happy with how this voice turned out. The mix was too easily blown out, giving it a much darker and grittier feel than I initially intended, though after a bit of struggle, decided to lean into it a bit. I need to find a different way for gentler chord washes like this using saw waves. Some of the individual tones were buried in the mix, and at times the chord is lost.
My forgetfulness finally caught up to this Jamuary day. I forgot to take pictures of this patch before I had to turn everything off for the night so my wife could go to bed, so no pretty eye candy tonight. I may add some tomorrow. If I remember anyways.
Today’s Jamuary was hard. I’m tired, and I made the fatal mistake of waiting until the last minute. The result isn’t bad. I actually like it, even if I’d make changes in a future revision. But in the spirit of using some unfamiliar gear during Jamuary, I ran into unfamiliar problems. I couldn’t find a filter I liked, had a hard time choosing delays, and had to patch and re-patch several times, only to arrive at a fairly simple audio chain and control scheme. I made dumb mistakes that hampered the effort and made it much more difficult than it should be.
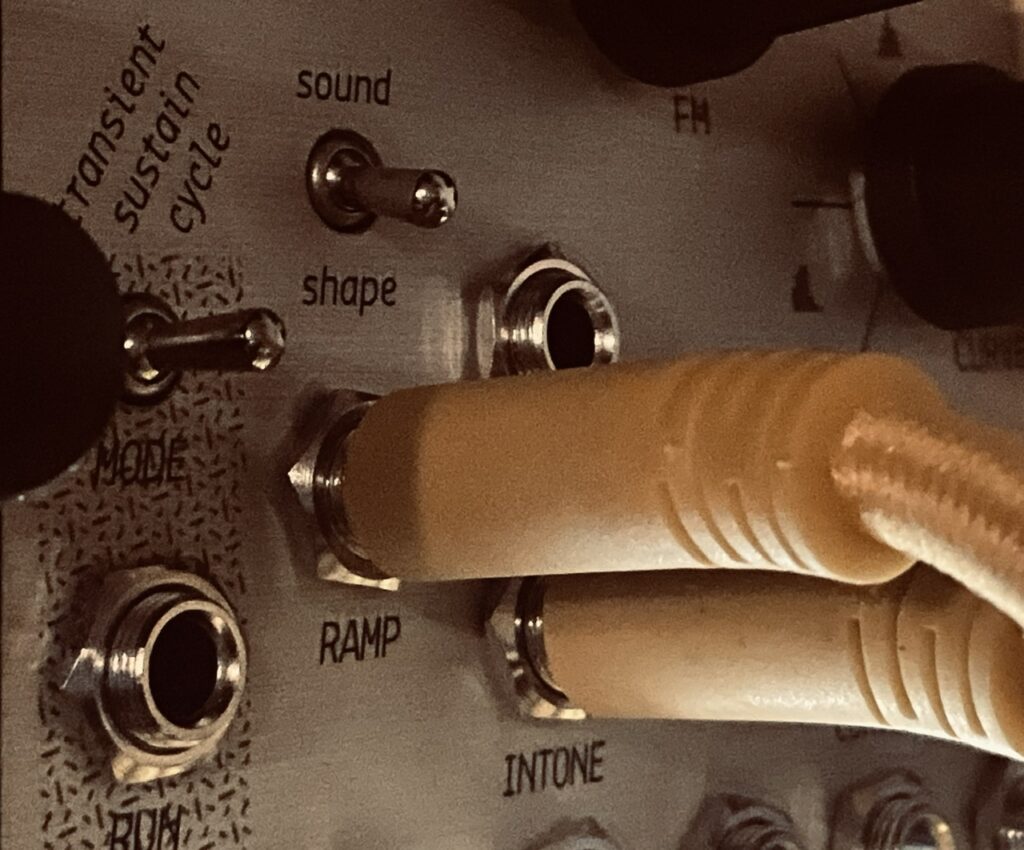
Jamuary 2513 and 2514 were both rhythmic driven patches, and cool as they were, I was ready for something slow today. Up in the top right corner of my synth (as it’s currently configured) sits the revered Mannequins Just Friends. I haven’t had it too long, perhaps three or four months, but I hadn’t had the occasion to use it yet and I figured there’s no better time than right now to pop that particular cherry. Though I know Just Friends is many things, including a harmonic oscillator, I wanted to try its modulation capabilities during my premier with it. From all reports, it’s utterly fantastic in that role. So I set it at a slow yet still moving Time, and let it loose. The Hypster, via De-Escalate, modulated both Intone and Curve to keep the movement of each function in constant flux.
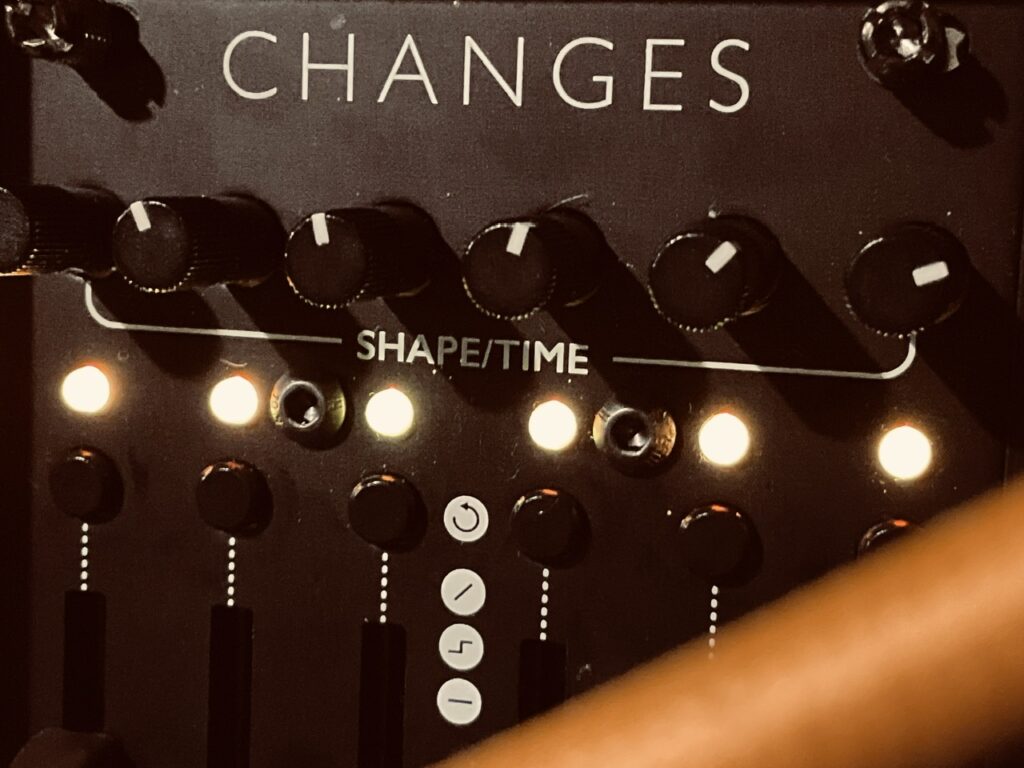
I thought about using virtually every multi-oscillator module I had. The E370, Falistri(s), 4Vox, CUNSA, Harmonic Oscillator, Quad Operator, and several others. But for some reason, I settled on using a Calsynth Changes, a very excellent 1:1 Mutable Instruments Stages clone, in Harmonic Oscillator (AKA Ouroboros mode). It’s not really a conventional choice for use as an oscillator, though it does the job great, and has the added benefit of having exactly six oscillators with six shapes (I used triangle waves), conveniently matching the six outputs of Just Friends.
Initially I tried to control the levels of each oscillator directly on Changes, but it doesn’t work great that way, so I opted to patch each output to a individual VCAs to be modulated by Just Friends, with the odd harmonics left and the even harmonics right. The output goes directly to the Bizarre Jezabel Mimosa, then Quarté Mk2 for a bit of lo-fi-ification. I had two looping triangle envelopes modulating time on both delay channels for some vibrato (even if I couldn’t hone in the modulation to my satisfaction), and, as the performance progressed, fed a slow looping stochastic function from the Addac506 to Mimosa’s wet/dry CV input. The noisy delay made Mimosa superfluous in some ways, but the effect is still nice, though probably not necessary, especially since I was also overdriving the VCAs with hot envelopes and, for much of the performance, with the attenuator wide open.
As a last minute addition, I also added a send to the Dradd brothers (in Grain mode) for some more gritty texture. This patch is full of texture. I tried to send the Dradd(s) through a delay, but couldn’t find one I liked quickly enough, and so abandoned the idea and ran it straight to the mixer for some reverb treatment.
The result is a pretty epic drone, perhaps a bit reminiscent of Alessandro Cortini (if I may be so bold), especially with the signature noisy PT2399 sound from the delay chips.
It’s been a while since I’d played my Make Noise synth. It’s not part of my main synth, but down in my media room where I spend time to myself at night. Knowing my work schedule today, I knew that I wouldn’t have time to make a patch on the main synth, and I wanted more than just the iPad. So I made sure that tonight would be my return to this wonderful instrument. Only today I had a new addition. After dealing with a few technical difficulties with my audio interface, I was ready to go.
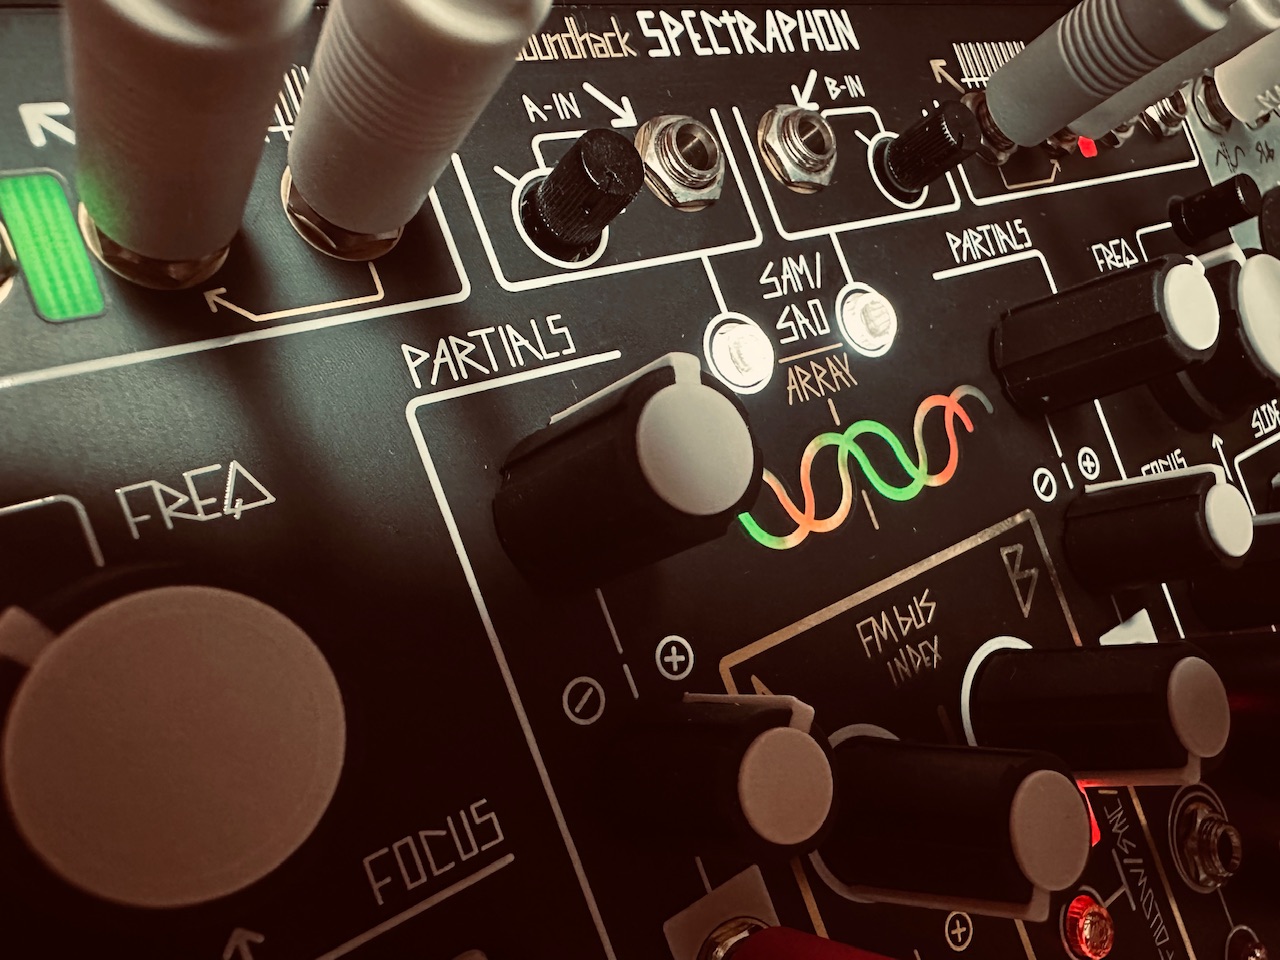
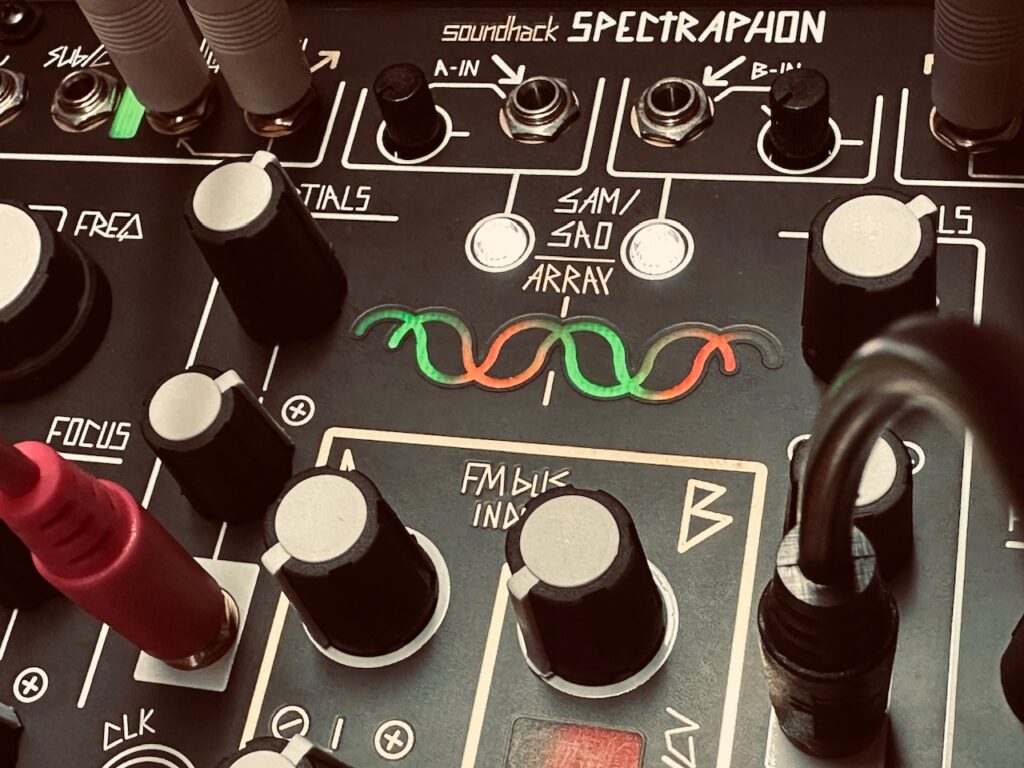
I was never really enthused by Spectraphon. Lots of people had an immediate case of GAS when it was announced, but it wasn’t something that drew my interest. Several months after release, I saw a couple of intriguing patches, and decided to revisit the early Spectraphon demo videos to get a decent hold of what it was and was not. Upon release, its resynthesis capability was the emphasis of most synthesists, and it turns out I was more interested in it being an oscillator, so when I found one at a decent price, I ordered it. Though I’ve had it for a couple of months, I hadn’t installed it until tonight with this very patch in mind.
Jamuary 2511 was inspired by my recent patch, Jamuary 2505, which used the cascading envelopes from the Verbos Polyphonic Envelope. Make Noise doesn’t have a cascading envelope, but it’s easy enough to patch up using End Of Rise or End of Cycle outputs that Make Noise’s function generators do have. The envelopes don’t have the same sort of close relationship as with the Polyphonic Envelope, but each function can be tailored specifically how you want them, and each envelope can still be triggered the same way. I used four functions for the drone, each bringing its oscillator in and out of audibility. The first envelope started with Maths Ch1, then to the first Function, and then to a second. The second function generator in Maths won’t work for this patch because it only has a EOC trigger, and I needed EOR gates to trigger the next envelope so as one chord tone was falling, another would be rising. The second Function triggered Contour on the 0-Coast, which in turn completed the cycle by triggering Maths. The chain started with a gate output from 0-Control, before I quickly switched cables. All four envelopes had their decays modulated in one form or another so the recycling chain of chord tones wouldn’t repeat exactly the same.
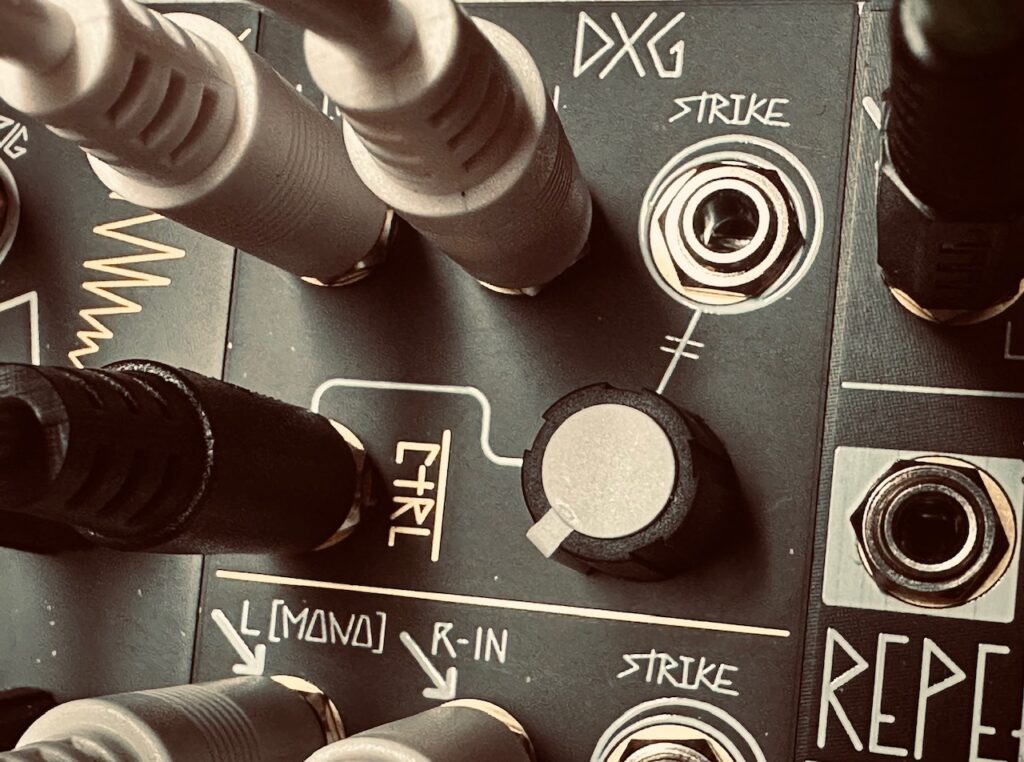
In total five separate oscillators are used in this patch. Maths Ch1 controlled Spectraphon A’s Odd and Even outputs in DXG. The first Function controlled Spectraphon B’s Odd and Even outputs in DXG. Both sides had Partials, Slide, and Focus modulated to some degree, and oscillator A was having its FM Bus lightly modulated to give it a bit of growl. The second Function controlled STO’s Waveshaper output in QMMG (LPG mode), and Contour controlled 0-Coast’s oscillator with its built-in LPG. Strega just drones on.
All of these signals were mixed in stereo, and sent to QPAS and out of the Smile Pass outputs for some subtle picking out of harmonics and a gooey, gooey swirl. The cutoff frequency was modulated by Maths Ch2, cycling away, and Radiate L and R were modulated by Wogglebug. I gave QPAS increasing amounts of drive as the patch played on.
From QPAS signal went to Mimeophon for some delay and further stereo movement. I had it modulated, but it just didn’t sound very good, so took it all off.
When I first got Strega I was preoccupied by figuring out the best way to stereo-ize it. It doesn’t exactly need it, Strega is a wall of sound kind of wash, but some movement in the stereo field is nice. It turns out I had the answer the whole time: Mimeophon. I hadn’t yet tried that until tonight (for some stupid reason or another), but it’s perfect. QPAS works great too, but it can be too much at times, whereas the Mimeophon is more subtle. I had used a stereo reverb in the past, but I wanted more.
There was also a new pedal in the mix tonight for reverb, the AC Noises Ricorda. My audio interface was giving me fits tonight when I sought to use sends, and so I couldn’t use it how I normally would. I had to control the wet/dry mix on the pedal, which is less than ideal, and it didn’t work exactly how I wanted it to work. The reverb sounds great, even if I’m a bit less enthused with its implementation of granular, which seemed to spit out grains in even intervals. First one, then two at twice the speed, then four, then eight, etc. it just didn’t sound natural. I’ll have to dig in the manual to get that sorted. I also used it to add noise with a scratchy pot, that was pretty cool, even if I didn’t use it enough.
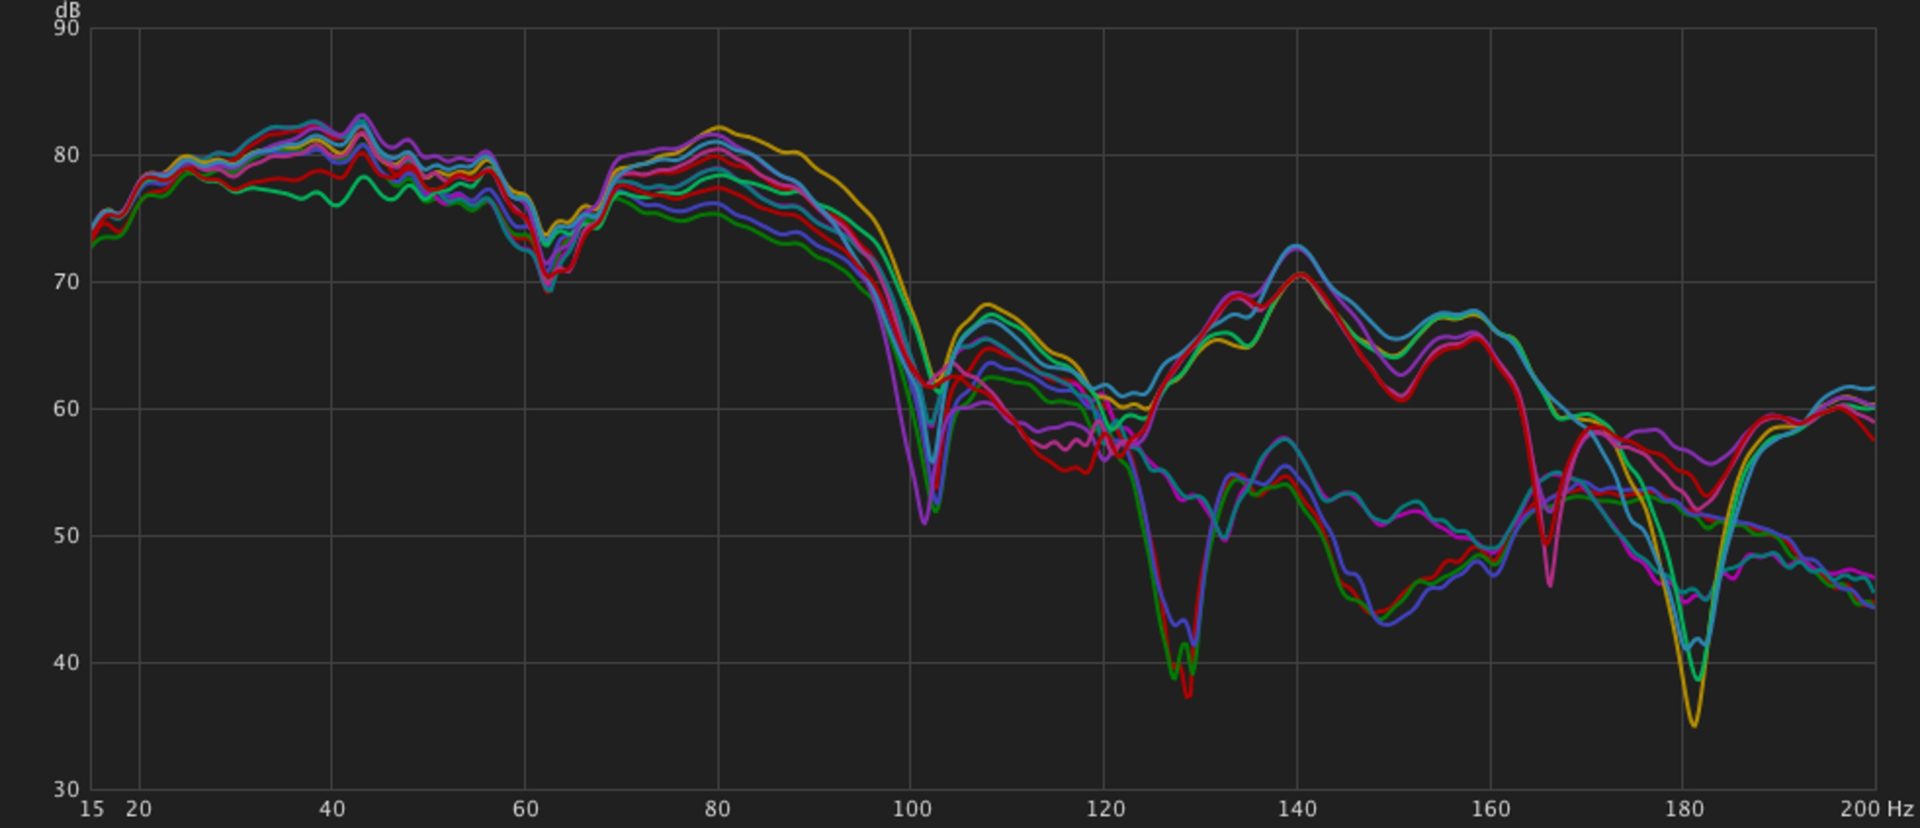
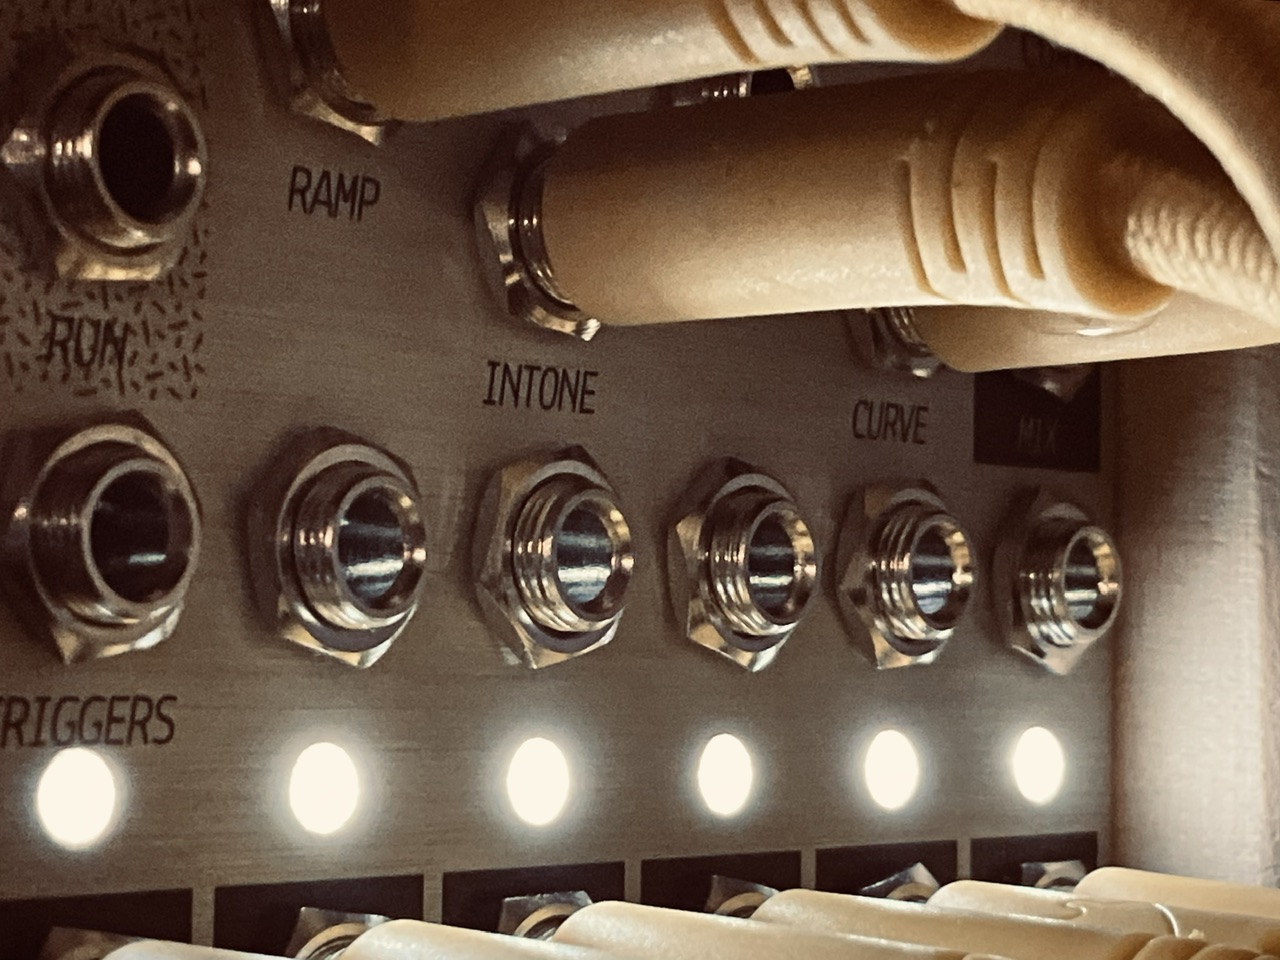
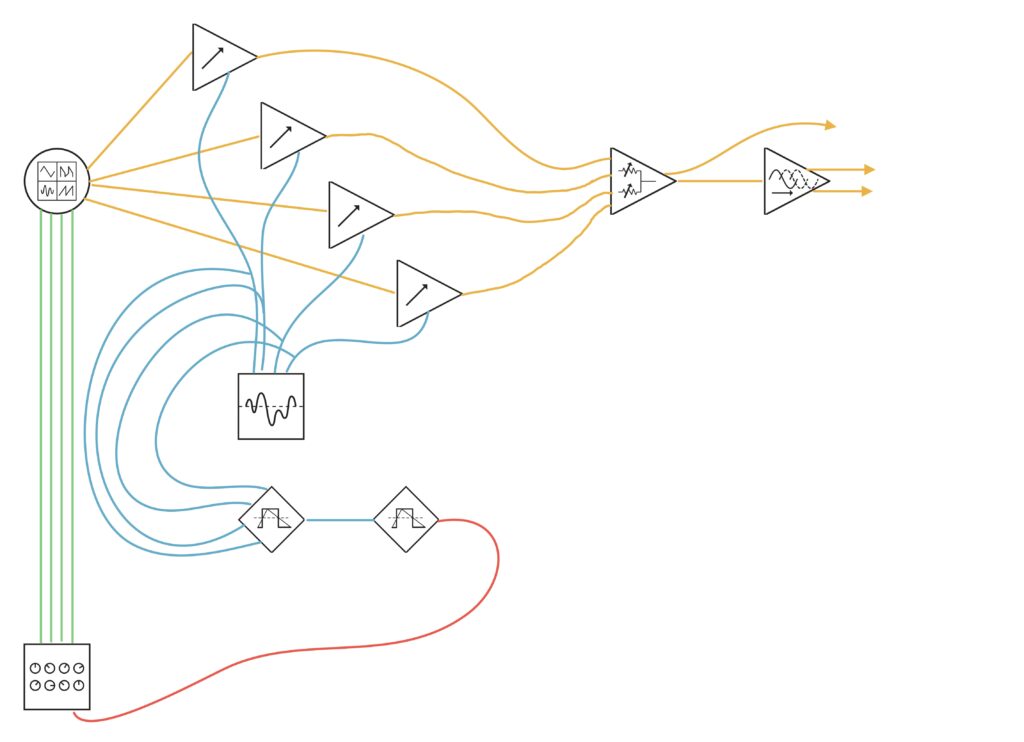
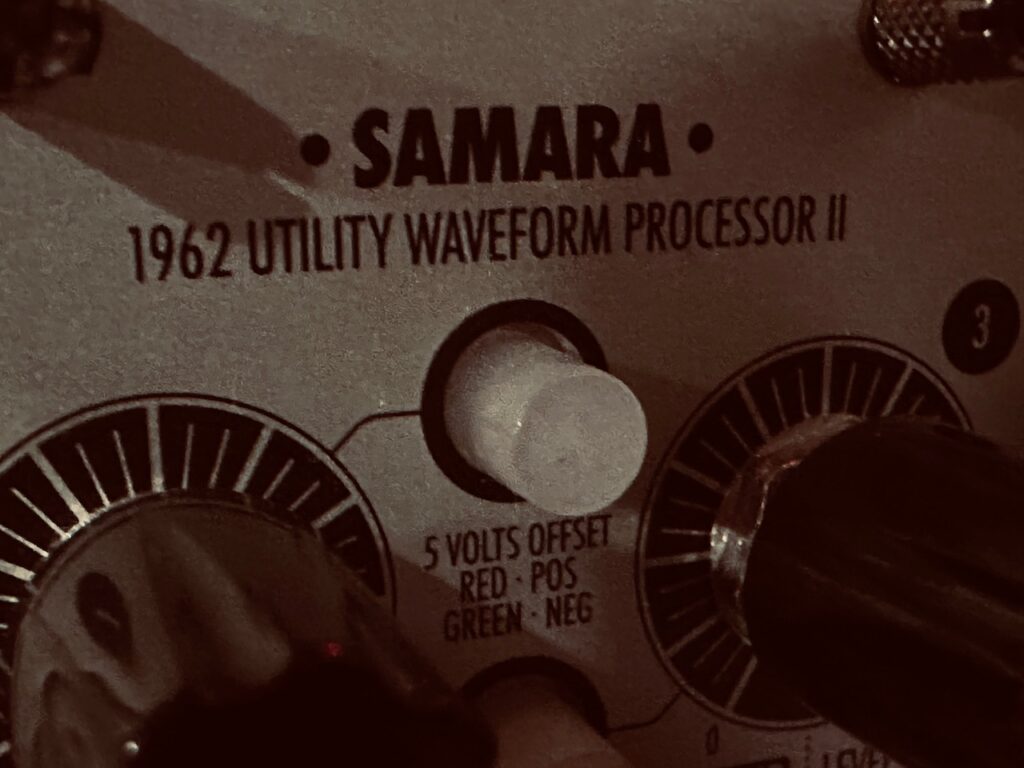
The four waves from Swell Physics that control volume of the chords are all fed to four VCAs, as well as an analog comparator (Xaoc Devices Samara II).
Samara II compares the signals and outputs the Maximum (AKA, Analog OR) voltage level of all four signals at any given moment.
This signal is fed to a window comparator, (Compare 2), which generates a gate every time the Maximum signal goes below 0v.
This gate goes to the Clock input on the NOH-Modular Pianist, which changes to the next chord in the sequence.
As a result of acquiring both the Synthesis Technology E370 and the Flame Instruments 4VOX, after also getting the Humble Audio Quad Operator and RYK Modular Algo earlier in the year, I’ve been stringing together a series of chord-based polyphonic patches using various forms of slow modulation to control the volume of each chord tone. From standard LFOs to chaos, and stochastic functions to ocean wave simulations, I’ve tried at least a dozen of this style of patching over the last several months. Some of these have used static chords that don’t really move anywhere. Different notes of a chord come in and out chaotically (in most cases), but the chord itself doesn’t change. Others are based on the harmonic series, where only one pitch change of the master oscillator affects all of the individual harmonics resulting in chord changes. All of those were composed using chaos or random as a pitch source. But, with one exception, it wasn’t until this patch that I used the NOH-Modular Pianist with real intent and composed a chord progression to move the piece along. To set a mood and provide some tension and relief with harmonic motion in addition to volume and timbre changes. And this time I went big with using all eight CV outputs, rather than just four.
The NOH-Modular Pianist is an interesting module. It promises a world of harmonic movement in an environment where using chords isn’t a simple proposition. Polyphony in Eurorack is equipment and labor intensive. Each separate note of a chord requires its own separate oscillator, function generator, and VCA, at minimum. and requires its own discrete signal path. That’s a lot of patching for what is an easy task in a DAW or by using keyboard-based synths. It’s a lot of tuning (and re-tuning); lots of signals to tweak, and lots of modulation to account for. Before the Pianist, ways to get this sort of advanced polyphony was hard to come by. You could use a MIDI > CV converter, which has its own challenges, or else by painstakingly programming a pitch sequencer note by note, which requires a level of music theory knowledge that most don’t possess.1 MIDI > CV converters require careful calibration, and there are few sequencers with more than just four channels. But the Pianist is different.
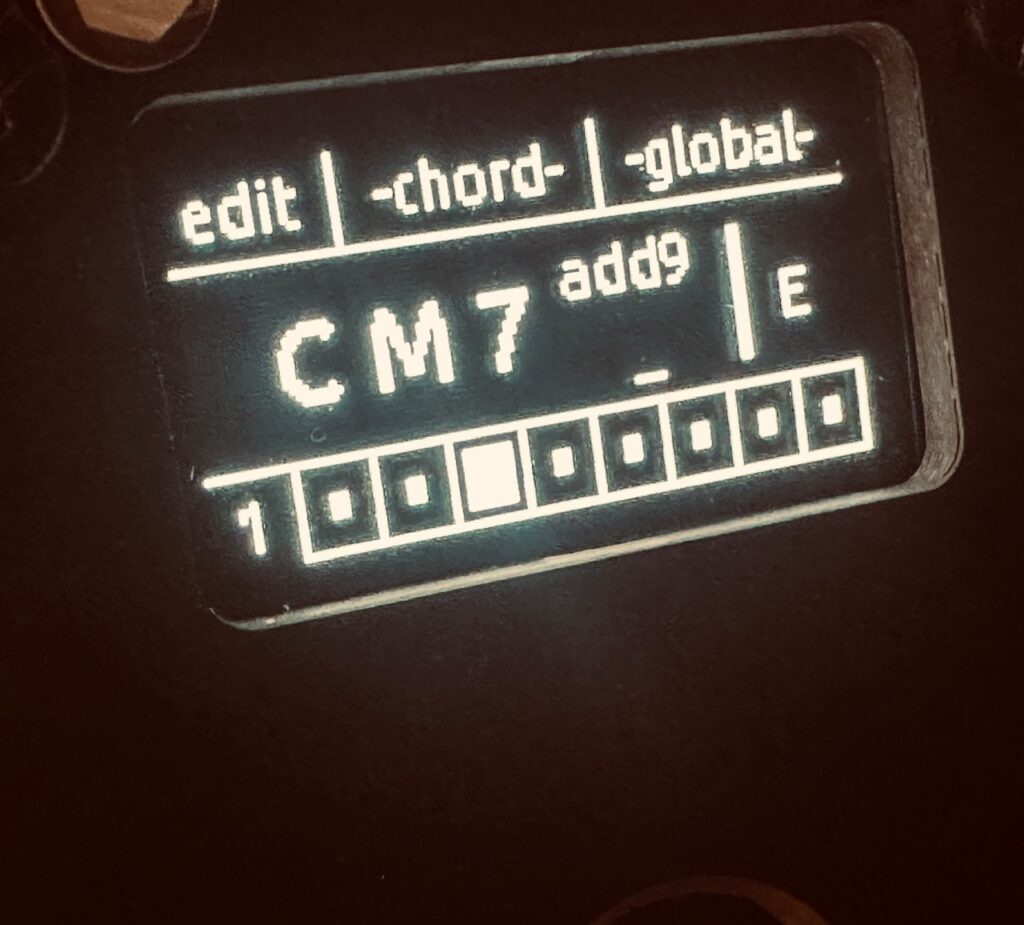
Rather than programming chords note by note, Pianist uses standard western music shorthand for identifying chords, and the module does the rest. When you program it to play a CM7 chord, for instance, it knows to send out pitch data for C E G and Bb. It’ll even repeat chord notes in a different octave if no color tones are used. You can add two chord extensions beyond the 7th, called Colours in the Pianist, or use chord inversions to designate the third or fifth as the bass note in the chord. If a up to six note chord can be played on a piano, it can be played by the Pianist.
Users can freely enter chords from scratch in Free mode, or, to make the job even easier, set it to Scale mode and choose only from chords within your chosen key. The scale can be set to Major, Minor, or any of the modes2 and Pianist does the rest. So, for example, if a user in Scale mode were choose A Major as the scale, Pianist would present you with only AMaj, Bmin, C#min, DMaj, EMaj, F#min, G#dim, the diatonic chords in A Major, in order to facilitate easier chord progressions for theory novices. As long as your oscillators are tuned, your chords will be in key. Nifty. For those who want to use chords outside of a key, or if your composition isn’t really in a specific key, Free mode allows for creating chords from scratch. Virtually any chord is possible (up to six notes). In both modes, harmonic complexity is simple, with up to two color tones available, and made even simpler in Random Gate mode where each gate received will add random colors automatically, and choose colors that make harmonic sense within that chord. The workflow in creating chord progressions is intuitive. I was quickly making fairly complex progressions with repeats and skipped chords with ease.
Though Pianist is a boon to those of us seeking access to polyphonic 12TET harmonic movement in our Eurorack patches, it does have its weaknesses. Though you can move notes up and down in octaves to create chord depth, it’s done in a haphazard way. Rather than setting each note for the exact voicing you’re looking for, you have to rely on functions Pianist calls Shift and Spread in order to get full, rich chords that don’t clutter a particular part of the audio spectrum, but it’s not exactly clear how that affects the chord as a whole. I can hear changes, but can’t always identify them. Easy variety, however, can be achieved when the Gate mode is set to Spread. No chord will be voiced exactly the same which creates intrigue.
The calibration for the module, at least in Version 1.0, is straight funky. This patch uses eight discrete oscillators. While tuning I sent a C from Pianist to set a baseline. But in order for the oscillators to play the C being sent, they each had to be tuned to G, which I found odd. The newest firmware, 1.2, addresses tuning and scales in a way that version 1.0 does not, which is a great improvement by all accounts, even if I haven’t used it yet to note any changes. Since I’m using Pianist in Free mode in this patch, however, there wasn’t a compelling reason for me to upgrade, though I certainly will now that I’ve finished recording it, even if I have an aversion to the upgrade processes of most digital modules.
The screen has a lot of information, and not a lot of room. However, navigation is still reasonably simple and the information on the screen laid out such that it’s not hard to read. It’s easier to read and use than many far more established modules like the Disting Ex, Kermit Mk3, or uO_C, even if there isn’t a lot of screen real estate. The interface is super easy to navigate using the mini joystick/push button. Version 1.2 is reported to have an even more streamlined navigation and menu system. Though altering global settings like the Scale, Gate or Spread behavior requires some menu diving which is never fun, programming chords decidedly does not. It’s a point and click operation made easy with the joystick, all done on one level. Move the cursor to what you want to change, click, move the joystick to the desired value, and click. Done.
A major issue with version 1.0, which may have been changed, is that it always boots up with the first saved sequence. Unless you save your progression to one of the user slots, you will lose your work if the module power cycles. If you don’t have much in your progression, or it’s a super simple that’s no problem. But if it’s long or has a lot of direction you might be losing a lot. Ask me how I know.
Pianist has its own clock that will change on each beat, along with a clock output to trigger envelopes or some other event as chords change. But it also has a clock input, which will move along the chord sequence with every rising edge like any standard step sequencer. Being that I rarely use a steady clock, I haven’t tried the internal clock, and have instead used clocks created by chaos or some other irregular source. This patch used a fairly complicated sub-patch in order to derive the chord changes. I didn’t want haphazard pitch changes in the midst of notes actively being played, but only when nothing was being heard. Finding an approach for this was time consuming, and although there are probably (certainly?) other methods that would work as well, I settled upon an approach using two comparators, one analog and one digital.
The four waves from Swell Physics first went to the Xaoc Devices Samara II. Samara compares all four inputs, and outputs the Maximum signal (AKA Analog OR). Being that these four waves were controlling the volume of the individual chord tones, it occurred to me that once the Maximum signal went below 0v meant that all four parent signals were below 0v, which meant no volume at all from the chord voice. This is exactly when I want to trigger the next chord in the sequence. I then sent that Maximum signal from Samara II to a digital comparator, the Joranalogue Compare 2, with its compare window set to anything below 0v. So once that Maximum signal went below 0v, it would spit out a gate that would trigger a chord change in Pianist.
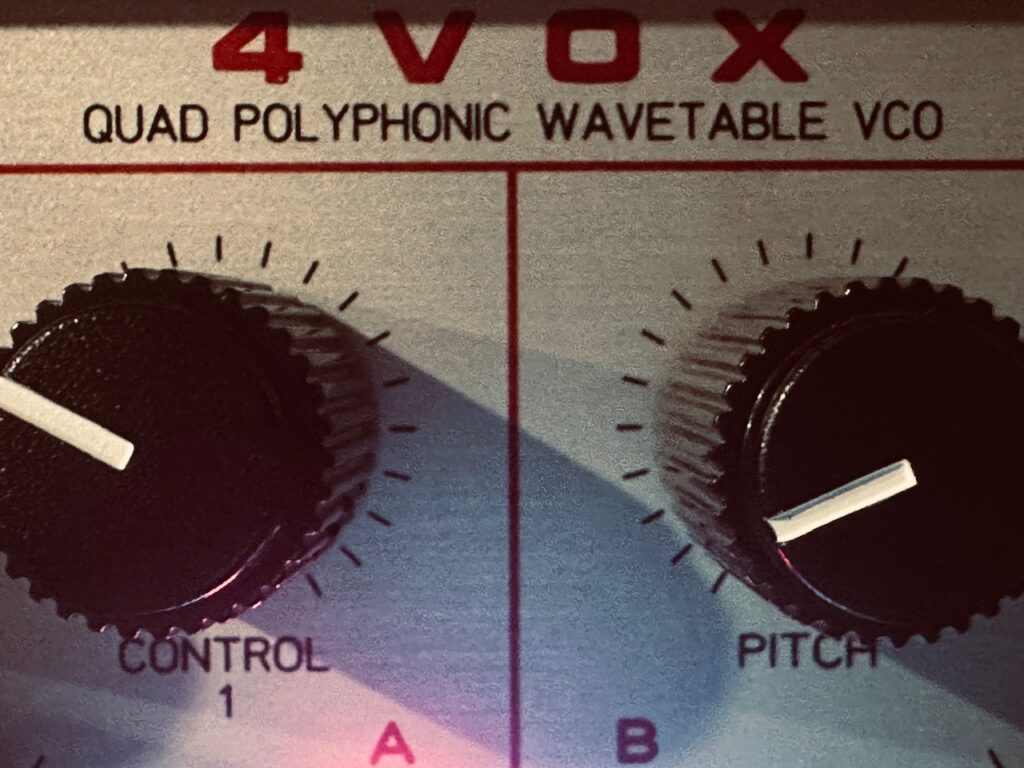
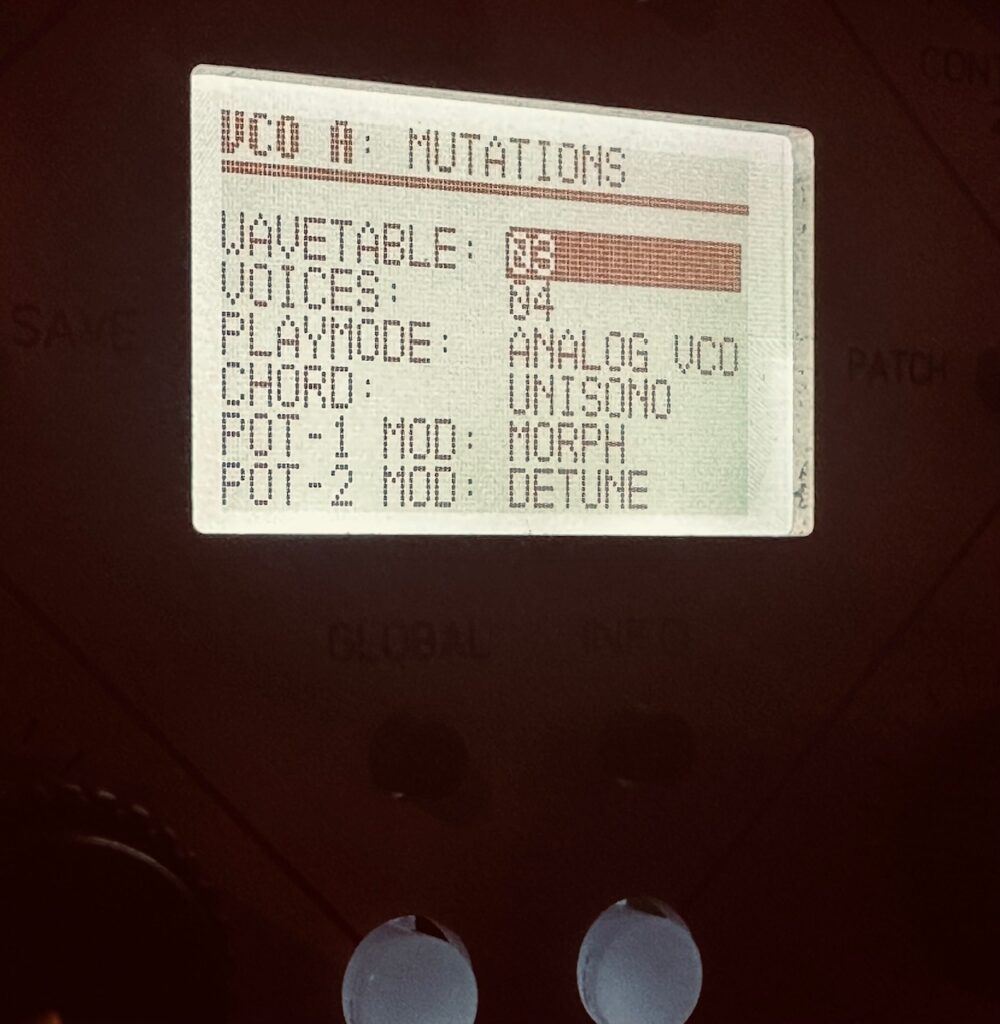
The eight chord tones created by the Pianist went to eight different oscillators. The root, third, fifth, and seventh (or fifth if there is no seventh) form the base of the chord and all go to one of the four Flame Instruments 4VOX oscillators, while the color notes and two additional root notes, one that follows chord inversions and one that does not, all go to a self-frequency modulated Frap Tools CUNSA, where each filter is set to self oscillate, and pinged in a Natural Gate.
The Flame 4VOX has been around a long time. My brother, a house sound engineer, producer, and DJ who’s been into Eurorack a long time, lusted for one long before I even knew what Eurorack was. It’s a fully polyphonic, wavetable oscillator beast, split into four sections of up to four oscillators each. Each oscillator can create detuned swarms, chords, or be unison. Each oscillator can be controlled by v/oct CV or midi, and is fully polyphonic with its own output. It really was a very advanced piece of gear for its time. It still is, even if it hasn’t been updated in several years and is showing its age. There are two pots and two CV inputs per oscillator that can control several parameters including scanning the wavetable, detuning, amplification, and more. It has internal VCAs to control volume, but I did not like how they functioned at all, and opted to use external VCAs, which worked to my benefit allowing me to modulate two wavetable parameters rather than the volume and only one parameter. There are also separate FM and reset/sync inputs per oscillator, along with its individual output. Even if CV-able options seem to be limited, virtually every facet of the 4VOX can be addressed via midi, although I haven’t used it with midi at all. It’s a very powerful oscillator bank that can cover lots of ground.
Although I wouldn’t say programming the 4VOX is difficult, it’s not as easy as most more modern interfaces. The screen is bare bones with low resolution and a slim viewing radius. The encoder is a little weird. You have to push it down and turn CCW to move downward in menus, while you simply turn it CW to change parameter values inside the menu. As a unit, it’s impressive. There are lots of options, plenty of stock wavetables to choose from, and it sounds good, but it shows its age. Upgrading firmware is a laborious process with modern computers. Although you can install your own wavetables, the processes to convert them to the right format and get them loaded can be a nightmare, particularly if you’re a Mac user. All of the computer-side software is a decade or more old, and workarounds are sometimes needed. I’m not a “I need to load my own wavetables” kind of guy, and my unit came to me with the latest update, but if I were that guy or my unit hadn’t already had the latest firmware, it would not be an easy task. I’ve had similar problems with older gear before3, and they’re no fun.
The 4VOX forms the base of the chords, brought in and out by the four waves from the Addac508 Swell Physics. The sound is both powerful and delicate, with each quadrant set to four slightly detuned, unison oscillators, each one being slightly modulated by the Nonlinearcircuits Frisson. Although I was pleased with the 4VOX’s performance, the Synthesis Technology E370 is a better overall option. Although the E370 is also based on nearly decade-old technology, it’s still a better user experience. The screen is in color, fully customizable, bigger, and gives more information. The stock wavetables are a gold standard. The software UI is easier to navigate using a more standard encoder. The physical UI is also far better arranged. With the 4VOX, the screen is in the middle of the module, knob locations are not symmetrical, and are more difficult to wiggle once everything is patched up. The E370 has everything laid out very neatly. The screen is on the far left, I/O on the far right, with knobs in the middle, leaving more than enough room to wiggle. It’s really a premium user experience. The only advantages the 4VOX has are its price, size, and complete polyphonic midi capabilities. The 4VOX has always been less expensive than the E370, and that remains true on the secondary market. However, the price differential on the used market is much closer than their respective MSRPs, as the E370 can be purchased for well under 50% of the original retail cost. The price difference on my units, both purchased used within a week of one another, was $100. The size, however, cannot change, and in that regard the 4VOX has the E370 soundly beat. At 29hp the 4VOX is still large (and odd hp ), but it’s dwarfed by the massive 54hp E370. It’s the massive size, however, that makes the E370 such a pleasure to wiggle.
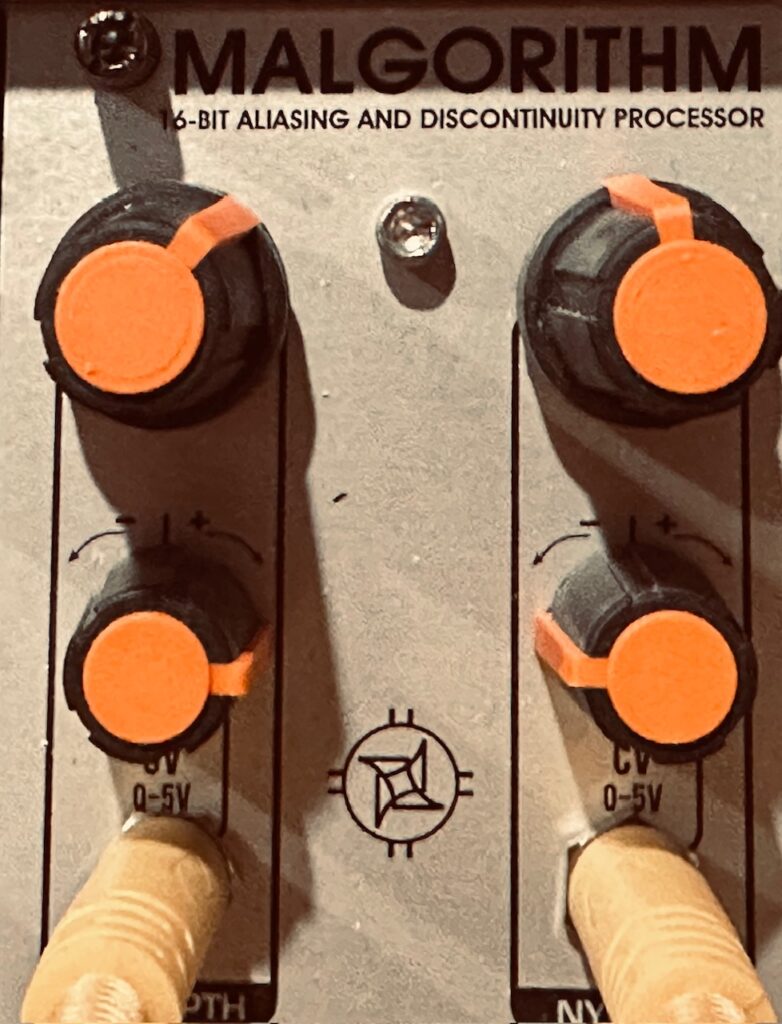
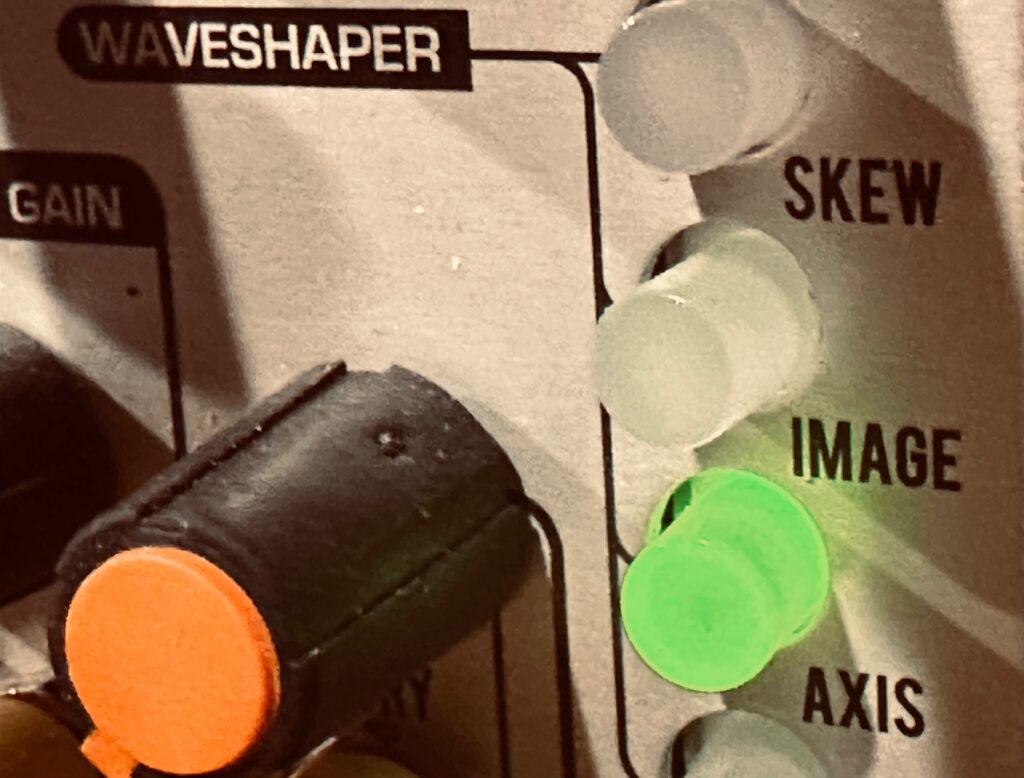
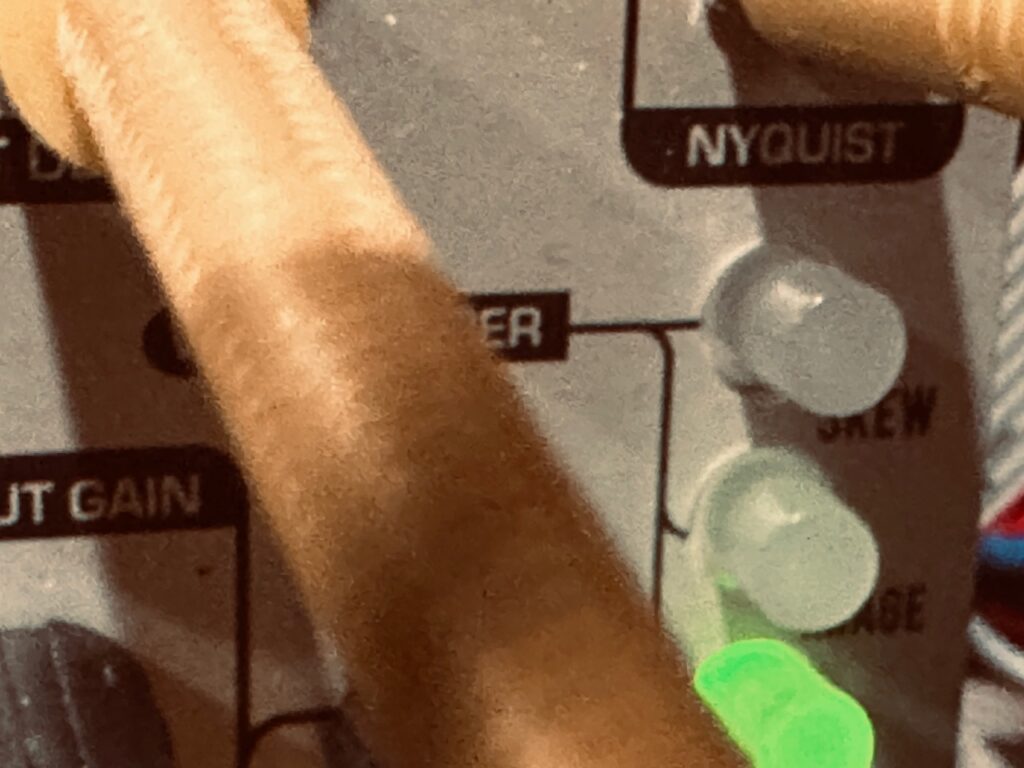
Once mixed to mono in the Atomosynth Transmon, the 4VOX chords went through the venerable Industrial Music Electronics Malgorithm MkII, a powerhouse FSU-type module with bit crushing, sample reduction, and various types of waveshaping available to have anything from subtly crunchy through completely mangled audio at the output. Using Malgorithm was an absolute treat. Most of the lo-fi effects I tend towards are of the vintage variety, tape sounds, record pops, etc, vs just slightly old sounding digital artifacting, so it was a different sort of experience. On any other day I likely would have chosen distortion in this role, but the day I started this patch I precipitously chose to go with a different kind of dirt. And it was perfect. I was still able to get some nasty distortion via the “Axis” waveshaper (whatever that does), with the bit crushing and sample reduction playing a slowly increasing role. It’s starts clean, then moves to understated digital artifacting, and finally waves of full blown destruction, ending clean once again. One aspect of Malgorithm I enjoyed was the interaction between input level and the waveshaping. It responds similarly to tube distortion circuits, where the harder you drive the input, the more distortion there will be ranging from just barely there to outright obliteration. Each of these waveshaping circuits has three different levels, red, orange, and green, and all of them have their own character. These waveshapers can even interact with each other for nuking your audio from orbit if that’s what you want. I rode faders on the very awesome Michigan Synth Works XVI to control both the input level as well as the wet/dry mix in order to provide a performative aspect to this patch. Both the bit crushing and Nyquist parameters were modulated by the Addac506 Stochastic Function Generator, with a fairly wide range of both rise and fall times between medium and long. Each of the parameters were set to moderate crunchiness with the knobs, with their modulation moving towards a full-resolution signal. This created an absolutely amazing effect from the sound of dying batteries to the fabric of the universe being unzipped and sewn back together. I would highly recommend Malgorithm to anyone, but you’d have to find one first.
Once through Malgorithm and into the stereo matrix mixer, these now buzzy chords went to the Holocene Electronics Non-Linear Memory Machine, with a very light perfect fifth shimmer in the feedback loop. I initially went with a full octave shimmer, but decided against it as it was too prominent and spiraled too far out of control too quickly. This created a very subtle sheen on the chords that isn’t noticeable much of the time, but is a nice effect nonetheless. Feedback and Spread were both modulated by attenuated versions of the Average output from Swell Physics.4
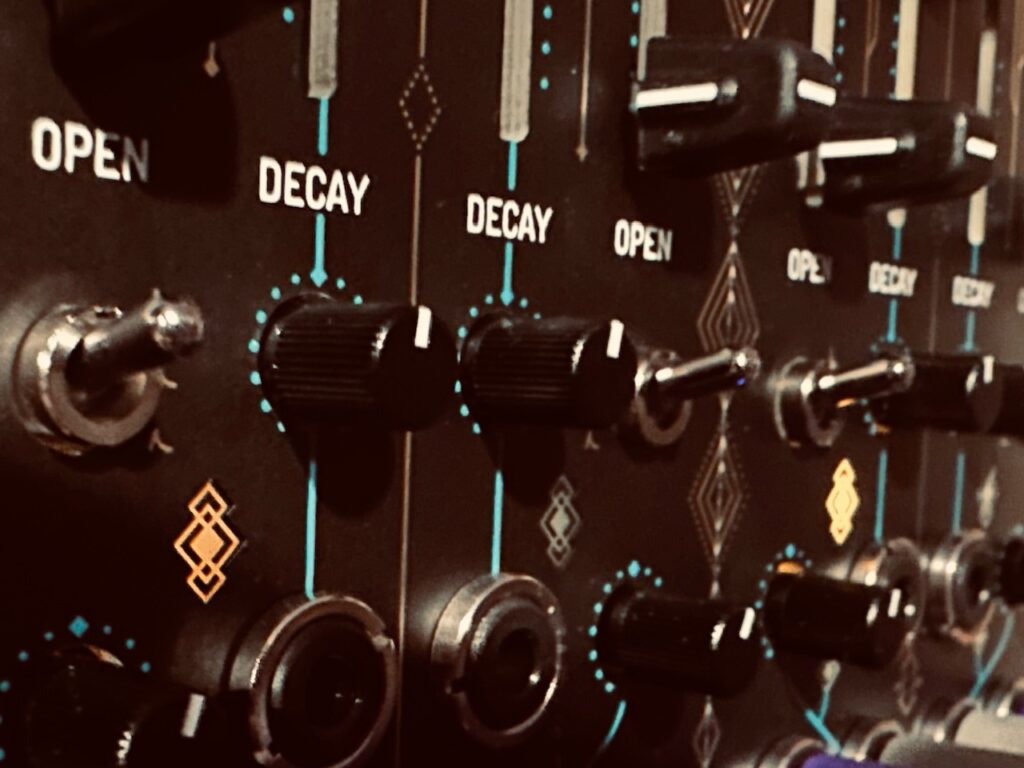
The color tones of each chord were all sent to the mighty Frap Tools CUNSA, a quad filter extraordinaire, and pinged in a pair of Rabid Elephant Natural Gates. Though I was tempted to use the simple sine waves from each LPF output, I later decided to use the HPF output as a means of each oscillator frequency modulating itself in order to add some harmonics, which worked a treat. In retrospect, I could have simplified the patch significantly had I pinged CUNSA itself instead of running the output to Natural Gate, but I chose the Natural Gate route because Natural Gate.
Using a patch technique I’ve used often, the gates that pinged the Natural Gates were created by running the four waves from Swell Physics into the Nonlinearcircuits Numberwang. But rather than simply choosing four gate outputs, I ran several Stackcables so that each strike input on the Natural Gates were each derived from three Numberwang outputs. This filled in space much better. The notes are still sparse, but they’re triggered at a much better pace using three gates each rather than just one. These notes fill out chords in interesting ways. They’re very short, but combined with delay and reverb, those colors hang around long enough to create intrigue in the overall sound without being intrusive.
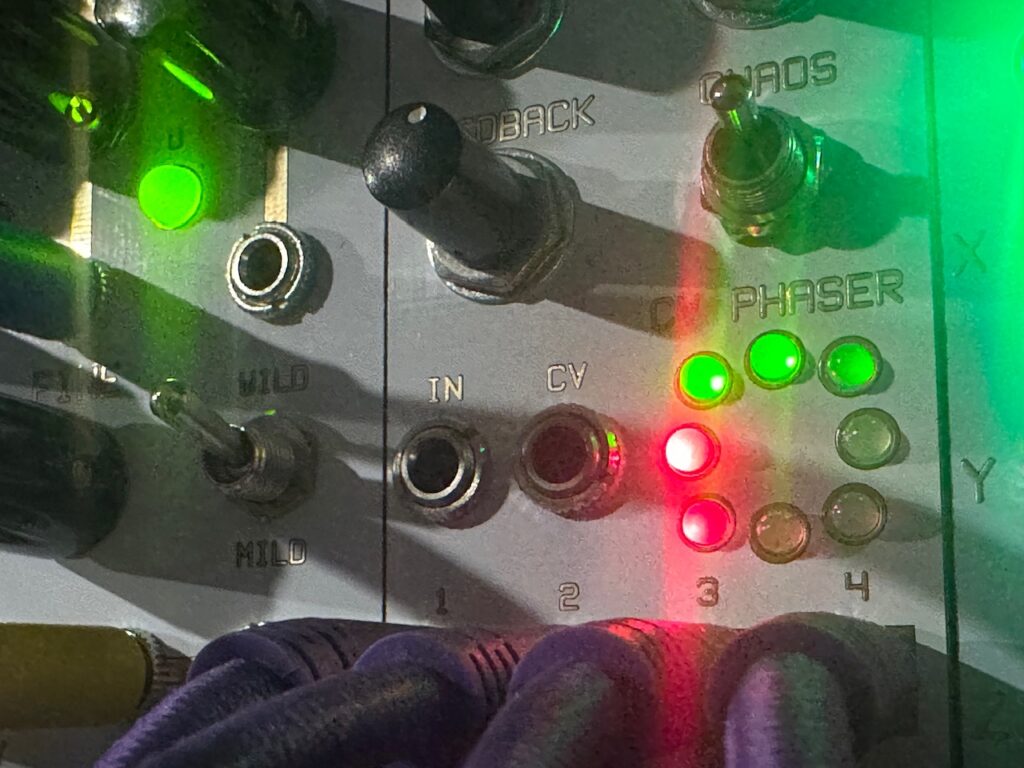
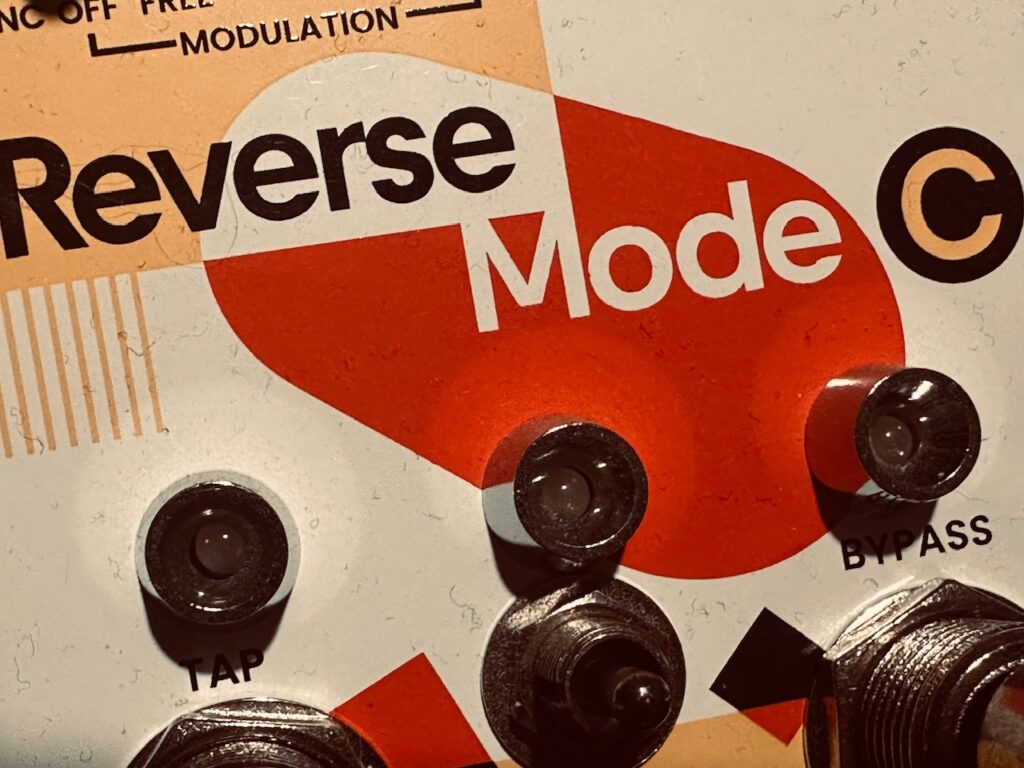
These notes were sent to what is becoming one of my favorite delays, the Chase Bliss Audio Reverse Mode C, a re-imagining of one of the modes on the legendary Empress Effects Superdelay. Although it certainly does standard stereo delay stuff, it excels at being a quirky sort of delay, able to output normal delays, reverse delays, and octave up reverse delays, by themselves, or in a mix. Mixing delays creates a beautiful sound space of echoes bouncing all around the stereo field, at different speeds and octaves, which is an incredible aural treat. I haven’t yet learned to properly modulate the Reverse Mode C, but that’s a function of not having a firm grasp on midi. As I figure that out, things ought to get very interesting, with different sorts of delays fading in and out in very creative ways.
The last synthesized voice in this patch is the Good and Evil Dradds as an effects send, sending both the chords and ornamental color notes for some granular action. The Dradd(s) outputs went to separate EF-X2 tape echoes with different settings. Ever since getting a second Dradd, I’ve been infatuated by what I can do with them, and this patch may be the best result yet. Both were set to Tape mode with similar P2, but different P1 knob positions, with the P1 parameter on both being modulated by an attenuated version of the Average output on Swell Physics. The Dradds, in some ways, steal the show. They create all sorts of movement in the stereo field and fill the space between chords and color notes in ways that keep the piece from becoming still. They’re the wake left after a large swell passes by. The bio-luminescence after a crashing wave.
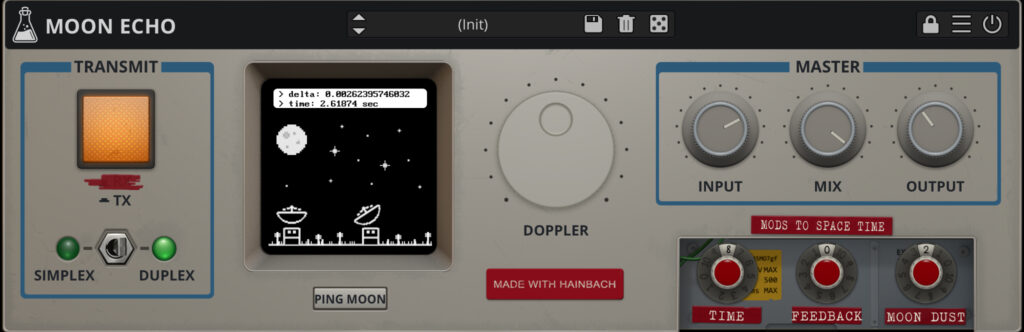
The spoken voice is a set of three samples that were triggered in Koala on the iPad. Triggers emanated from the gate outputs on Swell Physics combined in the new Nonlinearcircuits Gator, sent to the Joranalogue Step 8 and then the Befaco CV Thing and converted to midi notes that were sent to trigger Koala samples on the iPad. It took me a while to figure this one out, though it worked exactly how I envisioned. Gates from Swell Physics were combined in Gator, which triggered Step 8. Each of the first three steps sent its individual gate output to a different CV Thing input. This ensured that the three samples were always triggered in the correct order. The samples themselves were then sent to a new collaborative delay plugin, Moon Echo, by AudioThing and Hainbach.. Moon Echo is a modeled simulation of bouncing sound off the moon, and has a very distinct character. The delay was set to fully wet, and has a delay of about 2.5sec, though that changes depending on the day. The moon is not at a fixed distance from the earth, and the plugin reflects that. By “pinging” the moon upon startup, you will get the current distance to the moon, and a new delay time down to five decimal points (1/100,000 of a second). Fucking cool.
One thing I did differently with this patch paid off high dividends, and will absolutely become a staple in my recordings. I’ve been patching for a few years, but am still an absolute novice at standard studio stuff. Mixing, EQ, compression, and everything else in that sphere evades me. I’ve used some very basic EQ in the past, but really only on the final output, which, as I’ve discovered has several drawbacks. This patch was the first I’ve ever recorded using EQ, the highly regarded Toneboosters TB Equalizer 4, on individual channels as they were being recorded. The chords, ornamentals, and reverb send received EQ that greatly improved the sound quality, even if it could still be better. I did, however, neglect to put EQ on the Dradds, which proved to be a mistake, as there is a very occasional pitch that pierces through in what can’t be far from dog whistle frequencies. It’s not eardrum busting, but I can hear it, and it annoys me. I didn’t catch that behavior when recording, and never EQ’d it out. That said, it was also the first time I’ve recorded a modular patch in separate multi-tracks, including the chords, ornamentals, Dradds, spoken voice, reverb return, and the mixed stereo signal (presented here). I can go back and make changes or additions should that be something I want to do, or send the parts to someone else for mixing and mastering should I ever choose to release it.
Overall I’m very pleased with this patch. It was originally composed in a different key and completely different chord progression, and for a special group of online friends. The chord progression I used in this recording wasn’t composed, as such. At least not by me. I asked ChatGPT for a “sad progression, yet with a sense of hope.”5 I asked for it to be more sad, and it changed key from Amin to Dmin, and ended in a non-diatonic chord (DMaj), which I found a wonderful “choice.” Then, as a means to test the Pianist, I asked for several chord extensions and inversions, and ChatGPT complied, giving us what we have in the recording.
Improvised and recorded in 1 take on iPad in AUM via the Expert Sleepers ES-9.
I studied music performance in college, and have a decent grasp on music theory. The last 30 years, however, have pared that knowledge down to basics. I’m certainly no expert, but I can read chord charts and identify chord notes, even if I have to think for a second. ↩︎
The Humble Audio Quad Operator I purchased did not have the latest firmware update, and the internal VCAs all bled badly. I was unable to install the latest firmware with a modern Mac. I was fortunate to have an older one available to me that I was able to use. ↩︎
There are no fewer than seven modulation points in the patch that are all modulated by an attenuated version of the Average output from Swell Physics. ↩︎
This was literally the first time I’ve ever considered purposefully using AI for anything. ↩︎